


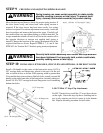
6
HINT:
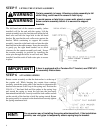
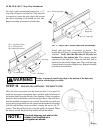
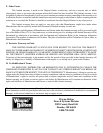
STEP 5 LIFTING THE CURTAIN ASSEMBLY
Curtain assembly is heavy. Allowing curtain assembly to fall
while lifting, could result in severe or fatal injury.
To avoid severe or fatal injury, never walk, stand, or work
below curtain assembly before it is secured to support
brackets.
The left hand end of the curtain assembly (when
installed) will be the end with the spring. Lift the
curtain assembly up to the brackets and insert the left
hand axle end into the large hole in the left hand
bracket. Be sure that the axle collar rests against the
bracket. While continuing to support the curtain
assembly, insert the right hand axle end into the right
hand bracket in the same manner. It may be necessary
to gently pry the right hand bracket out to allow
clearance for the curtain assembly axle end. Secure
the curtain assembly in position by installing the
cotter pins through the holes in each axle end. Once
installed, bend the ends of both cotter pins to secure
in place.
If door is equipped with a Tension-Pro™ bracket, see STEP #12
for assembly instructions.
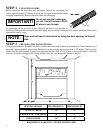
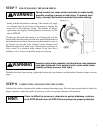
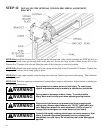
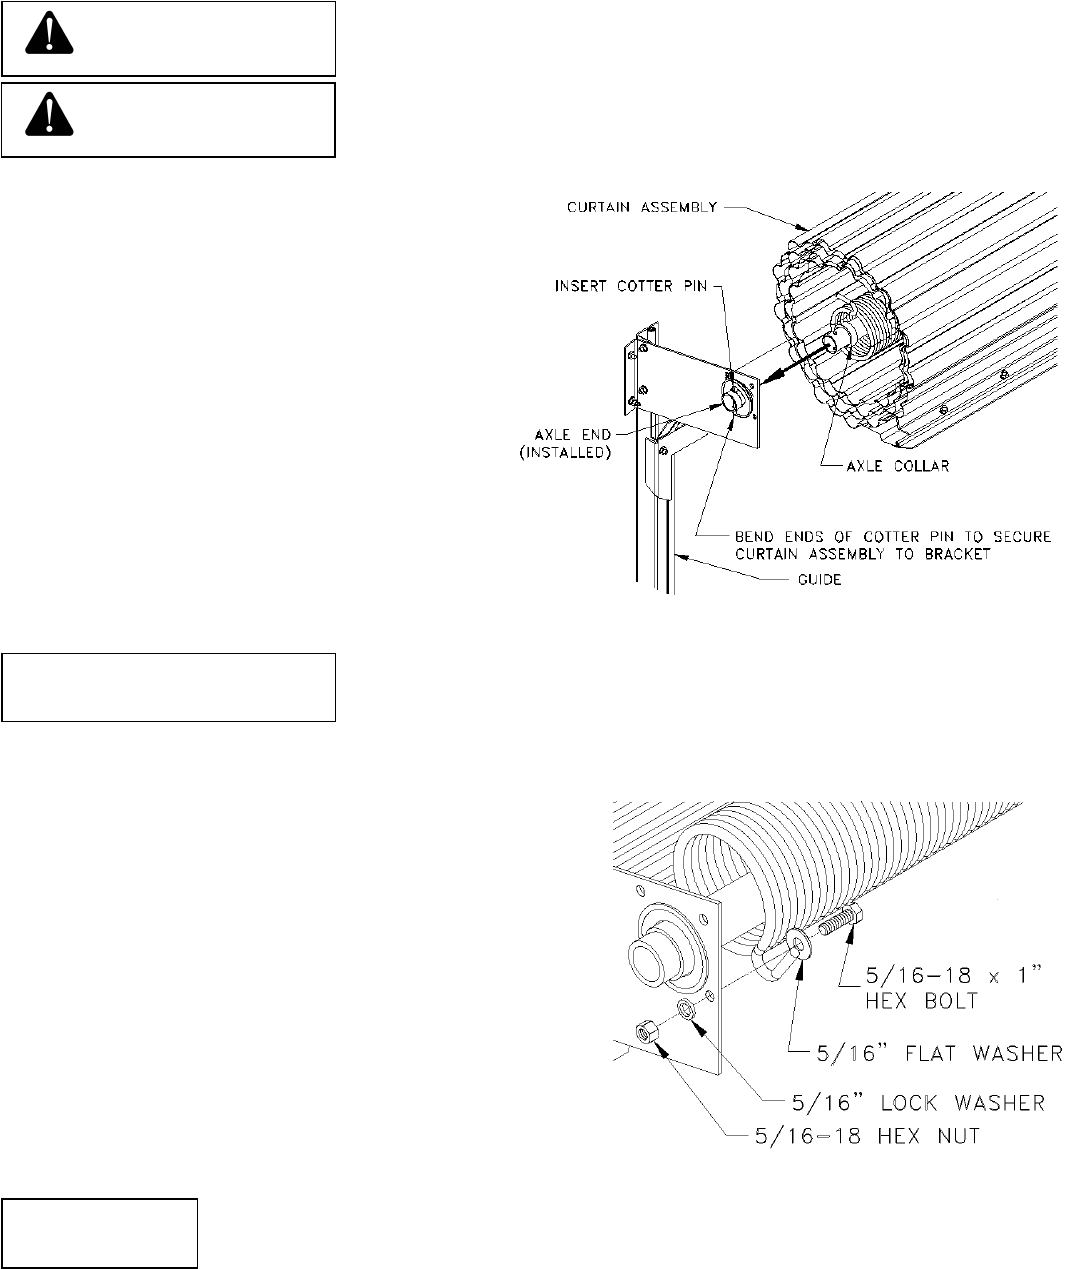
STEP 6 ATTACHING SPRING
Rotate curtain assembly so that the bottom bar is at the top of
the curtain roll. While keeping the curtain from rotating,
carefully stretch the spring end to the bracket to determine the
bracket hole nearest to the loop in the spring end. Position the
5/16-18 x 1” hex head bolt and flat washer in the spring loop
and stretch the spring to insert the bolt into the previously
determined bracket hole. Loosely install the lock washer and nut
on the outside of the bracket to hold the spring stretch. Rotate
the spring until it is centered on the bracket and securely tighten
the spring attachment bolt.
(Axle Pin installed in step #5 omitted from view for clarity)
For an easier way of installing the spring attachment bolt, if the installation
permits, use vice grips to temporarily secure spring loop to bracket.
WARNING
WARNING
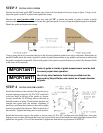
IMPORTANT!