


3
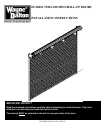
INTRODUCTION
This manual's main function is to assist the installer in correctly installing the doors to ensure safe operation.
Compliance with building codes, enforced in your area, is required.
All Wayne-Dalton DS-50, DS-75, and DS-100 Mini Roll-Up Doors follow these general instructions. Additional
installation information for the specific door shipped is found with the packing slip and on supplementary drawings.
There are also bolt and small sealed parts bags with accessory lists, describing proper application.
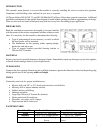
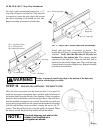
PREPARATION
Read the installation instructions thoroughly to become familiar
with the names of the various components and their relation to each
other. It is necessary for the installer to determine the following:
Type of jamb material (wood, masonry, or steel) on which
the door guides will be mounted.
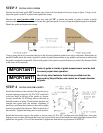
The dimensions for the opening width, opening height,
headroom, and side room.
Type of support brackets provided (bearing bracket or
Tension-Pro™ bracket).
MATERIAL
Inspect your door for possible damage or shortage of parts. Immediately report any shortages to your door supplier,
or transit related damage claims to your freight carrier.
CLEARANCES
Compare the door opening dimensions and available clearances against the dimensions listed on the packing slip,
taking special note of the opening width and height.
TOOLS
Commonly used tools for proper installation are:
Electric drill with 3/8" or 1/2" chuck with nut driver and drill bits.
Masonry drill or impact hammer and bits.
Ladders and/or scaffolding.
Hammer and pliers.
Large Pipe Wrench (if Tension-Pro bracket).
Center punch and Screwdrivers.
Wrenches, vise grips, and C-clamps.
Tape measure and a water level.
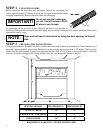
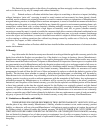
FASTENER TABLE
Jamb Condition Bracket Fasteners Guide Fasteners
Wood
5/16 x 1-1/2” Lag Screw 5/16 x 1-1/2” Lag Screw
Masonry
5/16 x 1-1/2” Wedge Anchor 1/4 x 1-3/4” Tapcon
Steel
1/4 x 3/4” Self Drilling
Screw
1/4 x 3/4” Self Drilling
Screw