


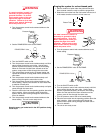
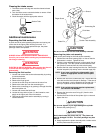

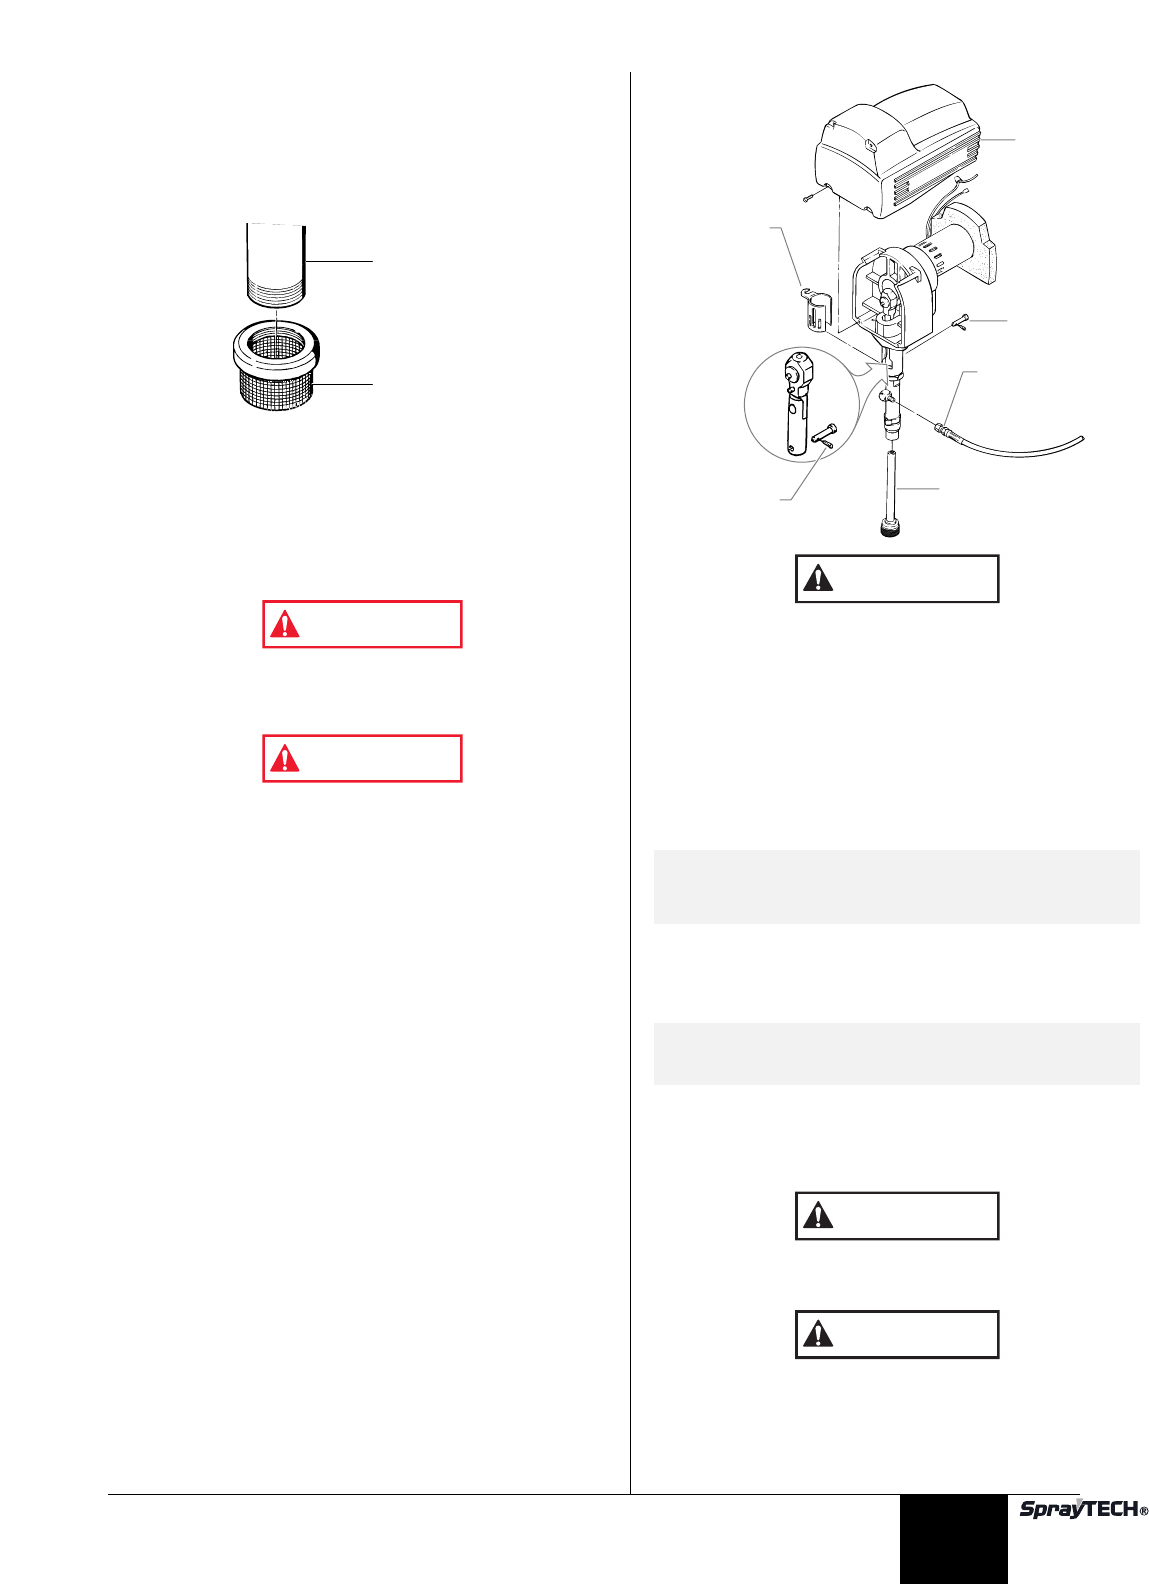
Cleaning the intake screen
1. The intake screen will clog and must be cleaned at least
once a day.
2. Turn the intake screen counterclockwise to remove it from
the bottom of the suction tube.
3. Clean thoroughly with the appropriate solvent.
Additional maintenance
Repacking the fluid section
A small amount of paint bypassing the piston and coming out
of the slots in the upper piston housing is normal. If it
becomes excessive, or if paint pressure drops, the piston
packings need to be replaced.
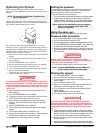
ALWAYS follow the PRESSURE RELIEF PROCEDURE
found in your manual before starting any troubleshooting,
servicing or cleaning.
ELECTRICAL SHOCK HAZARD. Make certain that the unit
is turned off and unplugged before attempting any
disassembly.
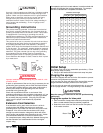
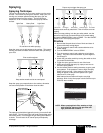
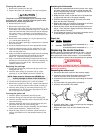
Removing the fluid section
1. Loosen and remove the suction tube assembly by turning
it counterclockwise.
2. Remove the shroud.
3. Remove the finger guard.
4. Loosen the screw clamp and remove the return line.
5. Remove the cotter pin from the connecting pin.
6. Remove the connecting pin by pushing it through the slide
block and piston rod.
7. Loosen and remove the fluid hose.
8. Loosen the large locknut (item 7 in the illustration, next
page) on the upper end of the fluid section.
9. Unscrew the entire fluid section assembly by turning it
counterclockwise.
WARNING
WARNING
Suction Tube
Intake Screen
Do not run the motor with the fluid assembly removed.
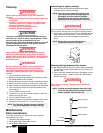
Removing the piston rod assembly
Refer to the parts listing for the fluid section assembly.
1. Position the inlet valve housing (28) in a vise so that the
fluid section is vertical. Tighten the vise.
2. Position a large adjustable wrench on the wrench flats of
the cylinder (8). Turn the cylinder counterclockwise until
the cylinder is removed from the inlet valve housing.
3. Remove the inlet valve housing from the vise. Remove the
inlet ball stop disk (23) and tap out the inlet ball cage (25).
4. Remove the inlet valve carbide seat (26). Inspect the inlet
valve ball and the inlet ball seat for damage. If the seat is
worn or damaged, it can be flipped to the unused side. If
you flip or replace the seat, the ball must be replaced.
5. Remove the inlet valve seat O-ring (27) from the inlet
valve housing.
6. Position the wrench flats of the cylinder (8) in a vise and
tighten the vise.
Do not over tighten or you might damage the cylinder.
7. Remove the packing nut (1).
Hold a hand under the piston rod (10). The piston rod
may be damaged if it falls. The lower packings may also
fall out.
8. Gently tap down the piston assembly with a rubber mallet
until the piston assembly comes out.
CAUTION
CAUTION
NOTE: If the carbide valve seat requires replacement,
use valve kit P/N 0294689.
NOTE: If any parts are difficult to disassemble, soak
them in an appropriate solvent until the paint
softens.
CAUTION
Fluid Hose
Finger Guard
Suction Tube Assembly
Connecting Pin
Shroud
Cotter Pin
© SprayTECH Corporation. All rights reserved. 9
English