– 8 –
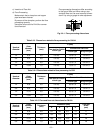
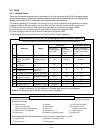
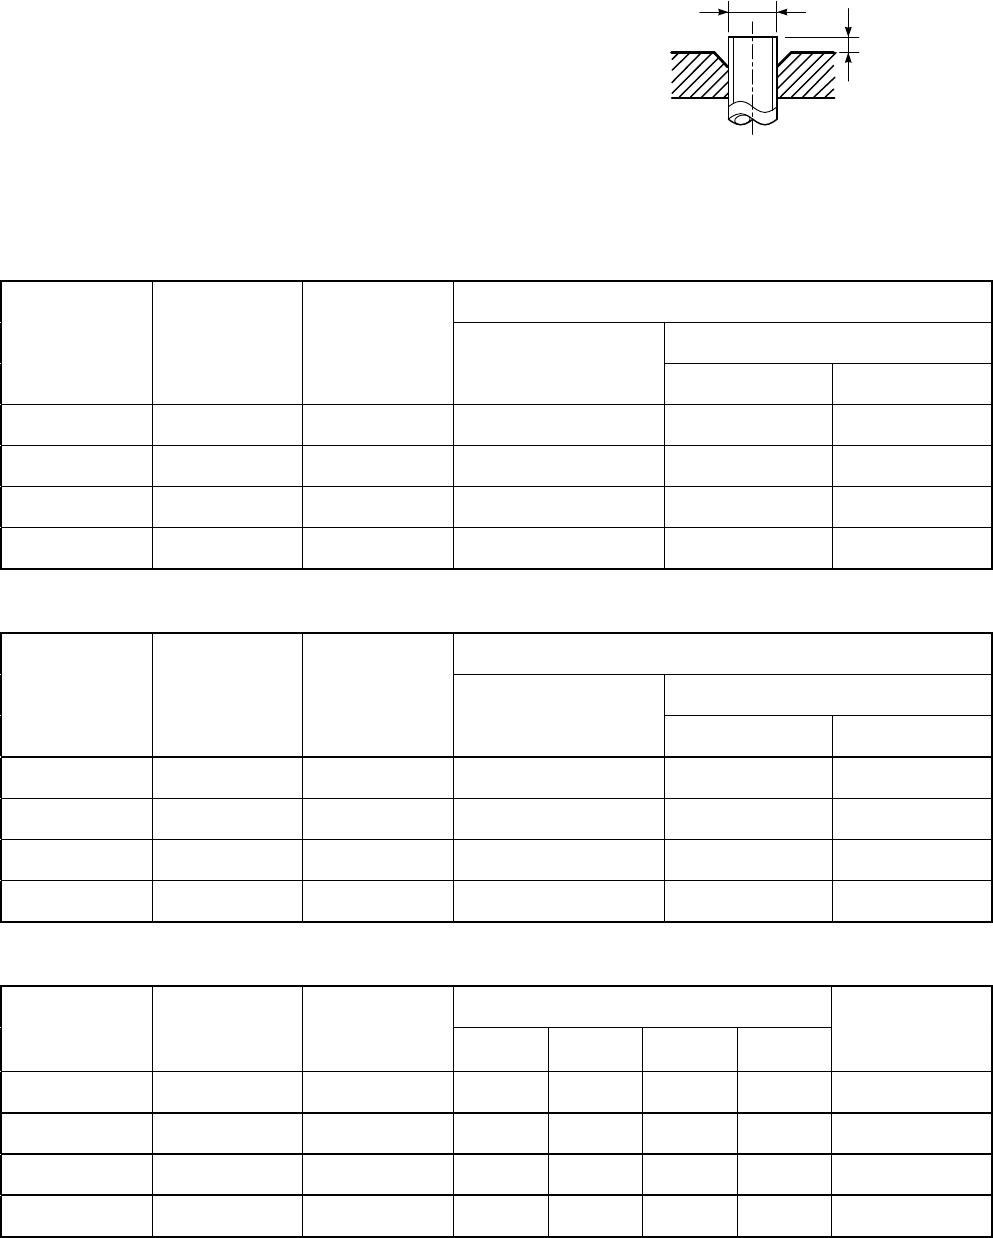
Table 2-2-5 Flare and flare nut dimensions for R410A
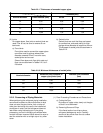
Table 2-2-3 Dimensions related to flare processing for R410A
Table 2-2-4 Dimensions related to flare processing for R22
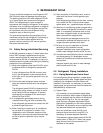
A
ØD
c) Insertion of Flare Nut
d) Flare Processing
Make certain that a clamp bar and copper
pipe have been cleaned.
By means of the clamp bar, perform the flare
processing correctly.
Use either a flare tool for R410A or conven-
tional flare tool.
Fig. 2-2-1 Flare processing dimensions
Flare processing dimensions differ according
to the type of flare tool. When using a con-
ventional flare tool, be sure to secure “dimen-
sion A” by using a gauge for size adjustment.
A (mm)
Conventional flare tool
Nominal
diameter
Outer
diameter
(mm)
Thickness
(mm)
Flare tool for R410A
clutch type
Clutch type Wing nut type
1/4 6,35 0,8 0 to 0,5 1,0 to 1,5 1,5 to 2,0
3/8 9,52 0,8 0 to 0,5 1,0 to 1,5 1,5 to 2,0
1/2 12,70 0,8 0 to 0,5 1,0 to 1,5 2,0 to 2,5
5/8 15,88 1,0 0 to 0,5 1,0 to 1,5 2,0 to 2,5
A (mm)
Conventional flare tool
Nominal
diameter
Outer
diameter
(mm)
Thickness
(mm)
Flare tool for R410A
clutch type
Clutch type Wing nut type
1/4 6,35 0,8 0 to 0,5 0,5 to 1,0 1,0 to 1,5
3/8 9,52 0,8 0 to 0,5 0,5 to 1,0 1,0 to 1,5
1/2 12,70 0,8 0 to 0,5 0,5 to 1,0 1,0 to 2,0
5/8 15,88 1,0 0 to 0,5 0,5 to 1,0 1,0 to 2,0
Dimension (mm)
Nominal
diameter
Outer
diameter
(mm)
Thickness
(mm)
ABCD
Flare nut
width
(mm)
1/4 6,35 0,8 9,1 9,2 6,5 13 17
3/8 9,52 0,8 13,2 13,5 9,7 20 22
1/2 12,70 0,8 16,6 16,0 12,9 23 26
5/8 15,88 1,0 19,7 19,0 16,0 25 29


