


Initial Settings
68
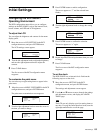
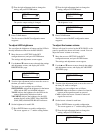
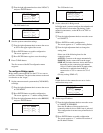
2 Turn the right adjustment knob to change the
setting, and press ENTER button.
The preview output setting is changed.
5
Press CLEAR button.
The first screen of the RCP configuration menu
reappears.
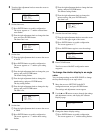
To adjust LED brightness
You can adjust the brightness of buttons and the LEDs in
the tally indication window on the RCP-920/921.
1
Move the cursor to SETTING in the RCP
configuration menu, and press ENTER button.
The settings and adjustment screens appear.
2
Use the v and V buttons to move through the settings
and adjustment screens, and display the <LED
BRIGHTNESS> page.
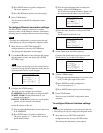
3
Turn the right adjustment knob to move the cursor to
the item you want to configure.
The items you can configure are as follows.
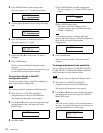
SWITCH/LED: Adjusts the brightness for the button
LEDs and the OPT and ALARM indicators.
TALLY: Adjusts the brightness for the LEDs in the
camera number/tally indication window.
7SEGMENT: Adjusts the brightness for the LED
number displays of the ND/CC filter, MASTER
GAIN, IRIS, and MASTER BLACK indicators.
4
Set the brightness for each LED.
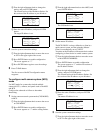
1 Press ENTER button to enable configuration.
The cursor appears as “?” and the setting flashes.
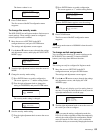
2 Turn the right adjustment knob to change the
setting, and press ENTER button.
The brightness is set.
5
Press CLEAR button.
The first screen of the RCP configuration menu
reappears.
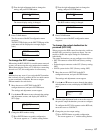
To adjust the buzzer volume
When a call signal is received on the RCP-920/921 or the
panel is operated, the buzzer will emit a sound. You can
adjust the buzzer volume as necessary.
1
Move the cursor to SETTING in the RCP
configuration menu, and press ENTER button.
The settings and adjustment screens appear.
2
Use the v and V buttons to move through the settings
and adjustment screens, and display the <BUZZER
VOLUME> page.
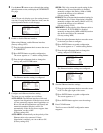
3
Turn the right adjustment knob to move the cursor to
the item you want to configure.
The items you can configure are as follows.
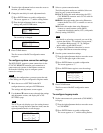
SWITCH: Adjusts the buzzer volume for when the
buttons on the operation panel are pressed.
CALL: Adjusts the buzzer volume for when call
signals are received.
4
Set the buzzer volume for each item.
1 Press ENTER button to enable configuration.
The cursor appears as “?” and the setting flashes.
2 Turn the right adjustment knob to change the
setting, and press ENTER button.
ᴹᵍᵏᵂᵓᵆᵂᵔᴻ
ᴼᵀᵌᵋᵑᴾᵀᵑᴷǽǽǽǽǽǽǽǽᵌᵃᵃ
ǽᵀᵀᵒᴷǽǽǽǽǽǽǽǽǽǽǽǽᵌᵃᵃ
ǽᵐᴪᴿᵒᵐᴷǽǽǽǽǽǽǽǽǽǽᵌᵃᵃ
ᴹᵍᵏᵂᵓᵆᵂᵔᴻ
ᴻᵀᵌᵋᵑᴾᵀᵑᴷǽǽǽǽǽǽǽǽᵌᵃᵃ
ǽᵀᵀᵒᴷǽǽǽǽǽǽǽǽǽǽǽǽᵌᵃᵃ
ǽᵐᴪᴿᵒᵐᴷǽǽǽǽǽǽǽǽǽǽᵌᵃᵃ
ᴹᵉᵂᵁǽᴿᵏᵆᵄᵅᵑᵋᵂᵐᵐᴻ
ᴻᵐᵔᵆᵑᵀᵅ¯ᵉᵂᵁǽǽǽǽǽǽǽᴲᴭ
ǽᵑᴾᵉᵉᵖǽǽǽǽǽǽǽǽǽǽǽǽᴲᴭ
ǽᴴᵐᵂᵄᵊᵂᵋᵑǽǽǽǽǽǽǽǽǽᴲᴭ
ᴹᵉᵂᵁǽᴿᵏᵆᵄᵅᵑᵋᵂᵐᵐᴻ
ᴼᵐᵔᵆᵑᵀᵅ¯ᵉᵂᵁǽǽǽǽǽǽǽᴯᴭ
ǽᵑᴾᵉᵉᵖǽǽǽǽǽǽǽǽǽǽǽǽᴲᴭ
ǽᴴᵐᵂᵄᵊᵂᵋᵑǽǽǽǽǽǽǽǽǽᴲᴭ
ᴹᵉᵂᵁǽᴿᵏᵆᵄᵅᵑᵋᵂᵐᵐᴻ
ᴻᵐᵔᵆᵑᵀᵅ¯ᵉᵂᵁǽǽǽǽǽǽǽᴯᴭ
ǽᵑᴾᵉᵉᵖǽǽǽǽǽǽǽǽǽǽǽǽᴲᴭ
ǽᴴᵐᵂᵄᵊᵂᵋᵑǽǽǽǽǽǽǽǽǽᴲᴭ
ᴹᴿᵒᵗᵗᵂᵏǽᵓᵌᵉᵒᵊᵂᴻ
ᴻᵐᵔᵆᵑᵀᵅǽǽǽǽǽǽǽǽǽǽǽᴲᴭ
ǽᵀᴾᵉᵉǽǽǽǽǽǽǽǽǽǽǽǽǽᴲᴭ
ᴹᴿᵒᵗᵗᵂᵏǽᵓᵌᵉᵒᵊᵂᴻ
ᴼᵐᵔᵆᵑᵀᵅǽǽǽǽǽǽǽǽǽǽǽᴰᴭ
ǽᵀᴾᵉᵉǽǽǽǽǽǽǽǽǽǽǽǽǽᴲᴭ