


SECTION 2. PREPARE THE MACHINE FOR SEWING
Starting To Sew
Now that you are familiar with the controls on your machine and with the accessories provided for the machine, you are ready to start to sew with your new Kenmore
sewing machine. Below are some good habits to lotlow each time you sit down to sew:
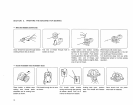
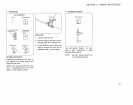
1. Inspect the needle. It should be straight, properly set and sharp on the point. It shouldbe the correct size for the fabric and thread being used. Do not be afraid to
change your needle lrequently. Many of the new fabrics made ol synthetic blends tend to dull needles more easily than fabrics made of natural fibers.
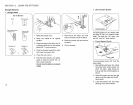
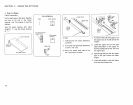
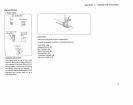
2. Belore piacing the material on the machine, see that the ends of the threads have been drawn about 4 inches to the rear ot the machine. Hold on to threads during
the sewing of the first 3 or 4 stitches of the seam.
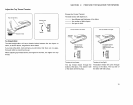
3. Test the machine stitch _n a scrap _f the labric y_u p_ant_ use_ The fabric sh_uId be d_uble thickness_ Adjust the machine __rthe Iength _t stitch and tensi_n suitable
to the labdc.
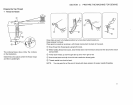
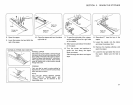
4. Fabric should be placed under the presser loot with the bulk of the material to the left of the needle and the right edge ot the material placed on the 5/8- seam
marking on the needle plate when making a simple seam.
5. Run the machine at a slow even speed. The more pressure you put on the toot control, the taster the machine will sew.
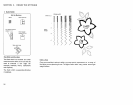
6. Fasten each seam by back tacking, sewing a tew stitches in reverse.
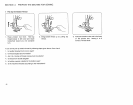
7. Always finish sewing each seam with the needle at its highest point.
& Guide the fabric gently with your hand in lront of the needle. Never putl or hold the tabnc in such a way that the normal leeding is altered.
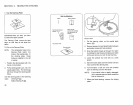
9. When turning the hand wheel manually, always turn it toward you.
17