


Contents
Page
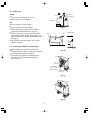
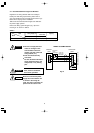
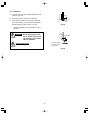
IMPORTANT!
Please Read Before Starting.................................. 1
1. GENERAL.......................................................... 2
1-1. Tools Required for Installation (not supplied)
1-2. Accessories Supplied with Indoor Unit
1-3. Optional Copper Tubing Kit
1-4. Type of Copper Tube and Insulation Material
1-5. Field Wiring
1-6. Additional Materials Required for Installation
1-7. Operating Range
2. INSTALLATION SITE SELECTION................... 3
2-1. Indoor Unit
2-2. Outdoor Unit
2-3. Air Discharge Chamber for Top Discharge
2-4. Wind Shield for “CL” Model
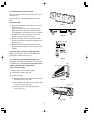
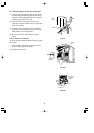
3. HOW TO INSTALL THE INDOOR UNIT ........... 6
3-1. Remove the Rear Panel from the Unit
3-2. Make a Hole
3-3. Install the Rear Panel on the Wall
3-4. Remove the Grille to Install the Indoor Unit
3-5. Shape the Indoor Side Tubing
3-6. Wiring Instructions
3-7. Recommended Wire Length and Diameter
3-8. Wiring Instructions for Inter-unit Connections
3-9. Mounting
3-10. Drain Hose
4. REMOTE CONTROL UNIT INSTALLATION
POSITION ........................................................ 14
4-1. Mounting on a Wall
5. ADDRESS SWITCHES..................................... 15
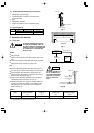
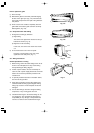
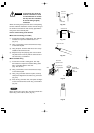
6. HOW TO INSTALL THE OUTDOOR UNIT....... 16
6-1. Removing the Packaging Skid
6-2. Installing the Outdoor Unit
6-3. Tubing Direction
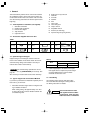
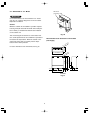
Model Combinations
Combine indoor and outdoor units only as listed
below.
Indoor Unit Outdoor Units
KS2462R C2462R
CL2462R
Power supply: 60Hz, single-phase, 208/230V
INSTALLATION INSTRUCTIONS
– Split System Air Conditioner –
COOL/DRY Model
Units should be installed by a licensed contractor
according to local code requirements.
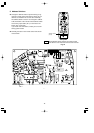
7. ELECTRICAL WIRING ..................................... 17
7-1. General Precautions on Wiring
7-2. Recommended Wire Length and Wire
Diameter for Power Supply System
7-3. Wiring System Diagram
7-4. Examples of Incorrect Wiring
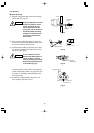
8. HOW TO PROCESS TUBING .......................... 19
8-1. Use of the Flaring Method
8-2. Flaring Procedure with a Flare Tool
8-3. Caution before Connecting Tubes Tightly
8-4. Precautions During Brazing
8-5. Indoor Unit Tubing
8-6. Connecting Tubing between Indoor and
Outdoor Units
8-7. Insulation of Refrigerant Tubing
8-8. Taping the Tubes
8-9. Finishing the Installation
9. AIR PURGING................................................... 22
10. TEST RUN......................................................... 25
10-1. Preparing for Test Run
10-2. Performing Test Run
11. REFRIGERANT R410A: SPECIAL PRECAUTIONS
WHEN INSTALLING UNIT................................ 28
11-1. Characteristics of New Refrigerant R410A
11-2. Checklist Before Installation
11-3. Tools Specifically for R410A
11-4. Charging Additional Refrigerant
In Canada
SANYO FISHER COMPANY SANYO Canada Inc.
A DIVISION OF SANYO NORTH AMERICA CORPORATION 300 Applewood Crescent
21605 Plummer Street Concord, Ontario
85464359328000 © SANYO 2002 Chatsworth, CA 91311 U.S.A. L4K 5C7, Canada
In order to protect the environment, this air conditioner uses the new refrigerant R410A.