Wired Remote Controller Installation (Optional)
Accessories
Wired Remote
Controller(1)
Cable-Tie(2) Cable Clamp(5) TH M4 X 16 Tapped
Screw(7)
E-
57
ENGLISH
Wired
Remote
Controller
Indoor Unit
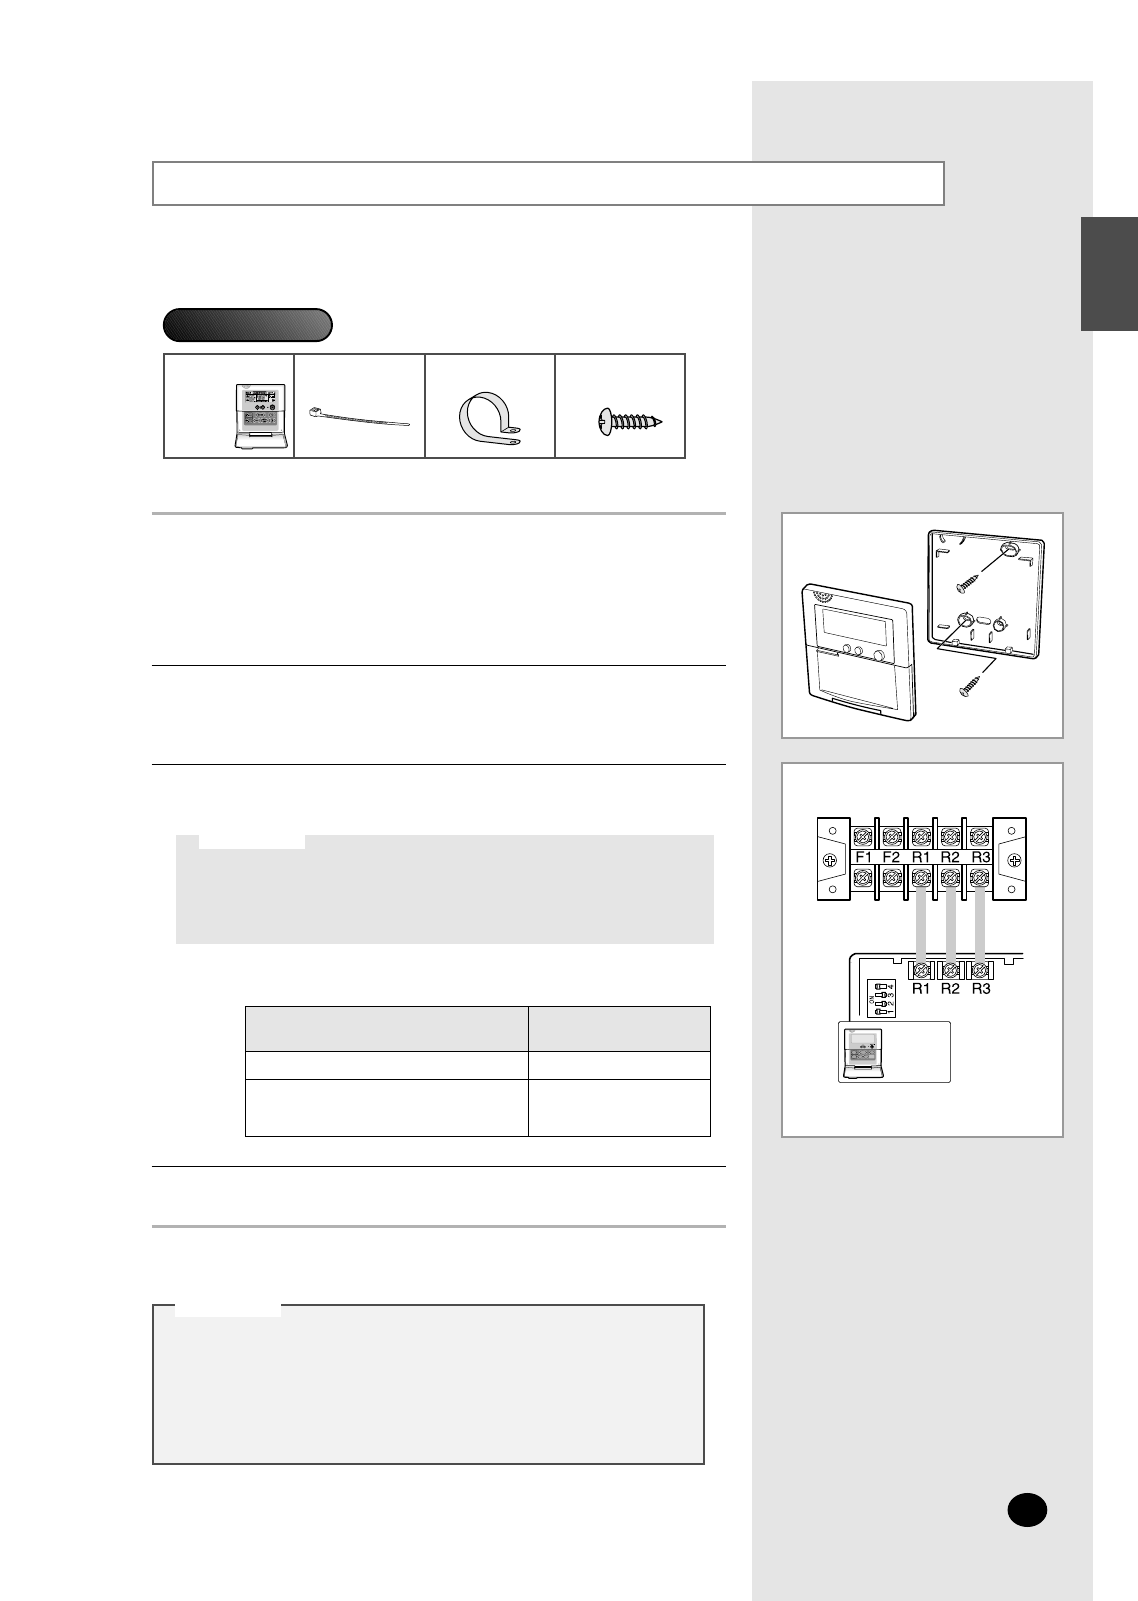
Disassemble the wired remote controller by using two grooves
on the top of it.
1
Secure the rear cover of the wired remote controller on the wall with two
screws.
2
Connect the R1, R2 and R3 terminals in the wired remote controller to
each R1, R2 and R3 terminals on the electrical component box.
3
Reassemble the wired remote controller.
4
CC
CC
AA
AA
UU
UU
TT
TT
II
II
OO
OO
NN
NN
Do NOT keep the wired remote controller cables with a 220V
cable because the remote controller cables have low voltage.
Do NOT input 220V power to the R1, R2 and R3 in the wired
remote controller.
◆
◆
Cable Specifications
NN
NN
oo
oo
tt
tt
ee
ee
Size of cables
Max. length of electric wires from the
indoor unit to the wired remote controller
0.3mm
2
~0.75mm
2
100m(109 yd)
Cable type
Double-insulation, 3G
CC
CC
AA
AA
UU
UU
TT
TT
II
II
OO
OO
NN
NN
◆ The optional kits must be installed by an installation specialist.
◆ Before installing the optional kits, ensure that you have turned
off the main power.
◆ All optional kits cables should be installed according to the
national wiring rules and you must install them in the wall not
to be touched by users.


