


I1200 Regency Wood Insert 13
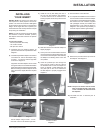
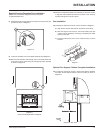
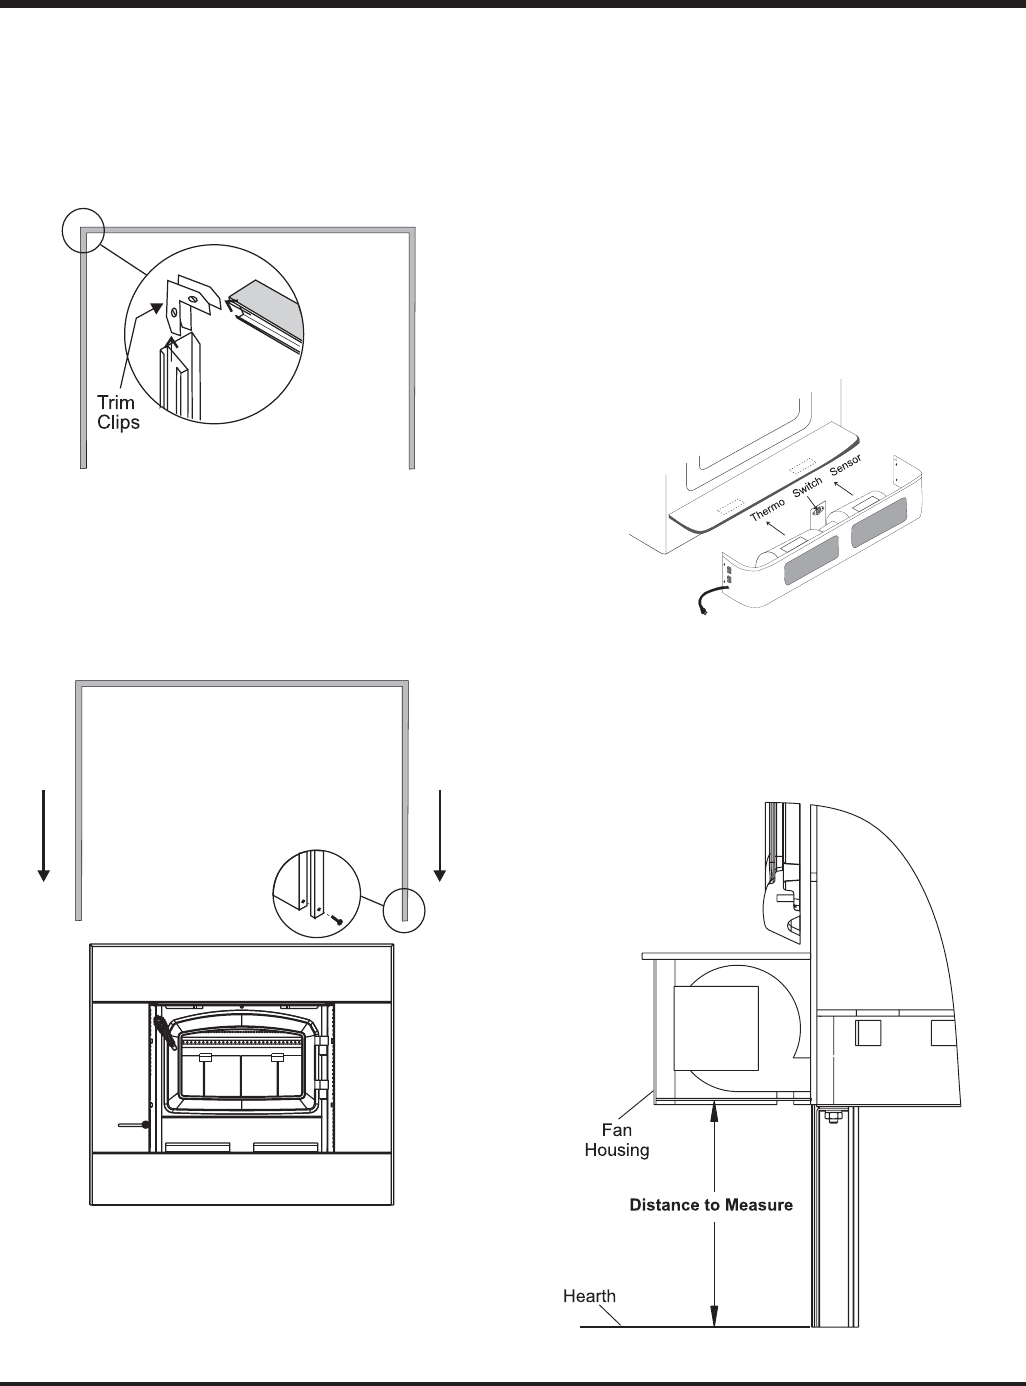
8) Assemble the left and right side trim to the top trim using the trim clips
provided as shown in Diagram 5.
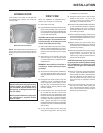
9) Fit the trim assembly over the faceplate assembly. See Diagram 6.
10) Drill two 5/32" diameter holes through the trim and side panels and
screw the trim to the panels using the self tapping screws provided
as shown in Diagram 6.
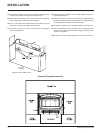
11) Mount the completed faceplate / trim assembly to the insert. Ensure
to align the side faceplate slots with the hex bolts in the mounting
brackets and tighten to secure in place.
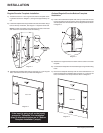
Diagram 5
Diagram 6:
Shown with Optional Bottom Faceplate
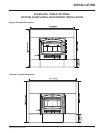
Regular/Oversize Faceplate Trim Installation:
(Black Trim included with Regular/Oversize Faceplate
or Optional Brass Trim)
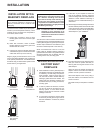
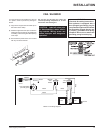
Fan Installation:
12) Install the fan assembly to ash lip of insert as shown in Diagram 7.
Diagram 7
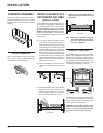
13) To install the optional fan support, measure the distance between
the hearth and the bottom surface of the fan housing as shown in
Diagram 8.
Diagram 8: Side View
a) Align the fan with the offset clips on the bottom of the ashlip.
b) Slide the supports into the clips. The tension holding the clips
in place may be adjusted by increasing or decreasing the offset
spacing of the clips.
c) Ensure that the power cord is not in contact with any hot stove
surfaces.
Optional Fan Support / Bottom Faceplate Installation:
INSTALLATION