


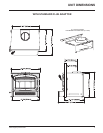
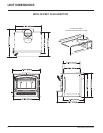
I1200 Regency Wood Insert10
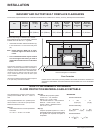
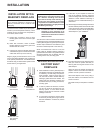
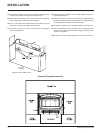
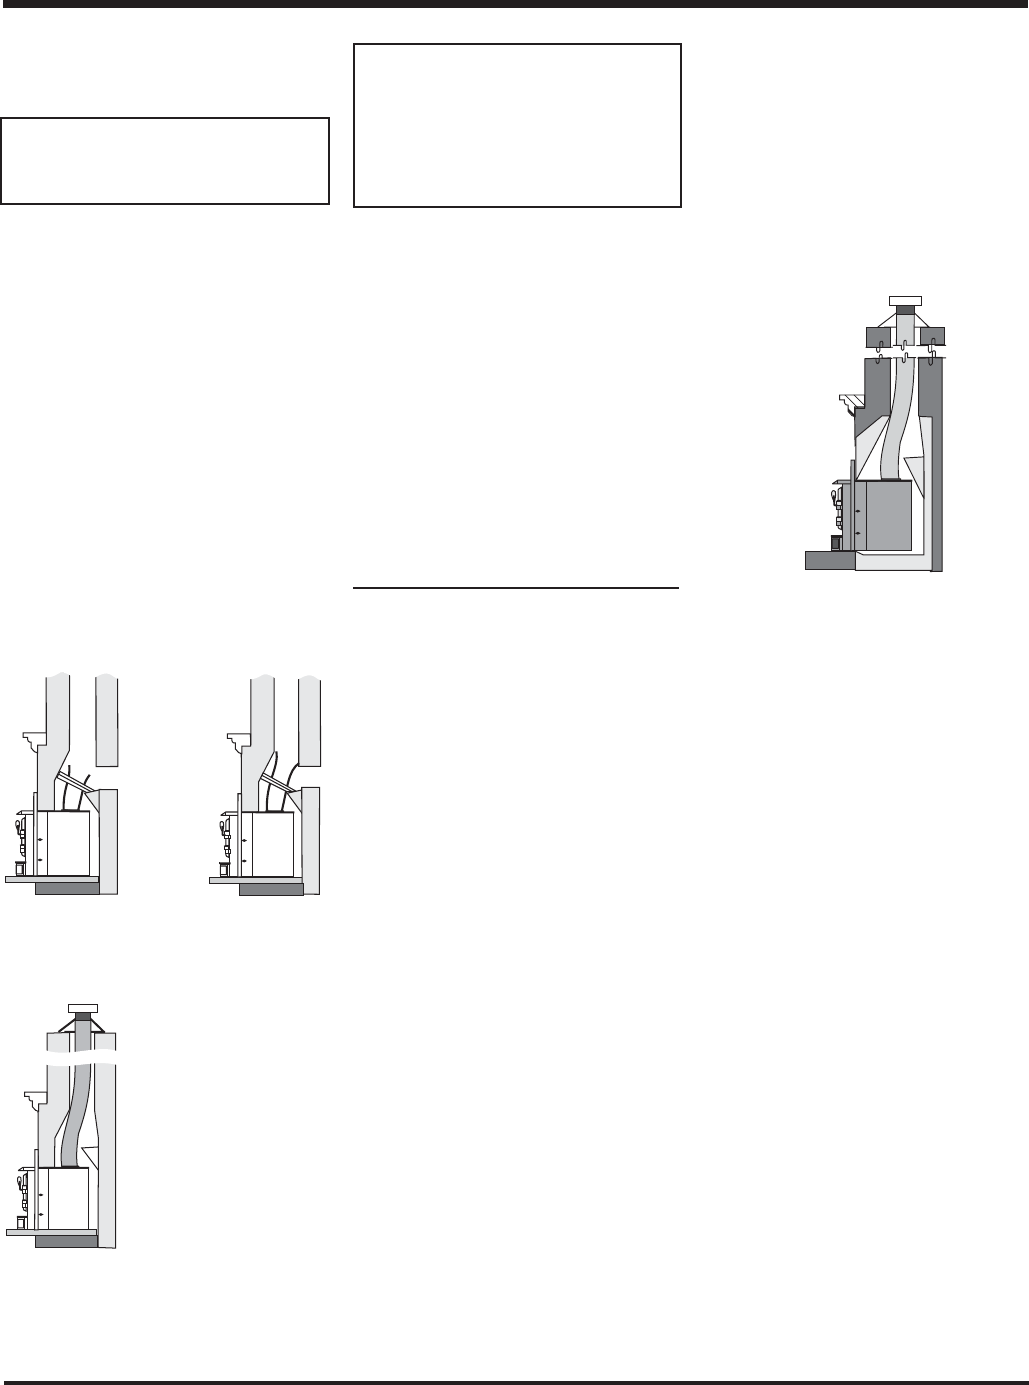
1) Positive Flue
Connection
with Cleanout
INSTALLATION
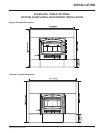
2) Direct Flue
Connection
with Cleanout
3a) Full Flue Liner
(No Cleanout
Required)
Note: A clean-out door is sometimes
required, by your inspector, to be
installed when either the Positive fl ue
connection or Direct fl ue connection
method is used.
The use of one of the connection methods listed
on this page not only increases the safety of your
insert by directing the hot gases up the fl ue, but
will also help increase the unit's effi ciency and
decrease creosote deposits in the chimney.
When a connected fl ue or liner is in use, the
insert is able to “breathe” better by allowing a
greater draft to be created. The greater draft can
decrease problems such as, diffi cult start-ups,
smoking out the door, and dirty glass.
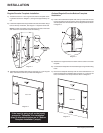
INSTALLATION INTO A
FACTORY BUILT
FIREPLACE
1) When installed in a factory built fi replace, a
full stainless steel rigid or fl exible fl ue liner
is mandatory, for both safety and perform-
ance purposes. When a fl ue or liner is in
use, the insert is able to breathe better by
allowing a greater draft to be created. The
greater draft can decrease problems such
as, diffi cult start-ups, smoking out the door,
and dirty glass.
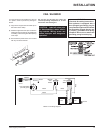
2) In order to position the fl ue liner, the exist-
ing rain cap must be removed from your
chimney system. In most cases the fl ue
damper should also be removed to allow
passage of the liner.
3) In most cases opening the existing spark
screens fully should give enough room for
the insert installation. If it does not, remove
and store.
When referencing installation or connec-
tion to masonry fi replaces or chimneys, the
masonry construction must or shall be code
complying.
INSTALLATION INTO A
MASONRY FIREPLACE
The insert must be installed as per the require-
ments of your local inspection authority. Three
methods of fl ue connection are acceptable in
most areas, these include:
1) Positive fl ue connection, where a large
blocking plate and a short connector pipe
is used.
2) Direct fl ue connection, where a smaller
blocking plate and a connector pipe to the
fi rst fl ue liner tile is used.
3) Full fl ue liner, where a stainless steel rigid
or fl exible liner pipe is routed from the insert
outlet collar to the top of the chimney.
Regency highly recommends the use of a full
liner as the safest installation and provides the
most optimum performance. Your retailer should
be able to help you decide which system would
be the best for your application.
In Canada this fi replace insert must be
installed with a continuous chimney liner
of 6" diameter extending from the fi re-
place insert to the top of the chimney. The
chimney liner must conform to the Class
3 requirements of CAN/ULC-S635 or CAN/
ULC-S640, Standard for Lining Systems for
New Masonry Chimneys.
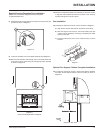
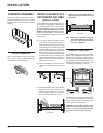
4) If the fl oor of your fi replace is below the
level of the fi replace opening, adjust the
insert's levelling bolts to accommodate the
difference. When additional shimming is
required, use non-combustible masonry or
steel shims.
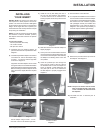
5) Measure approximately the alignment of the
fl ue liner with the position of the smoke outlet
hole on the insert to check for possible offset.
If an offset is required, use the appropriate
offset adaptor in your installation.
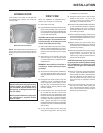
6) Once the above items have been checked,
slide your insert into position after fi rst po-
sitioning and securing the fl ue liner to the
offset adaptor.
Attach the rod to the adaptor and slide the
adaptor onto the unit as the unit is slid into
position. Ensure a positive connection.
Secure the adaptor to the unit by using 2
bolts, fl at washers, lock washers and one
screw in the front.
Re-install raincap at completion of installa-
tion.