


Regency FG39 FireGenie Freestanding Gas Stove
17
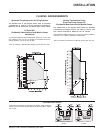
INSTALLATION
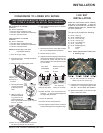
Conversion Kit for NG to LPG Model #736-969
THIS CONVERSION MUST BE DONE BY A QUALIFIED GAS FITTER IF IN DOUBT DO NOT DO THIS CONVERSION !!
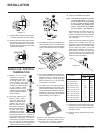
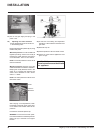
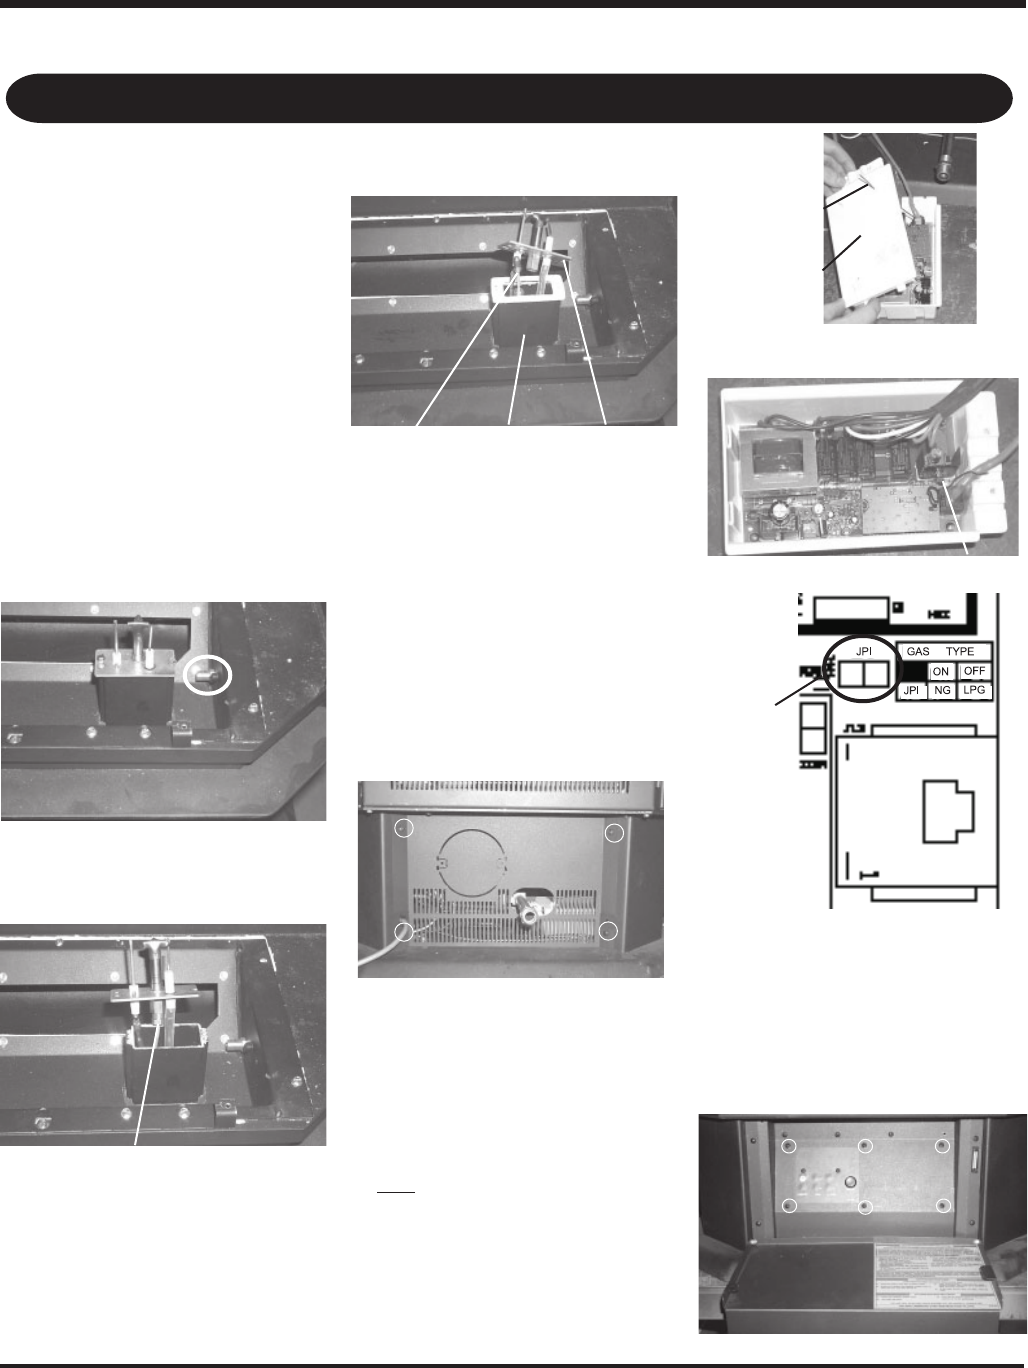
Burner Orifice
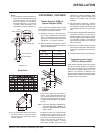
Conversion Kit 736-969 Contains:
Qty. Part # Description
1 904-641 Burner Orifice #50
1 908-528 Red "LPG" label
2 918-590 Label "Converted to LPG"
1 918-335 Instruction Sheet
1 910-920 Pilot Orifice
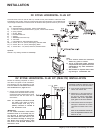
1) Shut off the gas supply and unplug the
power cord.
2) Open the front door and carefully remove
the logs and lava rock.
3) Remove burner.
4) Remove burner orifice with a 1/2" wrench
and discard. Use a wrench to hold on to the
elbow behind the orifice.
5) Reinstall new burner orifice LPG stamped
#50 and tighten.
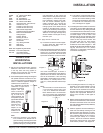
18)Stick the conversion label "This unit has
been converted to LPG" on the control box
cover.
19)Reverse steps 16, 15 & 12.
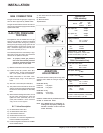
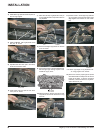
Jumper Location
Jumper
8) Remove the NG orifice and replace it with
the LPG orifice.
9) Install the pilot tube to the pilot assembly.
10)Place the pilot assembly over the pilot extru-
sion tube and secure it with 2 screws.
11)Adjust the burner areation setting to fully
open and install the burner.
12)Remove the pedestal back cover by remov-
ing the 4 Philips screws.
Pilot Tube
7) Lift the pilot assembly and remove the pilot
tube using an 11mm wrench.
6) Remove the 2 screws which hold the pilot.
Pilot
Orifice
Pilot
Assembly
Pilot
Extrusion
Tube
13)Stick the conversion label "This unit has
been converted to LPG" over top of the
serial number decal.
14)Replace the yellow "NG" label with the red
"LPG" label.
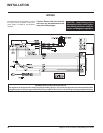
15)Carefully pull out the control box.
Note: The control box is held in place by
velcro.
16)Remove the control box cover by undoing
the 3 screws. Maneuver through antenna.
Control Box
Cover
Antenna
17)Remove the jumper using a plier.
20)Open the bottom door and remove the front
panel by undoing the 6 screws.