31
Fitting the splash back
The cooker can be installed with or without the
supplied splashback. To fi t the splash follow the
instructions below.
view from the rear of the cooker
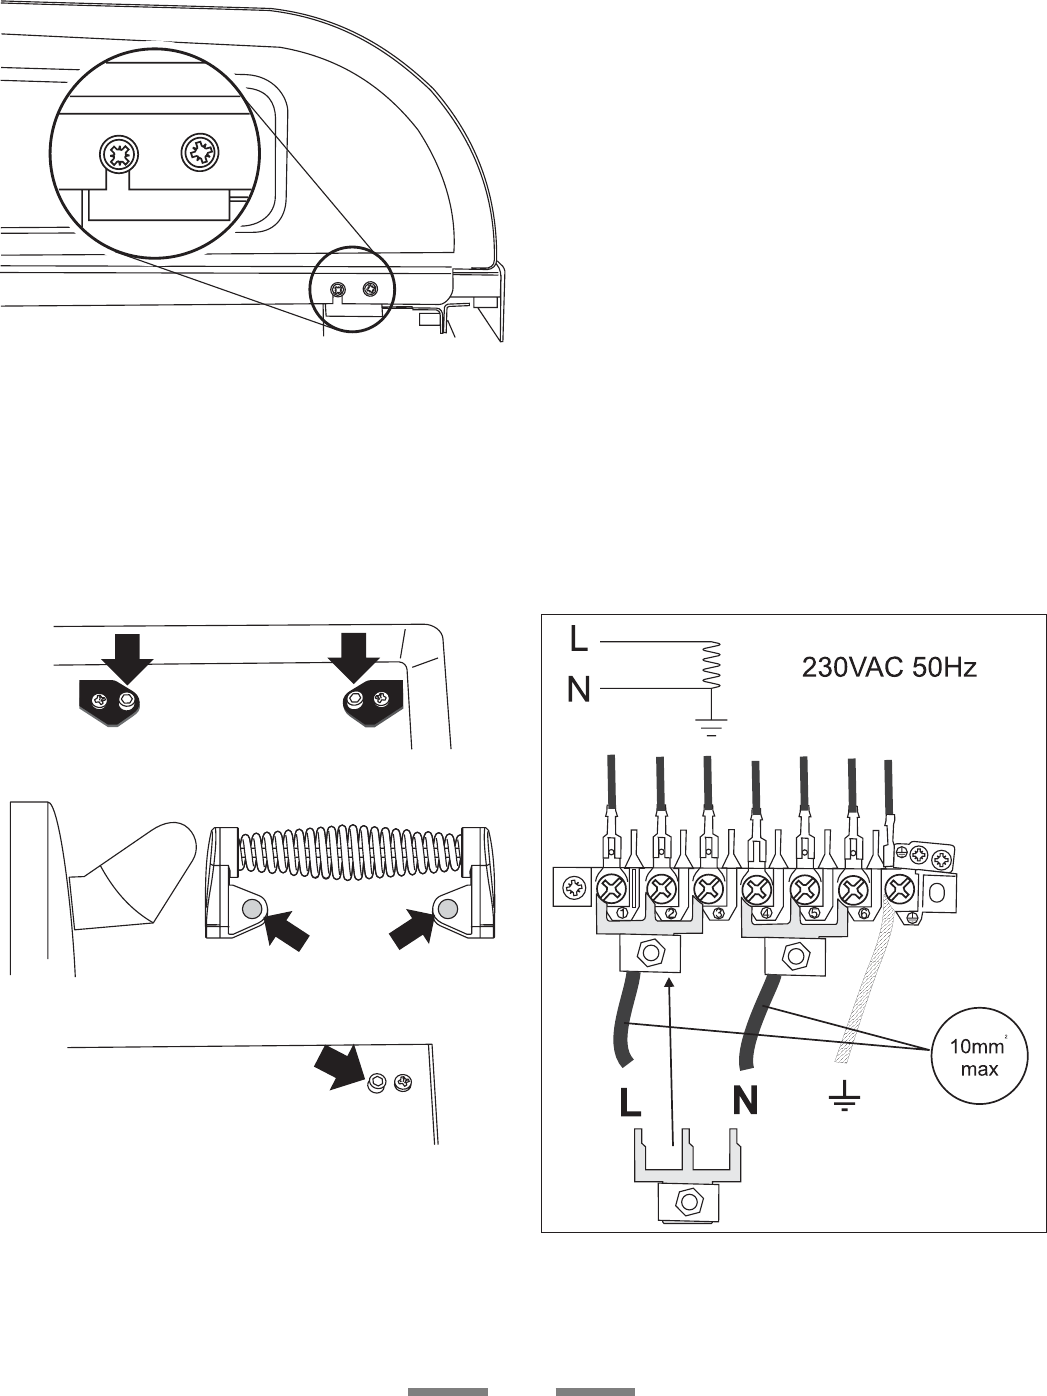
The splash back is fi tted using 4 screws in the rear
edge of the fl ue grille, two at each end. Remove the
outer two screws and loosen the inner pair. Fit the
splash over the inner screws and then refi t the outer
two screws. (see fi gure).
Fit the Handles
Remove the 4mm Allen screws from the doors with
the hexagon key tool. Use the screws to fi t the door
handles.
The handles should be above the fi xings.
Remove the 4mm Allen screws from the top corners
of the facia and fi x the front handrail in position.
Electrical Connection
This appliance must be installed by a qualifi ed
electrician to comply with the relevant
regulations and also the local electricity supply
company requirements.
Make sure that the mains characteristics (voltage,
nominal, power, etc.) match the ratings indicated on
the data plate affi xed to the lower right hand cooker
upright (remove storage drawer). The cooker is preset
for a single-phase earthed electrical connection.
It is essential to install a multi-pole circuit breaker
that completely disconnects the appliance from the
mains, with a minimum contact break distance of
3mm.
WARNING: THIS APPLIANCE MUST BE EARTHED
The appliance must be connected to an effi cient
earthing circuit. If the electricity network is not
equipped with an earth connection, then it must
be installed separately in compliance with local
regulations. Earthing is a safety measure required by
law, and must be performed with particular care by
a qualifi ed technician, who must also check that the
electricity supply characteristics are correct.
The cable size used should be suitable for the
appliance load and in accordance with local
regulations. Please note the maximum cable sizes
are 6mm
2
for the screw terminals and 10mm
2
for the
3 pronged links.
Access to the mains terminal is gained by removing
the electrical terminal cover box on the back panel.
Connect the mains cable to the correct terminals for
your electrical supply type (see fi g.).
Check that the links are correctly fi tted and
that the terminal screws are tight.
Secure the mains cable using the cable clamp.


