


30
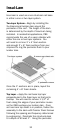
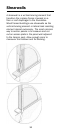
Use a lifting plate that is 12”x12”x3/16” with
a 4x5 grid of holes to attach screws through
and into the OSB skin of the panels. (The
plate should have a “U” welded to it to fasten
the lifting device to.) A minimum of two plates
should be used to lift each panel.
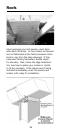
Determine the center of each panel. Depending
on the pitch of the roof, drill your hole for the
picking eye, or place the center of the two lifting
plates, 3” from the center of the panel toward
the ridge end for every pitch change after 4:12.
For example: On a 7:12 roof, the lifting hole will
be 9” from the panel center. This will allow the
panel to arrive on the ridge at almost the proper
pitch, which will help the panel installation. If
you use the picking eye, be sure to fill the hole
with expanding foam sealant prior to installing
roofing felt. (If the roof panel has installed
lumber, the placement of the lifting eye or plates
may need to be adjusted.)
During the install, it is recommended that
you alternate the placement of the panels
on either side of the ridge beam. Start with
two panels on one side of the ridge, then
four on the other side. To help prevent
the ridge beam from bowing, alternate this
sequence for the balance of the roof. To
make placement of adjacent panels easier, do
not fasten the last screw tightly at the ridge
or eave of the leading panel edge, as it It
may become difficult to place the next panel
due to compression from the last screw.
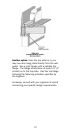
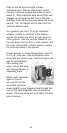
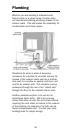
In some wall/roof connections, as shown on the
previous page, the electrician can run the wires
in the void created by the beveled block. Once
the wires are in place, spray expanding foam in
the void or use an EPS wedge infill.