


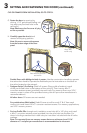
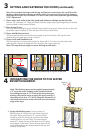

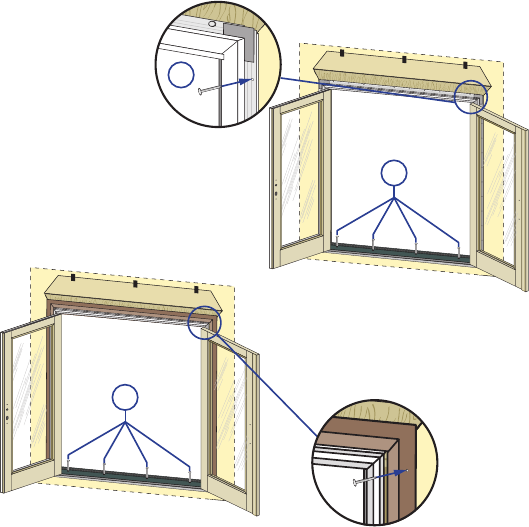
G. Fasten the door to opening by
driving 1-1/2” galvanized roong nail
into each pre-punched hole in the
nailing fin.
Note: Make sure the fin corner is lying
as flat as possible
H. Carefully open the door(s) and
remove all shipping spacers.
Note: Be sure to remove the spacers
from the bottom edge of the door
panel.
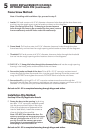
Double Doors with Multipoint latch in center: Use the construction handle to operate
the active door handle. Operate the flushbolts per the instructions on the label on
the strike located on the astragal.
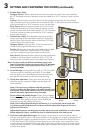
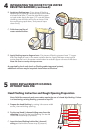
I. Designer Series® Out-Swing: Install sill screws. Place a dab of sealant in each
of the pre-drilled holes in the bottom of the unit (sill). Then insert a #8 x 2"
corrosion resistant screw (provided) into each hole. For masonry floors us a 3/16"
masonry screw in place of the provided screw, pilot drill per screw manufacturer’s
recommendations.
All other doors: Sill screws are not needed.
For combinations (Multi-wide): Predrill frame at mullion ends 3" & 6" from each
mullion joint and insert #10 x 3" corrosion resistant screws. For masonry applications,
use 3/16" masonry screws.
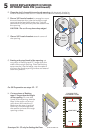
J. For Low Profile Sills: through each installation screw hole drill a 1/8" pilot; and install
a #8 x 3" corrosion resistant screw (provided) into the pilot hole into the oor. For
doors including a standard lock install tubs per instruction included with the sill strike
package.
Note: For concrete floors use masonry screws that are a minimum size of 3/16"
diameter x 3" and pilot per manufacturer’s recommendations for the screw.
3
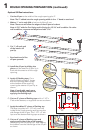
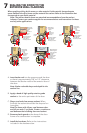
SETTING AND FASTENING THE DOOR (continued):
Exterior
3I
3G
Exterior
3I
Exterior
Door with
nail fin only
Door with brickmould
and nail fin
CLIP OR FRAME SCREW INSTALLATION, GO TO STEP 5I.