


C2
C3
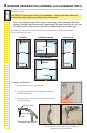
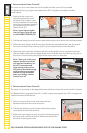
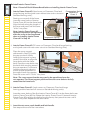
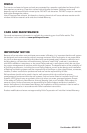
C. Remove Interior Frame Cover #2.
The cover on vent units where the crank handle and roto-cover will be located.
ForStandardAwning,singleunitsgreaterthan42"inheightandmultiplewindow
combinations.
1. Startingatthecoverend
closest to where the crank
handle will be located, insert
the tool between the sash and
cover(usingthesamemethod
of insertion used for Interior
FrameCover#1).
Note: Insert the tool under
Interior Frame Cover #2 next
to the FRAME CORNER (C2).
2. Pullthetoolawayfromtheframetostartreleasingthecoverbarbsfromtheframekerfs.
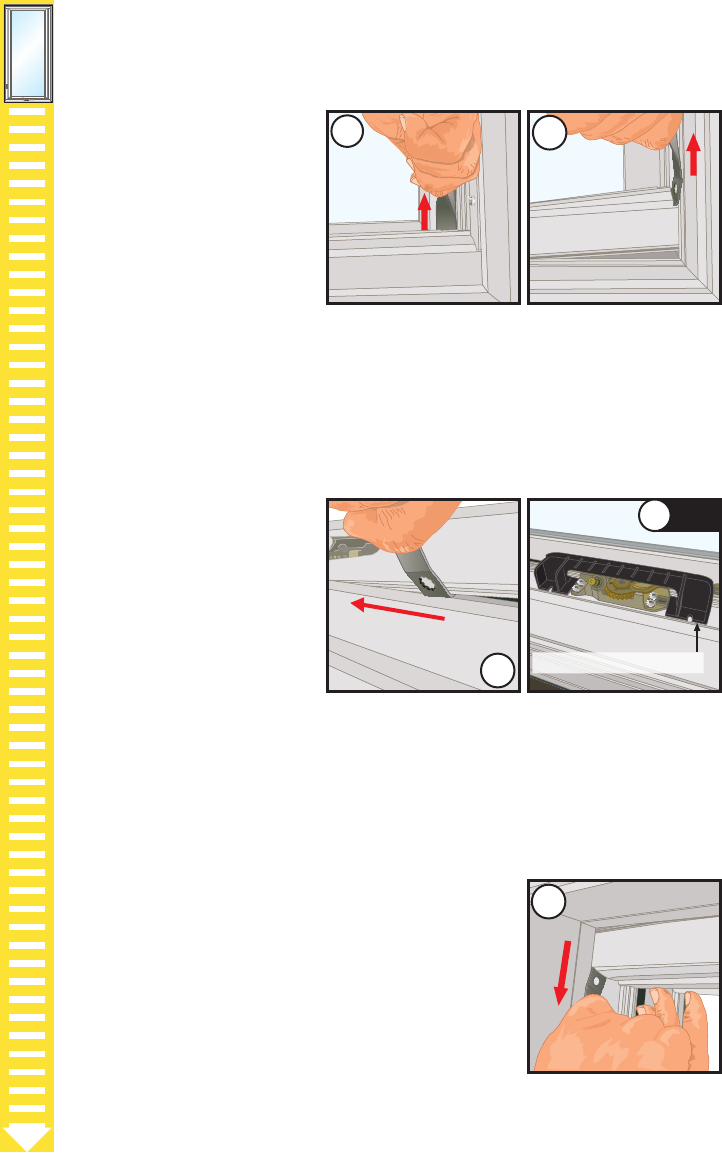
3. Whenthecoverbeginstopullawayfromtheframe,relocatethetoolneartheendof
the cover as shown and continue to pull up to release the barbs from the kerfs.
4. Whenthecoverhasbeenreleasednearthecrankhandlecut-out,repositionthetool
with the hook under the front edge of the cover. Slide the tool over while pulling up on
the cover. Continue along the length of the cover until it is removed.
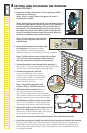
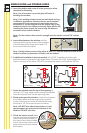
C4
C4 NOTE
Cover support bracket
AWNING/
CASEMENT
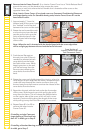
D. Remove Interior Frame Cover #3.
The cover on vent units on the opposite frame side from where the crank handle is located.
ForStandardAwninggreaterthan42"inwidth,singleunitsgreaterthan42"inheightand
multiple window combinations.
1. Startatoneendofthecoverandinsertthetool
between the frame and cover as shown.
2. Pullthetoolawayfromtheframetostartreleasingthe
cover barbs from the frame kerfs.
3. Whenthecoverbeginstopullawayfromtheframe,grasp
the cover and continue to pull to release the barbs from
the kerfs, removing the cover.
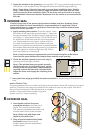
D1
TWO OR MORE PEOPLE ARE REQUIRED FOR THE FOLLOWING STEPS
Note: Take note of the cover
support bracket around the
roto operator hardware, (on
the sill of casement and
large awning units and on
the jamb of standard awning
units) as the cover support
bracket will be referenced
when re-installing Interior
Frame Cover #2.