


User’s Manual
36
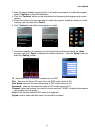
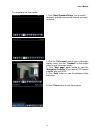
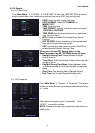
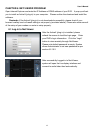
12. The “ASee” main interface will be displayed.
The functions of the various icons are as follow:
1 ---Channel Select
2 ---Pan/Tilt Control
3 ---Zoom +/-
4 ---Focus +/-
5 ---Iris +/-
6 ---Play/Pause, Snapshot, Settings, Next Channel Group, and
help.
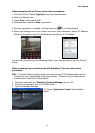
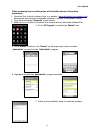
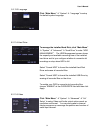
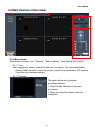
13. Click the Settings icon to open the “Settings” menu.
Enter the device information for the DVR that you would like to
connect to:
Address: Enter the IP address of the DVR
Port: Enter the Mobile Port Number of the DVR under section
5.2.9
Device Name: Enter DVR name (User defined)
User ID: Enter the Login User Name for you DVR under section
5.2.9
Password: Enter the Login User Password for your DVR under
section 5.2.9.
History: Click the “History” button at the upper right hand
corner to view records of previously connected devices.
NOTE: If you are having trouble accessing your DVR from your cell phone please visit
www.NightOwlSP.com to ensure you are using the most up to date software. If your phone
is not compatible with the above list please check our website once again to see if your
phone is listed.
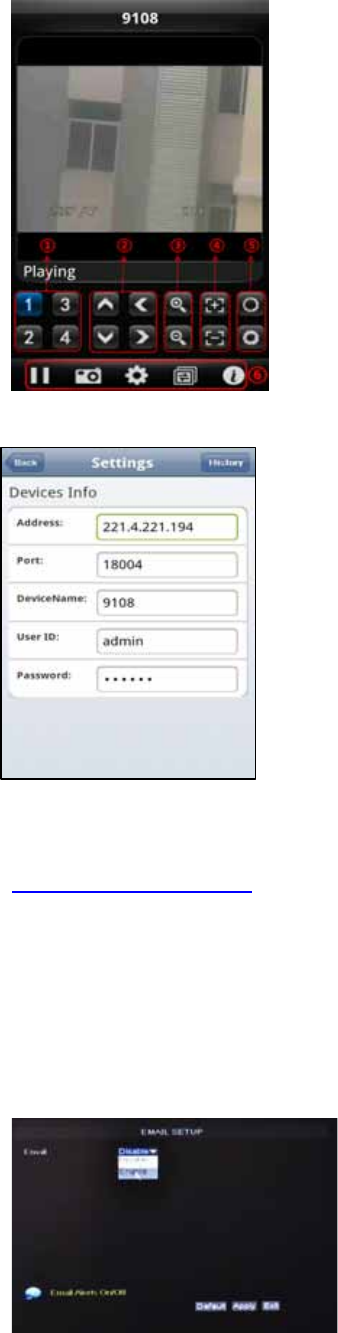
5.2.11 E-Mail Setup
There is also an option for the DVR to send an e-mail to a specific mails box when the alarm
is triggered. To enable this option, follow these steps:
Click the “EMAIL SETUP” button under Network.