


16
W415-0429 / C / 11.04.05
37
3
/
4
"
6"
1
7
3
/4"
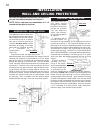
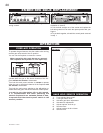
INSIDE
CHASE
37
3
/
4
"
40
1
/
8
"
56
3
/
4
"
37
3
/
4
"
39
1
/
4"
17
3
/
4
"
7"
4"
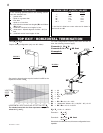
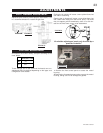
It is not necessary to install a hearth extension with this
fireplace system.
Note: In order to avoid the possibility of exposed insulation
or vapour barrier coming in contact with the fireplace body, it
is recommended that the walls of the fireplace enclosure
be “finished” (ie: drywall/sheetrock), as you would finish any
other outside wall of a home. This will ensure that clear-
ance to combustibles is maintained within the cavity.
When roughing in the fireplace, raise the fireplace to ac-
commodate for the thickness of the finished floor materi-
als, i.e. tile, carpeting, hard wood, which if not planned for
will interfere with the opening of the lower access door and
the installation of many decorative flashing accessories.
Objects placed in front of the fireplace should be kept a
minimum of 48" away from the front face.
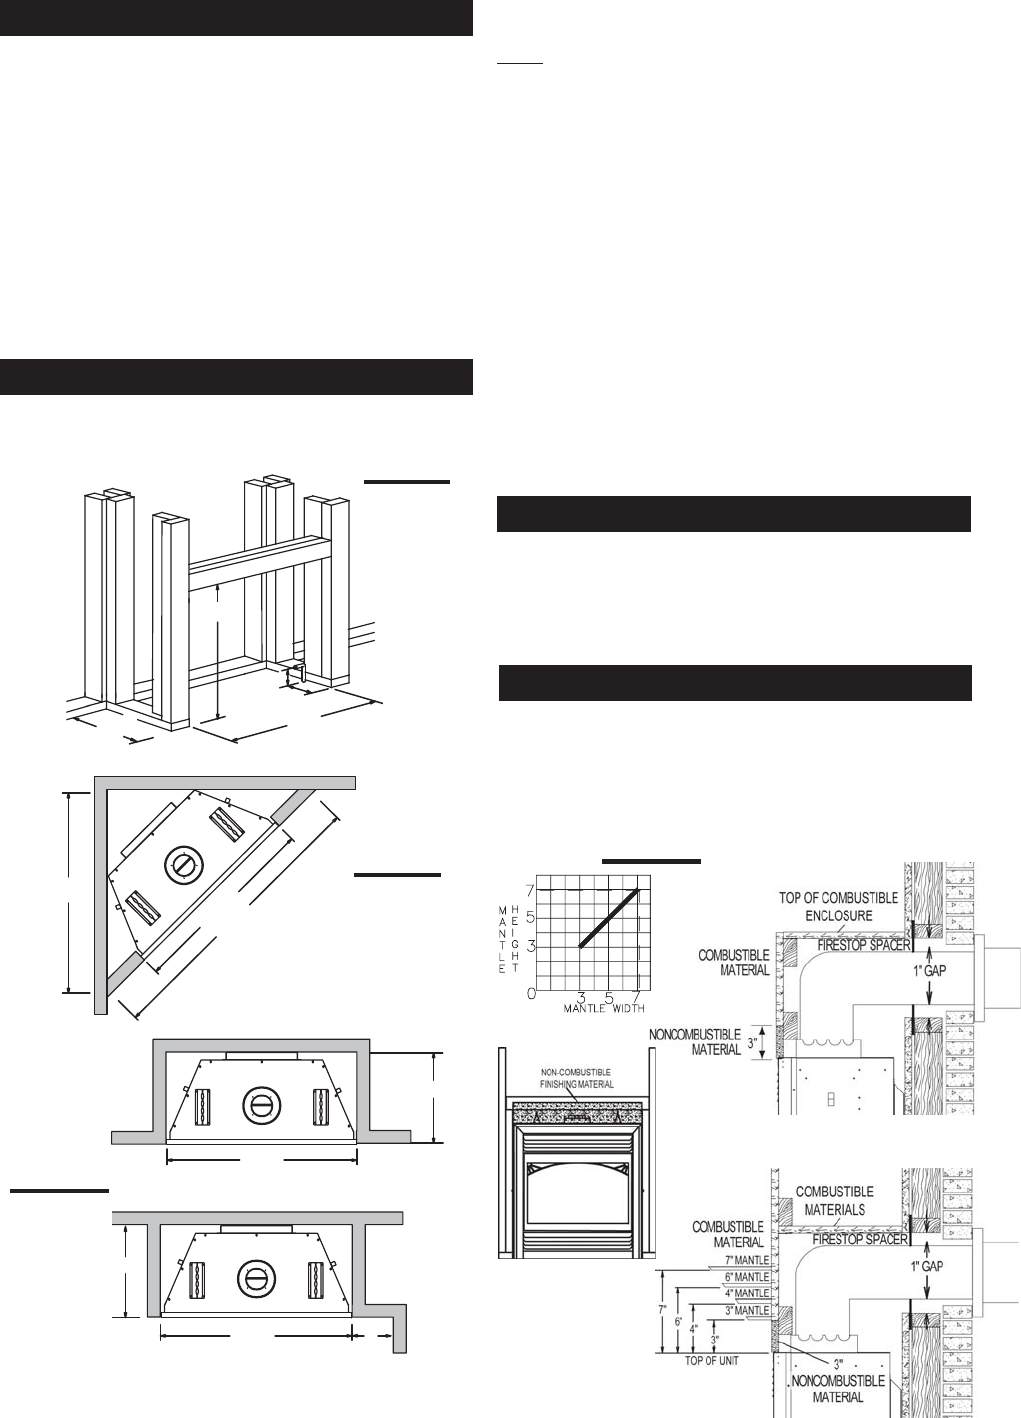
A non-combustible finishing material must be used for a
minimum of 3" above the fireplace
Combustible materials may be installed flush with the front
sides of the fireplace but must not cover or protrude past
any of the black face-side-areas of the fireplace. Non-com-
bustible material (brick, stone or ceramic tile) may pro-
trude in these areas.
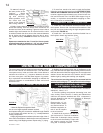
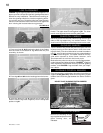
To install the fireplace face flush with the finished wall,
position the framework to accommodate the thickness of
the finished wall. Bend out the four nailing tabs, attached on
either side of the fireplace and secure to the 2x4 framing. The
tabs will facilitate the installation of either a
3
/
4
" or a 1" finished
wall thickness.The nailing tabs must not be removed.
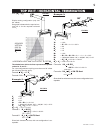
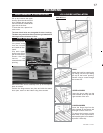
Combustible mantle clearance can vary according to the
mantle depth. Use the graph to help evaluate the clear-
ance needed. Curtains, above the fireplace, must not be
positioned lower than the 3" distance required for the 3"
combustible mantle. These same requirements apply to
any combustibles protruding on either side of the fire-
place.
FIGURE 32
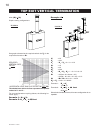
FIGURE 31
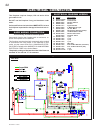
In Canada, mobile home installation may be vented hori-
zontally or vertically. In the United States, it may only be
installed vertically. See "Vertical Venting" or "Horizontal Air
Terminal Installation" for installation.
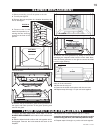
The fireplace is equipped with two 1/4" diameter holes
located in the front left and right corners of the base. For
mobile home installations, the fireplace must be fastened
in place. Use #10 hex head screws, inserted through the
holes in the base to secure. It is recommended that the
fireplace be secured in all installations.
Always turn off the pilot and the fuel supply at the
source, prior to moving the mobile home.
After moving the mobile home and prior to lighting the
fireplace, ensure that the logs are positioned correctly.
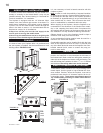
It is best to frame your fireplace after it is positioned and
the vent system is installed. Use 2x4's and frame to local
building codes. FIGURES 31-33.
MOBILE HOME INSTALLATION
FRAMING
MANTLE CLEARANCES & ENCLOSURES
NAILING TABS
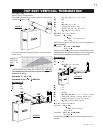
17
3
/
4
"
37
3
/
4
"
OUTSIDE
CHASE
FIGURES 33
FIGURES 34