


54D0700 19
HOT
HOT
VENT INSTALLATION
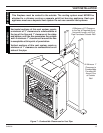
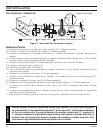
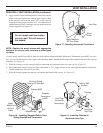
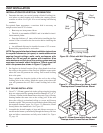
4. Apply a bead of non-hardening mastic around the outside
edge of vent cap. Position the vent cap in the center of hole
on the exterior wall with the word “UP” on the vent cap
facing up. Insure proper clearance of 1" to combustibles is
maintained to the flue. Attach the vent cap with four wood
screws supplied. See Figure 17.
Do not recess vent termination
into any wall. This will cause a
fi re hazard.
WARNING
NOTE: Replace the wood screws with appropriate
fasteners for stucco, brick, concrete, or other types
of siding.
Figure 17 - Installing Horizontal Termination
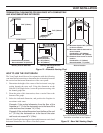
REAR WALL VENT INSTALLATION (continued)
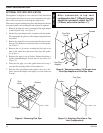
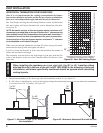
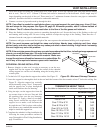
Figure 18 - Installing Simpson/Selkirk Vinyl
Siding Standoff and Termination
Apply
Mastic to
All Four
Sides
Vent Cap
Wood
Screw
Cut Vinyl Siding
Away to Fit Standoff
Wood Screw
Simpson
Termination
#985
Bolt
Apply Mastic to
All Four Sides
Nut
Standof #950
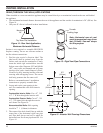
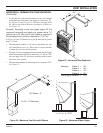
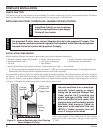
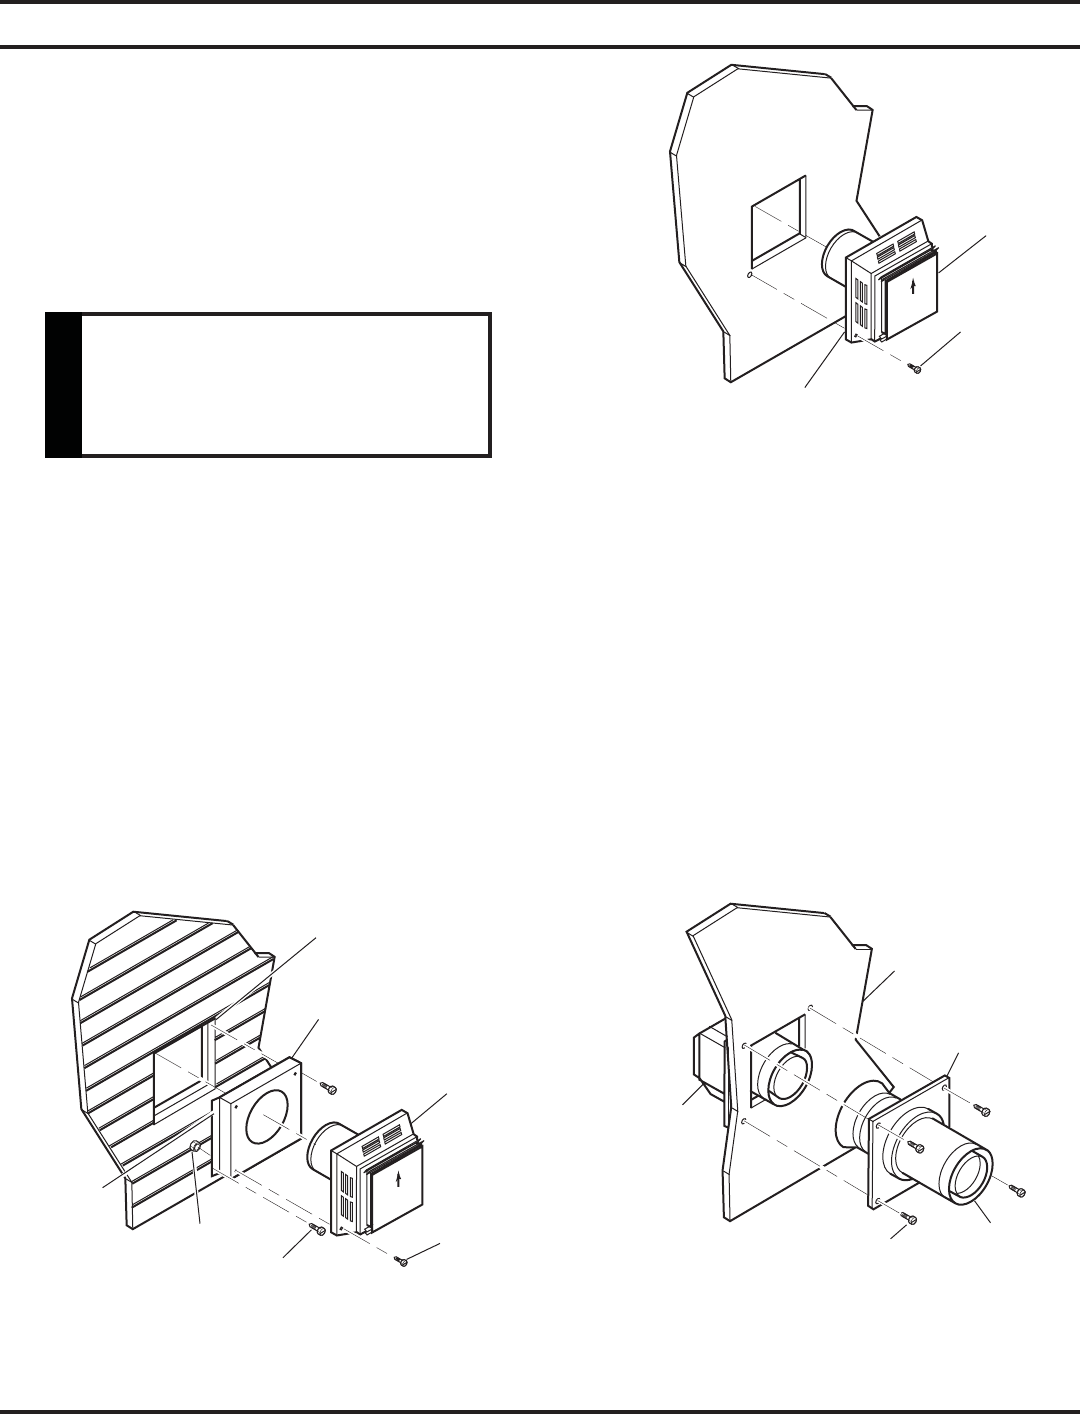
Figure 19 - Installing Firestop on
Horizontal Vent Pipe
Interior Wall
Surface
Firestop
Horizontal
Vent Pipe
Screw
Vent Cap
(Horizontal
Termination)
A vinyl siding standoff (part #950) must be used with the Simpson/Selkirk Horizontal Termination (part #985) on vinyl,
stucco or wood-clad exterior walls. Apply non-hardening mastic around outside edge of the standoff instead of the vent cap
assembly. See Figure 18.
5. Slide the firestop over the vent pipe before connecting the horizontal run to the vent cap. See Figure 19.
6. The termination should overlap the flue a minimum of 1
1
/4" Apply silicone to the outer pipe/termination connection.
Fasten termination with screws provided.
7. Slide the firestop against the interior wall surface and attach with screws. See Figure 19.