


6
SUNMONTUE WEDTHUFRI SAT
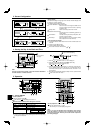
WEEKLY
TIME SUN
˚F
˚F
NO
˚F
TIMER
MON
OFF
WEEKLY
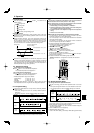
Function Selection of remote controller
Set Day/Time
Standard Control Screens
OFF
Timer Monitor Timer Setup
Day of the Week &
Time display
TIMESUN
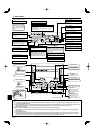
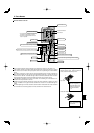
PAR-21MAA
ON/OFF
FILTER
CHECK
OPERATION
CLEAR
TEST
TEMP.
MENU
BACK DAY
MONITOR/SET
CLOCK
ON/OFF
˚F
˚F
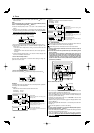
Time Setting
TIME SUN
Day of the Week Setting
4. Setting the Day of the Week and Time
˚F
˚F
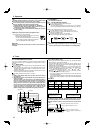
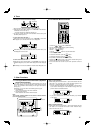
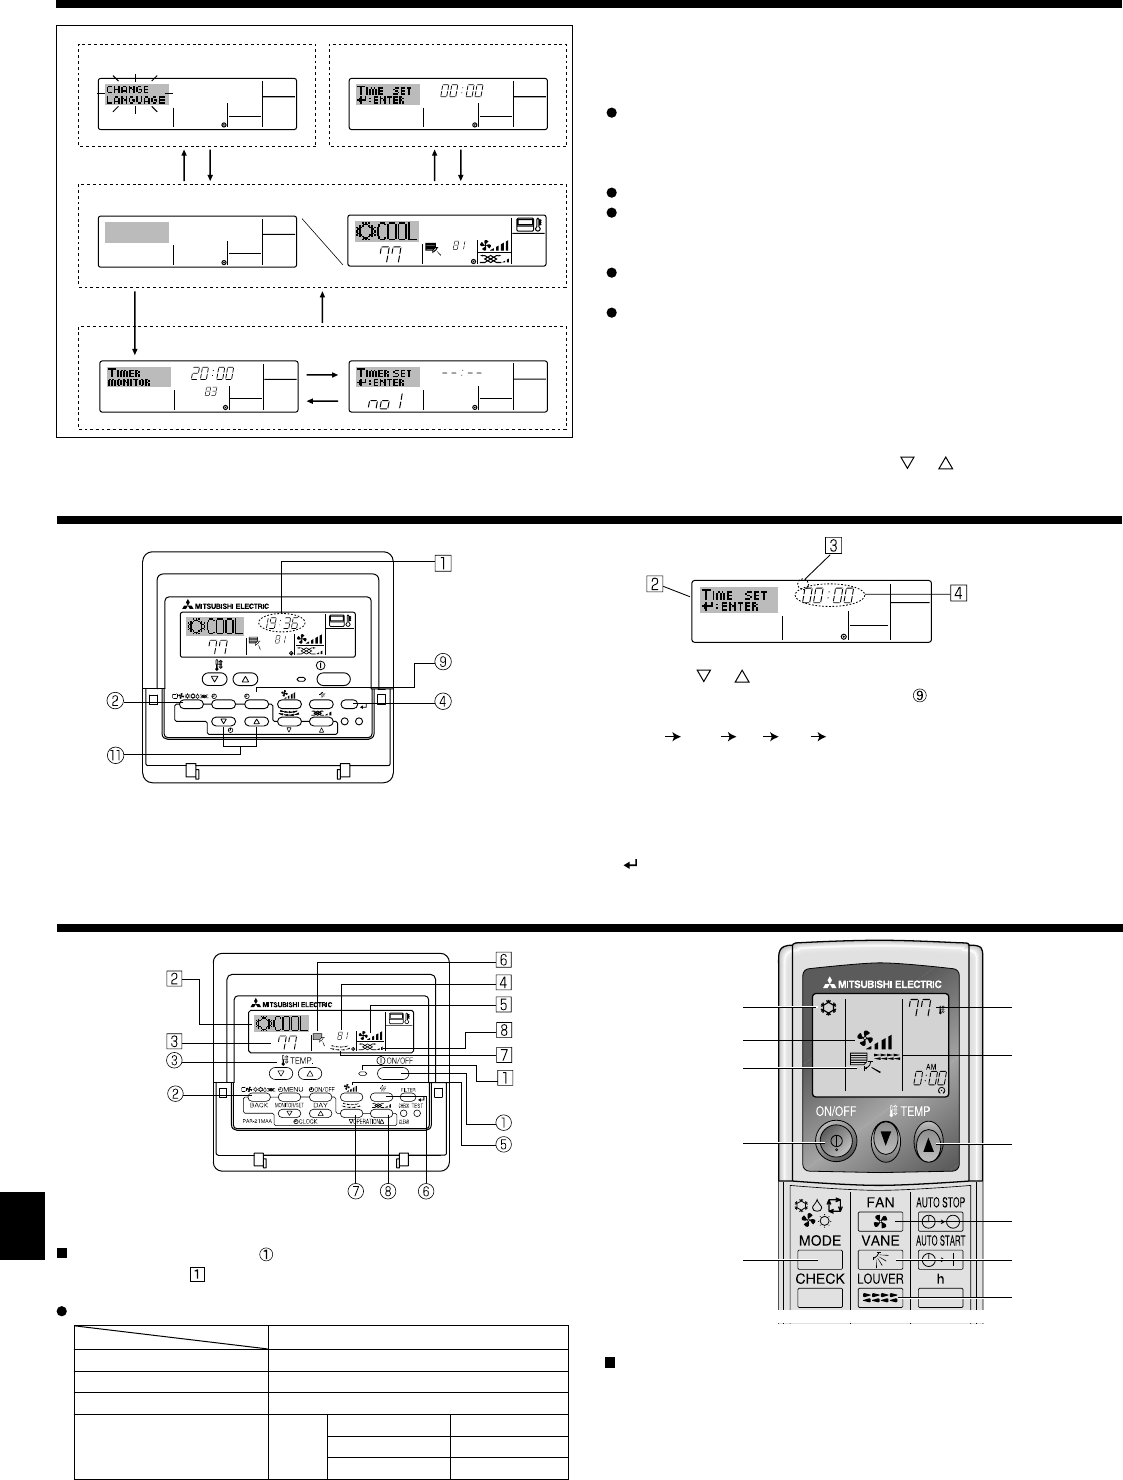
5.1. Turning ON/OFF
<To Start Operation>
Press the ON/OFF button .
• The ON lamp and the display area come on.
Note:
When the unit is restarted, initial settings are as follows.
Remote Controller settings
Mode Last operation mode
Temperature setting Last set temperature
Fan speed Last set fan speed
Airfl ow up/down
Mode
COOL or DRY
Horiz. outlet *1
HEAT
Last setting *2
FAN
Horiz. outlet *1
*1 Last setting might be applied depending on the type of the indoor unit.
*2 In case of the last setting is swing, airfl ow might be Downward 4 depending
on the type of the indoor unit.
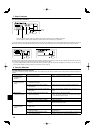
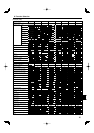
<Screen Types>
For details on setting the language for the remote controller display, refer
to section 8. Function Selection.
The initial language setting is English.
Function Selection of remote controller:
Set the functions and ranges available to the
remote controller (timer functions, operating
restrictions, etc.)
Set Day/Time: Set the current day of the week or time.
Standard Control Screens:
View and set the air conditioning system’s op-
erating status.
Timer Monitor: View the currently set timer (weekly timer, sim-
ple timer or Auto Off timer).
Timer Setup: Set the operation of any of the timers (weekly
timer, simple timer or Auto Off timer).
<How to change the screen>
A
: Hold down both the Mode button and the Timer On/Off button for 2
seconds.
B
: Press the Timer Menu button.
C
: Press the Mode (Return) button.
D
: Press either of the Set Time buttons ( or ).
3. Screen Confi guration
5. Operation
Note:
The day and time will not appear if clock use has been disabled at
Function Selection of remote controller.
1. Press the or Set Time button
1
to show display
2
.
2. Press the Timer On/Off (Set Day) button to set the day.
* Each press advances the day shown at
3
:
Sun
Mon ... Fri Sat.
3. Press the appropriate Set Time button
1
as necessary to set the time.
* As you hold the button down, the time (at
4
) will increment fi rst in
one-minute intervals, then in ten-minute intervals, and then in one-
hour intervals.
4. After making the appropriate settings at Steps 2 and 3, press the Filter
button
4
to lock in the values.
˚F
1
2
6
7
5
3
2
5
6
7
3
ADC
BC
B
<To Stop Operation>
Press the ON/OFF button
1
again.
• The ON lamp
1
and the display area go dark.
Note:
Even if you press the ON/OFF button immediately after shutting
down the operation is progress, the air conditioner will not start
for about three minutes. This is to prevent the internal components
from being damaged.