57
DISASSEMBLY INSTRUCTIONS
12
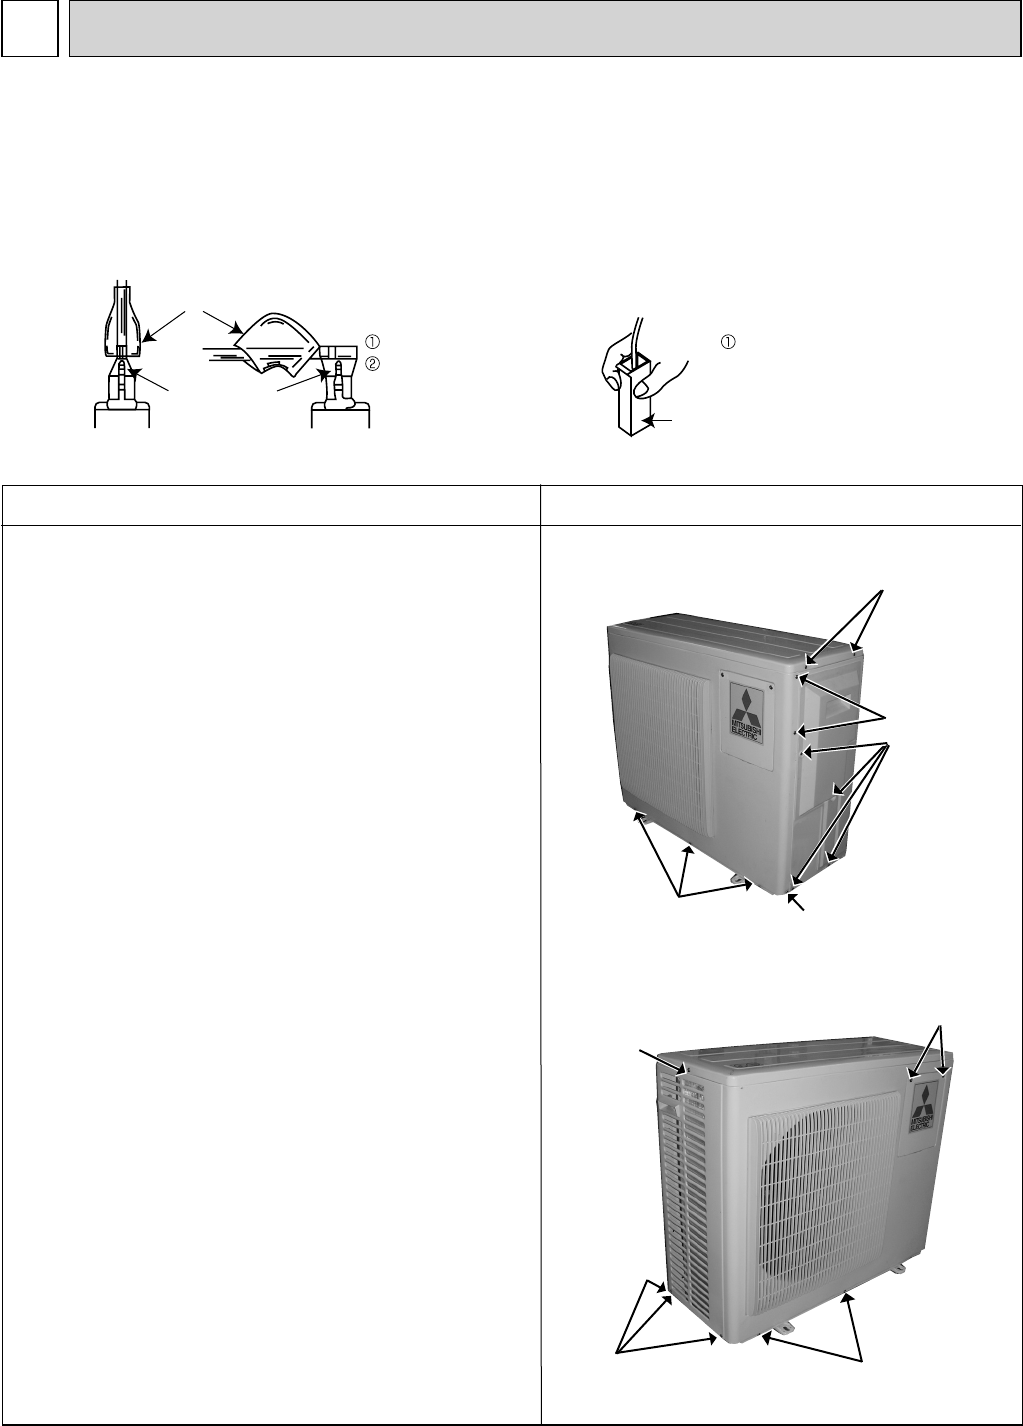
(1) Slide the sleeve and check if there is a locking lever or not.
(2) The terminal with this connector has the
locking mechanism.
Slide the sleeve.
Pull the terminal while
pushing the locking
lever.
Hold the sleeve, and
pull out the terminal
slowly.
The terminal which has the locking mechanism can be detached as shown below.
There are two types ( Refer to (1) and (2)) of the terminal with locking mechanism.
The terminal without locking mechanism can be detached by pulling it out.
Check the shape of the terminal before detaching.
<"Terminal with locking mechanism" Detaching points>
Connector
Sleeve
Locking lever
OPERATING PROCEDURE
PHOTOS
1. Removing the compressor
(1) Remove the screws of the top panel, and remove the top
panel.
(2) Remove the screws of the service panel, and remove the
service panel.
(3) Recover gas from the refrigerant circuit.
NOTE: Recover gas from the pipes until the pressure gauge
shows 0 PSIG.
(4) Remove the screws of the cabinet, and remove the cabinet.
(5) Remove the screws of the back panel, and remove the back
panel (Photo 3).
(6) Disconnect the compressor lead wire from terminal of the
compressor (U, V, W).
(7) Disconnect the outdoor electronic control P.C. board
connectors:
CN661, CN663, CN791, CN792, CN795, CN931, CN932
Disconnect the noise filter P.C. board connector:
CN912
(8) Remove the screws of the electrical parts, and remove the
electrical parts (Photo 4).
(9) Remove the propeller.
(10)
Remove the screws of the separator, and remove the
separator (Photo 6).
(11)
Remove the sound proof felt (Photo 6).
(12)
Detach the welded parts of the compressor suction and dis-
charge pipes (Photo 5).
(13)
Remove the compressor nuts and remove the compressor.
Photo 2
Photo 1
Screws of the cabinet
Screws of the
top panel
Screw of
the cabinet
Screws of
the cabinet
Screws of
service
panel
Screws of the
top panel
Screws of the
cabinet
Screws of
the cabinet
Screws of the
sub panel
12-1. MXZ-2B20NA


