


En-3
Wall
Outdoor
side
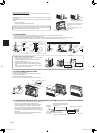
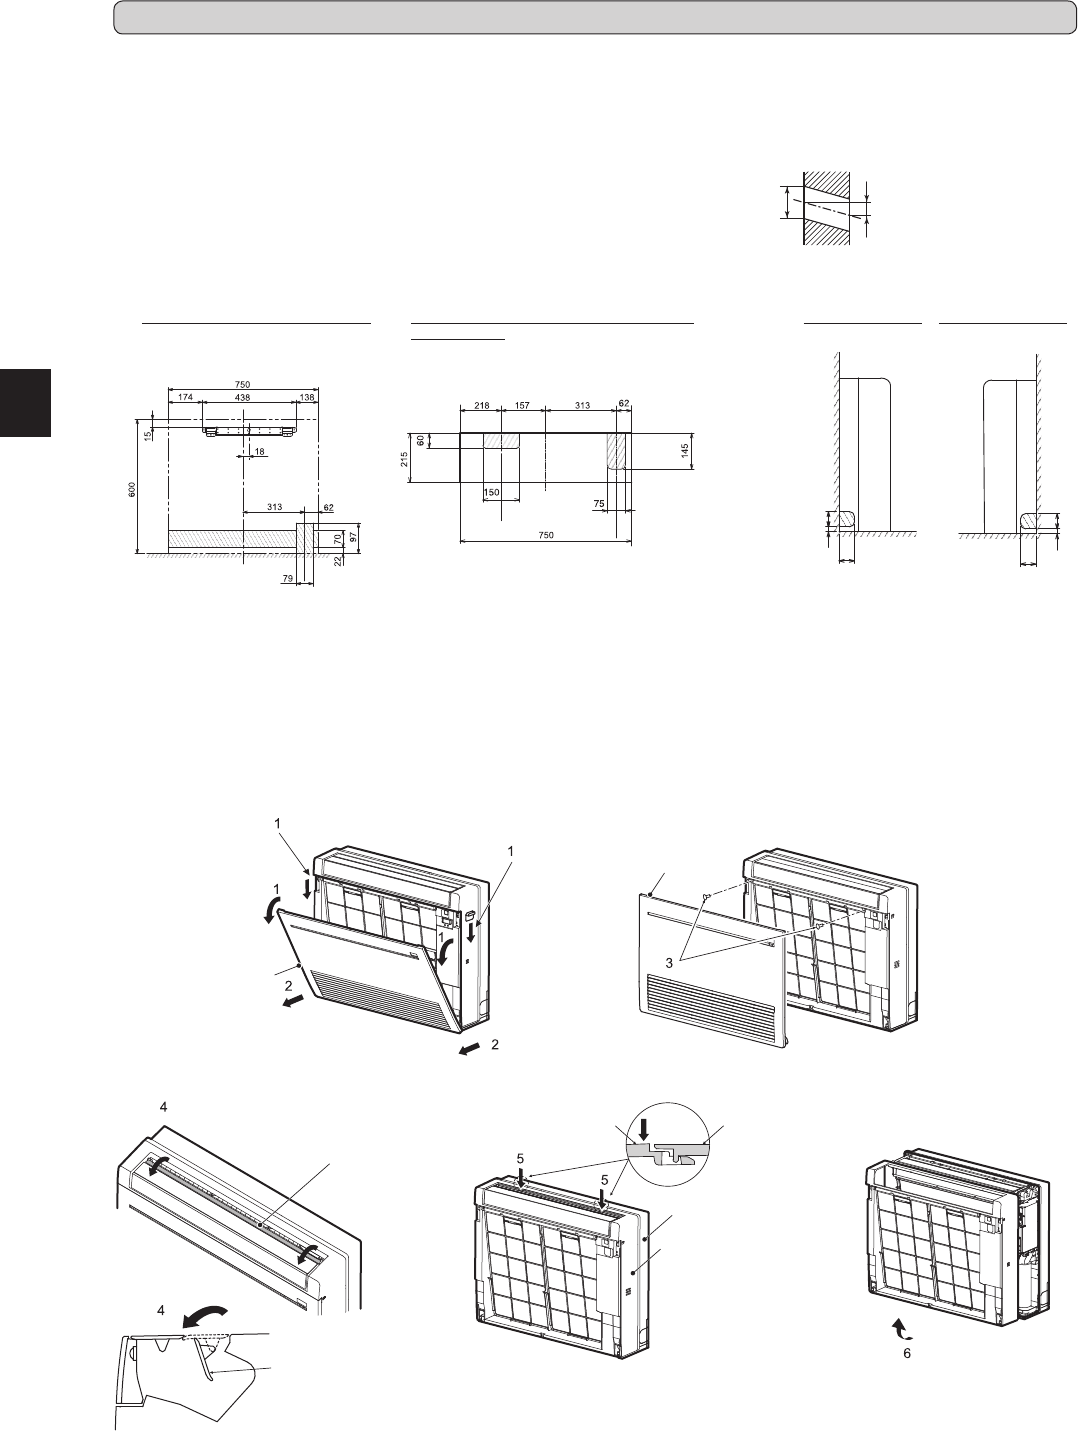
2-2. HOLE DRILLING
1)Determinethewallholeposition.
2)Drilladia.65mmhole(dia.75mmforKJ50/60).Theoutdoorside
shouldbe5to7mmlowerthantheindoorside.
3)Insertwallholesleeve(C).
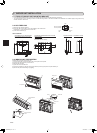
2-1. FIXING OF INDOOR UNIT MOUNTING BRACKET
• Findastructuralmaterial(suchasastud)inthewallandxbracket(7)horizontallywithxingscrews(8).
• Topreventbracket(7)fromvibrating,besuretoinstallthexingscrewsintheholesindicatedintheillustration.Foraddedsupport,xingscrewsmay
alsobeinstalledinotherholes.
2. INDOOR UNIT INSTALLATION
FORRIGHTDOWNWARDORLEFTDOWN-
WARDPIPING
(Thefollowinggureisaviewofthebottomof
theindoorunitfromabove.)
FORREARORLEFT-REARPIPING
(Thefollowinggureisafrontview
oftheindoorunitinstallationlocation.)
FORLEFTPIPING FORRIGHTPIPING
HOLE POSITIONS
ø65mm(KJ25/35)
ø75mm(KJ50/60)
5-7mm
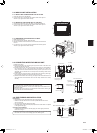
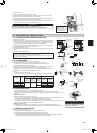
2-3. INDOOR UNIT PREPARATION
Removethefrontpaneloftheindoorunit.
1)Pushdownthetabonthebothsidesoftheunittoopenthefrontpanel.
2)Pullthefrontpaneltowardyoutoremoveit.
3)Removethe2screws.
4)Opentherearhorizontalvane.
5)Pushthe2locationsonthetopofthepanel,andthenpulltheupperpartofthepaneltowardyou.
6)Removethepanelwhileliftingitup(slightly).
Rearhorizontal
vane
Panel
Panel
Push
Indoorunit
60
60
6030
6030
Frontpanel
Frontpanel
Indoorunit
Indoor
side
Rearhorizontal
vane
JG79A867H02_en.indd 3 2014/06/25 13:38:55