SERVICING
mini HE --- Installation & Servicing 41
58 FAN REPLACEMENT
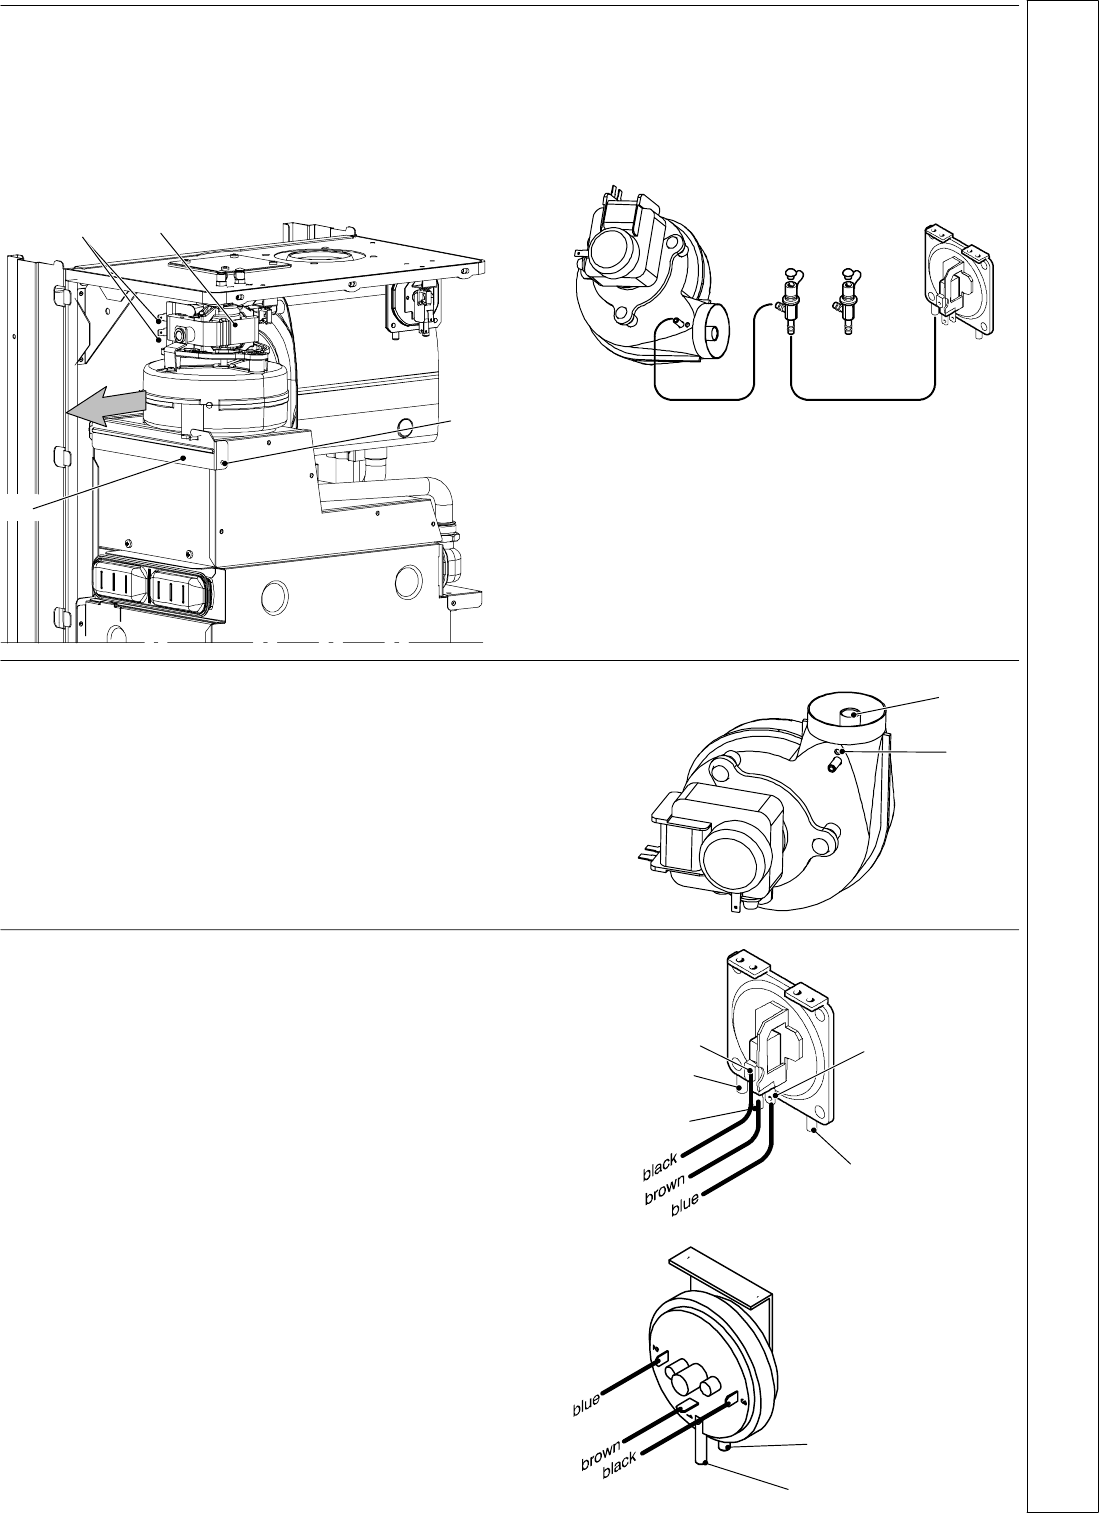
1 Disconnect the electrical supply .
2 Remove outer and inner casing.
3 Disconnect the connectors A and the earth co nnection B.
4 Disconnect the pipe which connects the venturi device to
the air pressure switch.
5 Unscrew the screw C and remove t he fan holder bracket
D.
A
B
C
D
6 Remove the fan by sliding it towards left (see the arrow).
7 Re---assemble in reverse order.
Note: Always take care when handling the fan, in order to
preserve the balance of the impeller.
To correctly connect the venturi device to the air pressure
switch, refer to the following illustration.
--- +
59 VENTURI REPLACEMENT
1 Removethefan(seeframe58).
2 Remove and replace the venturi device A by unscrewing
the screw B.
3 Re---assemble in reverse order.
A
B
60 AIR PRESSURE SWITCH
REPLACEMENT
Two different types of air pressure switch may be used in the
boiler. Refer tho the following drawings in acco rdance with the
type of air pressure switch used.
1 Disconnect the electrical supply .
2 Remove outer and inner casing as explained in frame 42.
3 Disconnect the pressure sensing pipe from the air
pressure switch.
4 Disconnect the electrical harness from the air pressure
switch.
5 Undo the two screws which hold the air pressure switch to
the chass is and remove it.
6 R eplace the switch.
7 Re---assemble in reverse order.
To correctly connect the venturi device to the air pressure
swit ch, refer to the illustration of frame 58 and to the
following illustrations in accordance with the type of
pressure switch used.
N.O.
N.C.
”L” connection
COM
”H” connection
(not used)
”L” connection
”H” connection
(not used)
SERVICING


