


13
Door Trim Installation Instructions
(ref. form # 775274M)
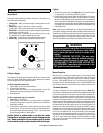
Parts List (A):
Qty
(2) Trim Pieces (Gold, Nickel, Brushed Nickel or
Black Nickel )
(6) #10 nuts
(6) #10 washers
Tools Needed:
Qty
(1) 3/8” nut driver or socket wrench
CAUTION: Always ensure that plated surfaces are clean and
free of fingerprints before lighting stove. Fingerprints will leave
permanent blemishes if left on plated surface when lit. When
installation is complete, the trim should be gently cleaned
with soft cloth and either alcohol or glass cleaner. Do not
overtighten nuts, overtightening can create visible dimples on
the plated surface.
To install Door Trim:
1. Remove the trim pieces and hardware from its packaging and ensure
that all pieces are present before beginning installation. Take care not
to scratch finished surfaces.
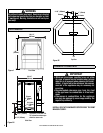
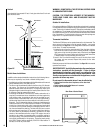
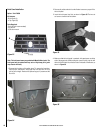
2. Open right and left side door. The side doors swivel open towards the
back of the stove. See Figure 24.
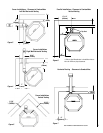
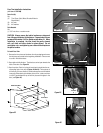
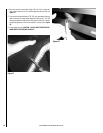
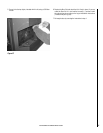
3. Open front door. Put trim in place by inserting trim studs into the cor-
responding holes in the door (Figures 22 and 25). The top piece of
trim will only fit in one direction, but the bottom piece can be installed
incorrectly. When placing the bottom piece of trim, make sure there
is a 9/16” gap between the top of the trim piece and the glass in the
door (see Figure 26).
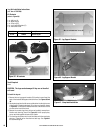
Trim stud
Door Handle
Holes for trim studs
Trim Screws
#10 washers
Trim Pieces
Top of Trim
(A)
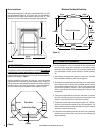
Pellet Stove Door
Trim Pieces
Figure 23
Figure 24
Figure 25
Figure 26
Figure 22
Pellet Stove Door
Trim Pieces