Page 4
505069M 07/05
COOL − Using the Cool Mode
Enabling and Disabling Cool Mode
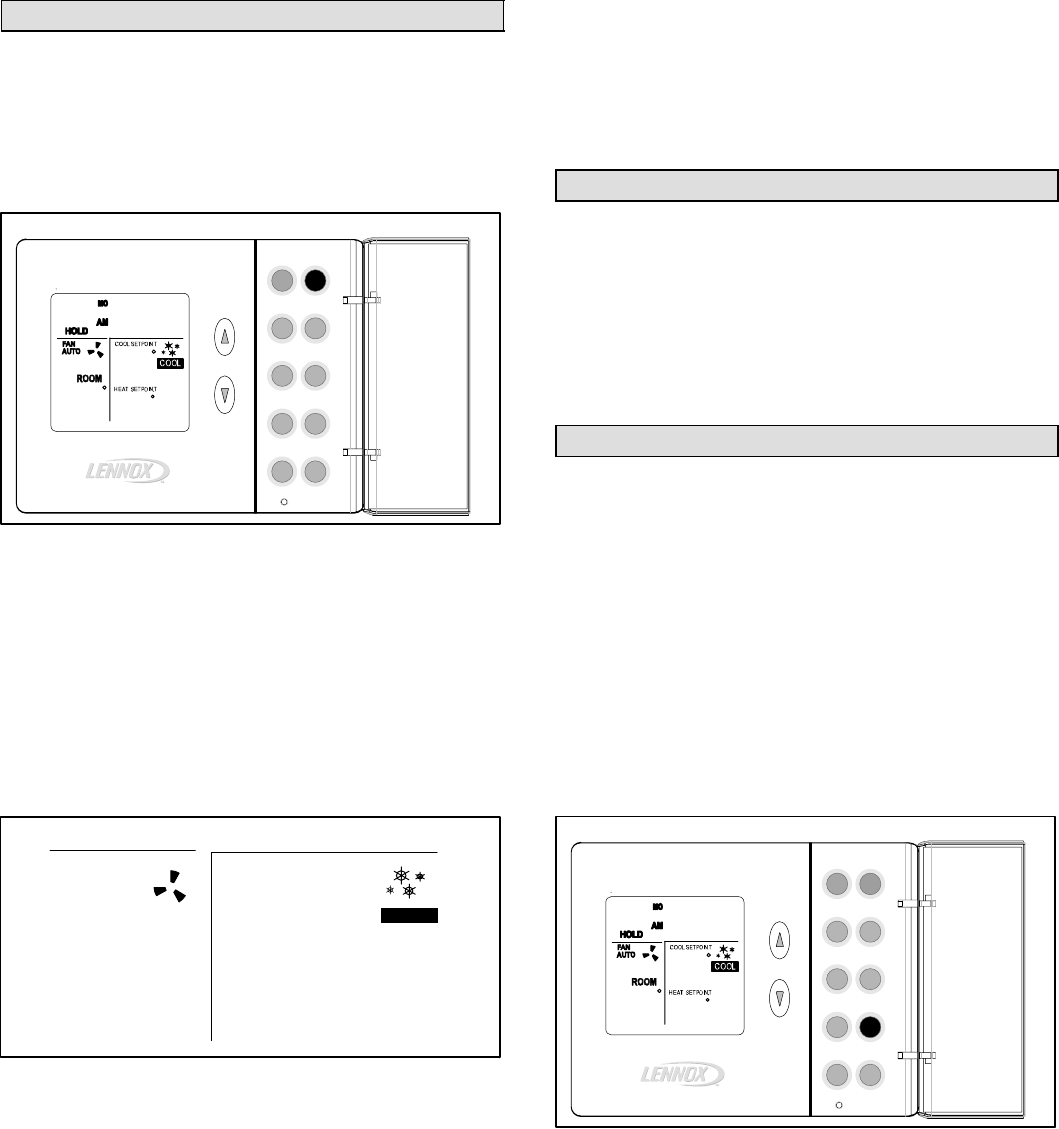
Use the COOL button to enable or disable cool mode as
desired. If the thermostat is in heat or off mode, cool mode
is enabled when the COOL button is pressed. This is indi-
cated by COOL on the right side of the display (see figure
9).
Heat
Prog
Fan
Settings
Cool
Day/Time
Hold
Enter
Turn Cool ON/OFF
Figure 9
(DOOR
OPEN)
Auto
Copy
(Outside)
66
i0:30
75
70
If the thermostat is in cool mode, pressing the COOL but-
ton disables cool mode (indicated by OFF on the right side
of the display).
Cooling Demand
Set the thermostat to cool mode to control the cooling
equipment. Then, if the room temperature is higher than
the temperature setpoint, as shown in figure 10, the ther-
mostat detects a cooling demand and will activate the cool-
ing equipment to satisfy the demand.
80
Cooling Demand
Figure 10
ROOM
°
Hi
Lo
FAN
AUTO
COOL
76
°
68
HEAT SETPOINT
°
COOL SETPOINT
Cooling operation is indicated by flashing snowflake"
icons. When the actual temperature drops below the tem-
perature setpoint, the snowflake icons will disappear. This
indicates that the cooling demand has been satisfied and
that the cooling equipment has been turned off.
If your system supports 2−stage cooling (as does the
51M42 thermostat), you may notice various cooling levels
being delivered during a demand. Also, if a small cooling
demand is present, "Lo" will be displayed in the SYSTEM
box. However, if a large cooling demand is present, "Hi" will
be displayed in the lower right side of the display (shown in
figure 10).
NOTE − If no buttons are pressed during a demand for
cooling, the equipment must operate for at least 4 minutes.
After a demand has been satisfied, cooling equipment op-
eration is locked out for 5 minutes. If another cooling de-
mand occurs during this 5−minute interval, COOL" and the
snowflakes will flash; however, the cooling equipment will
not operate until the 5−minute delay has elapsed.
AUTO − Using the Autochangeover Mode
When in either heat mode or cool mode, autochangeover
can be enabled or disabled by pressing the AUTO button. If
enabled, AUTO appears at the lower right corner of the dis-
play. The thermostat will then automatically change over
from heating to cooling and vice versa, to keep the room
temperature in between the heating and cooling setpoints.
Autochangeover can be used in either of the thermostat
hold modes, or when the thermostat program is running.
These modes are described later.
HOLD − Using Temperature Hold Modes
When the HOLD button is displayed at the HOME screen,
the thermostat is in a temperature hold condition. This
means that the temperature program data is ignored and
the thermostat functions much like a non−programmable
thermostat.
Adjusting Temperature Setpoint in Hold Mode
The temperature setpoint represents the desired tempera-
ture of the space around the thermostat. The default heat
setpoint in hold mode is 70°F; the default cool setpoint in
hold mode is 78°F.
To adjust the setpoint, press the UP or DOWN (YB) arrow
buttons (see figure 11); the existing setpoint is displayed to
the right of the actual room temperature. Each button
press adjusts the setpoint up or down by 1 degree.
Heat
Prog
Fan
Settings
Cool
Day/Time
Hold
Enter
Hold Temperature Mode
Figure 11
(DOOR
OPEN)
Auto
Copy
(Outside)
70
i0:30
80
78
After the desired setpoint is reached, the HOME screen
will reappear after about 15 seconds.
Permanent Hold Mode
At any time the program is running, from the HOME
screen, set a permanent hold (program override) by press-
ing the HOLD button (see figure 11). The thermostat now
functions much like a non−programmable thermostat. Use
the Up/Down arrow buttons to adjust the hold setpoint. To
return to the program, press the HOLD button again.
