


Page 4
505048M 5/1/05
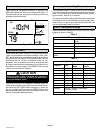
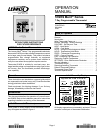
HOLD − Using Temperature Hold Modes
When HOLD is displayed at the HOME screen, the ther-
mostat is in a temperature hold condition. This means that
the temperature program data is ignored and the thermo-
stat functions much like a non−programmable thermostat.
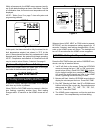
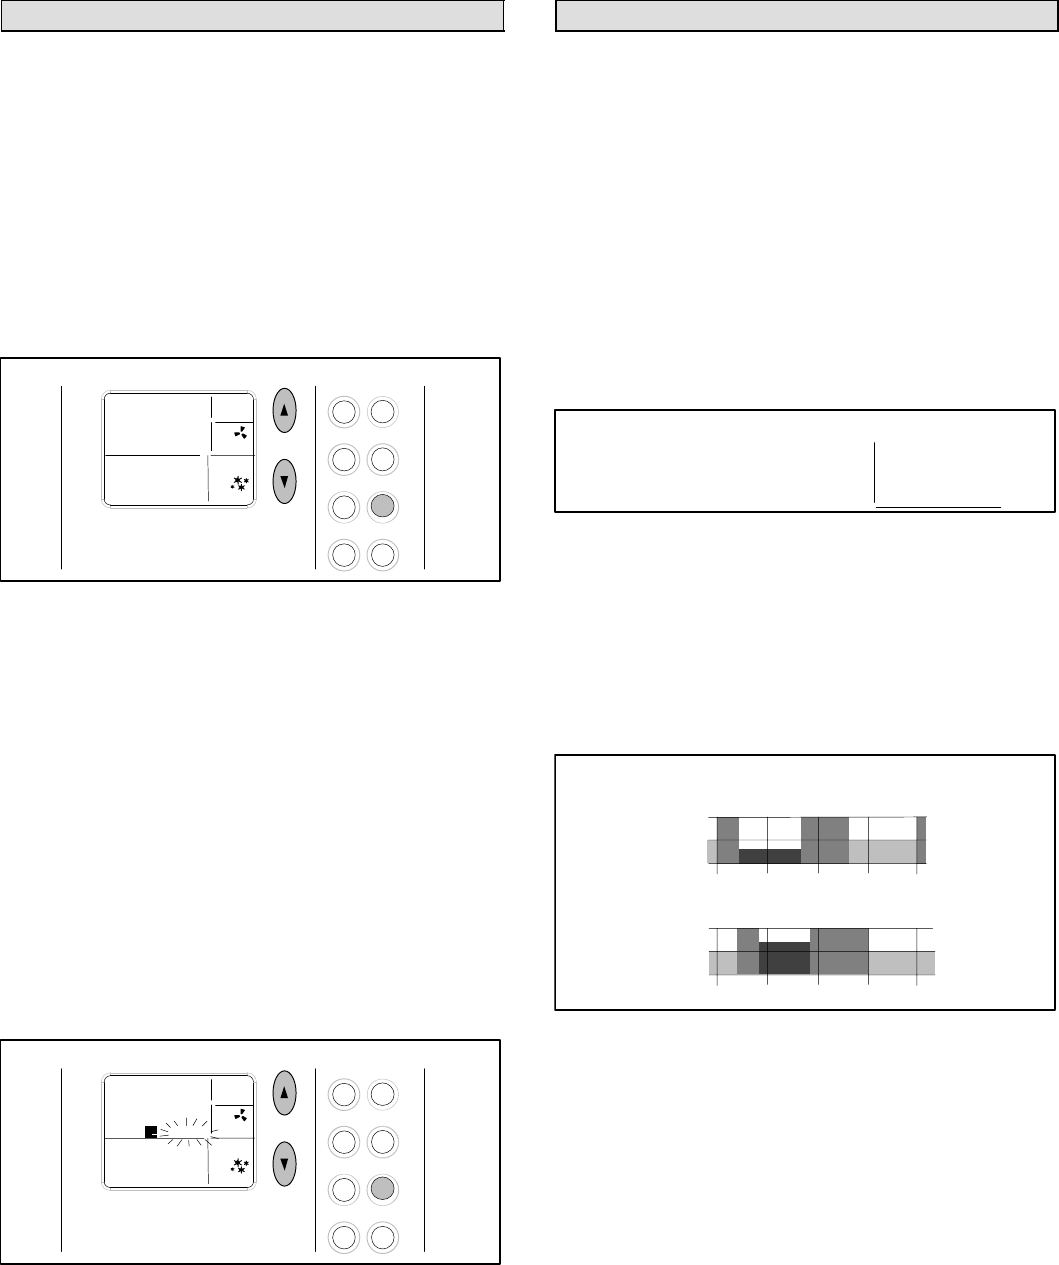
Adjusting Temperature Setpoint in Hold Mode
The temperature setpoint represents the desired tempera-
ture of the space around the thermostat. The default tem-
perature setpoint in Hold mode is 70°F.
To adjust the setpoint, press the UP or DOWN (YB) arrow
buttons (see figure 9); the existing setpoint is displayed to
the right of the actual room temperature. Each button
press adjusts the setpoint up or down by 1 degree.
Heat
Prog
Fan
Settings
Cool
Hold
Enter
Day/Time
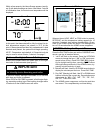
Hold Temperature Mode
Figure 9
I0:36
72
68
HOLD
AM
PM
SETPOINT
ROOM
MO
°
°
FAN
AUTO
SYSTEM
COOL
After the desired setpoint is reached, the HOME screen
will reappear after about 15 seconds.
Permanent Hold Mode
At any time the program is running, from the HOME
screen, set a permanent hold (program override) by press-
ing the HOLD button (see figure 9). The thermostat now
functions much like a non−programmable thermostat. Use
the Up/Down arrow buttons to adjust the hold setpoint. To
return to the program, press HOLD again.
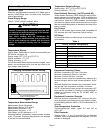
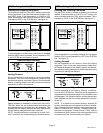
Temporary (2-Hour) Hold
At any time the program is running, from the HOME
screen, set a temporary 2-hour hold by pressing the Up/
Down arrow buttons until the desired setpoint is displayed;
HOLD" flashes (see figure 10). This overrides the pro-
gram for 2 hours from the last button press, then returns to
the program.
Heat
Prog
Fan
Settings
Cool
Hold
Enter
Day/Time
Temporary Hold Temperature Mode
Figure 10
I0:36
72
68
AM
PM
SETPOINT
ROOM
MO
°
°
FAN
AUTO
SYSTEM
COOL
PROG B HOLD
While in Temporary Hold, press HOLD once to switch to
Permanent Hold (HOLD displays solid; PROG not dis-
played); press HOLD again to return to the program
(PROG displays; HOLD not displayed).
PROG − Thermostat Programming
The 51M34 thermostat can be programmed to perform a
set of either heating or cooling events (but not a
combination of heat and cool) for 5 consecutive days using
a set of 4 unique events per day. The remaining 2 days can
then be set for a different set of 4 unique events per day.
Both the consecutive days and the events/temperature are
set by the homeowner.
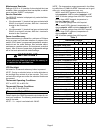
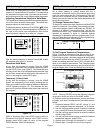
To Change Consecutive Days...
To alter the 5 consecutive days, press and hold the PROG
button for 5 seconds. The existing 5 consecutive day peri-
od is then displayed (default is MOnday thru FRiday). To
change to a different 5-consecutive days, use the Up/
Down arrow buttons. Any 5 consecutive−day span may be
selected, for example, in figure 11, Saturday through
Wednesday is defined as the 5−day programming (Thurs-
day and Friday would constitute the 2−day programming).
Press the PROG button when finished.
Change Consecutive days
Figure 11
FILTER
MO TU WE TH FR SA SU
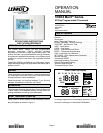
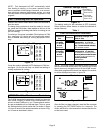
To Set Program Events and Temperatures...
Figure 12 gives an example of how the two sets of pro-
grams can be set for a normal workweek and weekend.
In the 5−day bar graph, note how programs A and C reflect
the desired warmth while the home IS occupied (72°); B
allows less heating while the home is NOT occupied; D re-
flects a cool sleeping temperature. The 2−day bar graph
would support day−long occupancy and, because the first
program begins later, a less−demanding time schedule.
Figure 12
5/2 Program Example
5−DAY PROGRAM:
72°
68°
64°
|A | B | C | D |
2−DAY PROGRAM:
72°
68°
64°
|A| B | C | D |
6AM NOON 6PM MID 6AM
NIGHT
6AM NOON 6PM MID 6AM
NIGHT
NOTE − Pressing ENTER during the following program-
ming steps, saves and exits to the HOME screen.
To program events and temperatures, perform the follow-
ing steps, once with Cool selected and once with Heat se-
lected.
1. Press and release PROG. AM 6:00", period A", and
the 5 consecutive days are displayed; AM 6" flashes.
2. Use the Up/Down arrow buttons to select the desired
hour; press PROG when the desired hour is reached.
3. Use the Up/Down arrow buttons to select the desired
minute; press PROG.
4. Use the Up/Down arrow buttons to select the desired
temperature setpoint; press PROG.
5. Repeat steps 2 through 4 for periods B, C, and D.
6. Repeat steps 1 through 5 for the 2−day program.