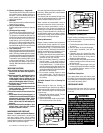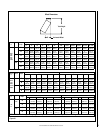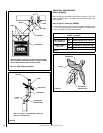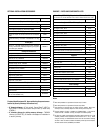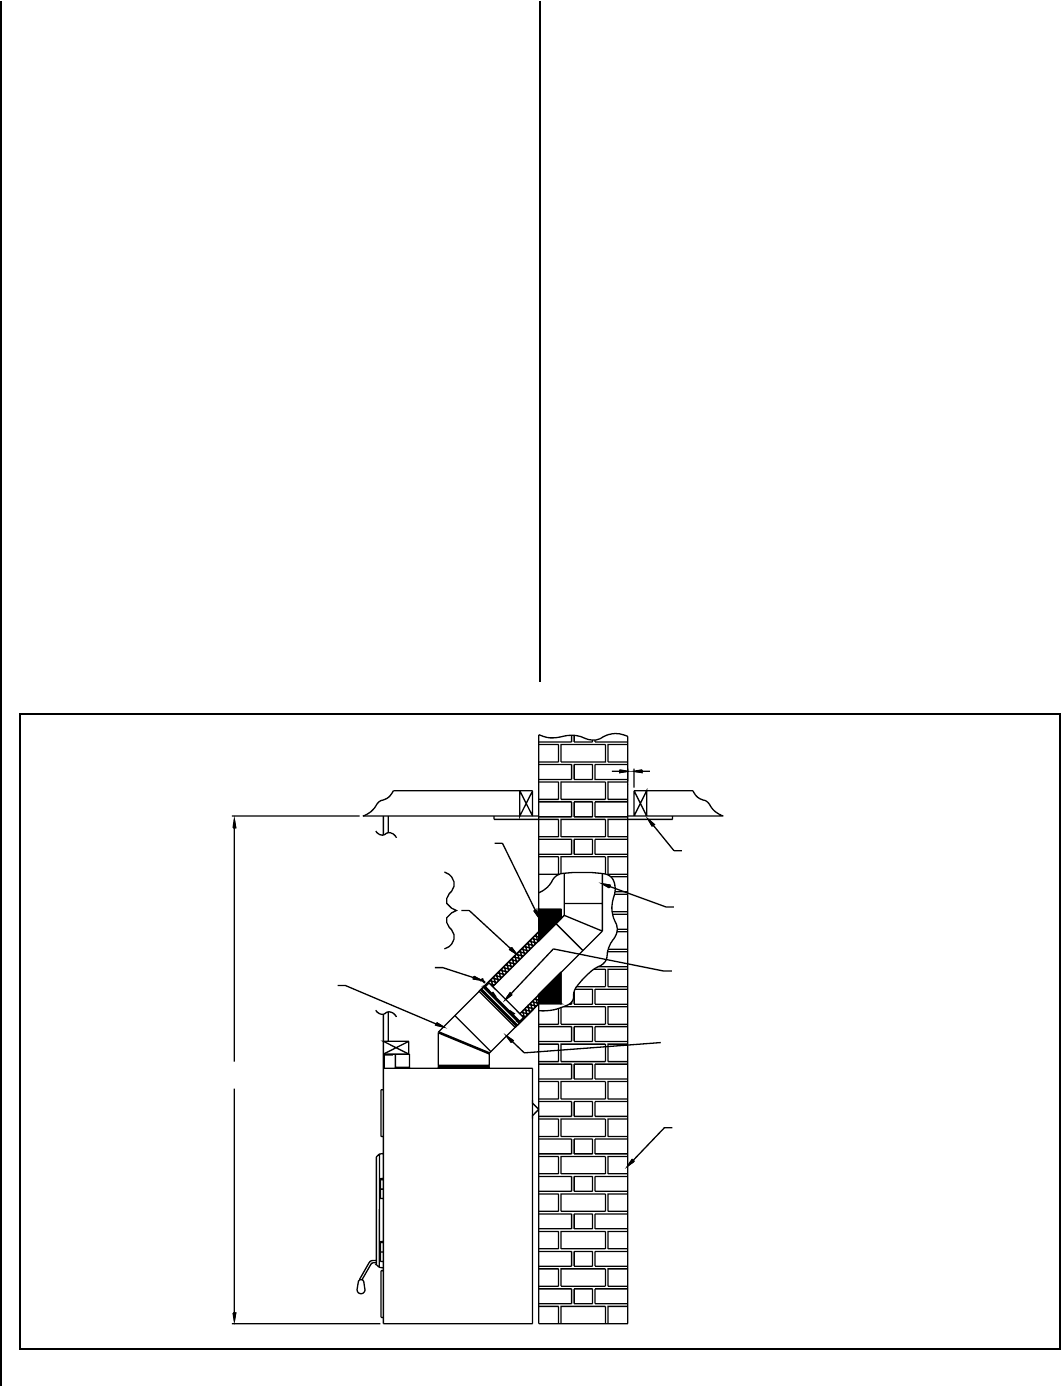
Follow these steps:
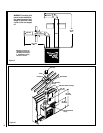
1- Position the fireplace in its location. Temporarily install the ASHT
elbow on the top of the fireplace and, using a level, mark with an oval
the location where the flue liner will enter the masonry chimney.
2- In the middle of the oval, drill a hole in the masonry chimney at
30º.
3- Increase the size of the hole until a or 30º TUBINOX liner elbow can
be easily slipped through.
4- Slide the liner down from the top of the masonry chimney until you
reach the hole level.
5- Slip through the hole a 30º liner elbow and connect it to the liner.
6- Add a small liner section to the liner elbow which will allow the liner to
extend at least 12” (measured at the top of the liner) from the masonry
chimney.
7- Seal the opening around the liner with high temperature refractory
cement.
8- The next steps must be done in the following order:
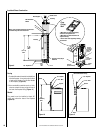
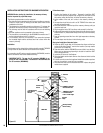
See typical installation illustrated below.
A. Select the ASHT length that will fit between the elbow and the liner
so that it will slide at least 2” over the liner section (You may need to
cut the liner for a better fit).
B. Take that section and the BISUMA30 cover and slide it over the liner.
Make sure you have enough opening to be able to install the ASHT
elbow without difficulty.
C. Install the 30º elbow on the fireplace.
D. Slide the length section back down on the elbow and twist lock the
two together.
E. Pull the cover down over the length and install the insulation pad over
the liner; be careful to cover the liner completely.
F. Slide back the cover over the insulation and fix it in place using the 3
metal screws supplied.
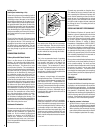
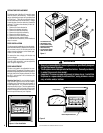
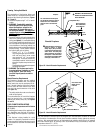
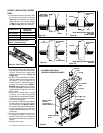
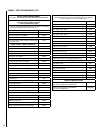
Figure 29
FIREPLACE
1” Clearance
* Insulated 30 Deg.
Elbow ASHT or
HT6103+
3 Screws
Insulation Pad
& Cover
High-Temp.
Cement
Firestop
TUBINOX or Projet SS
Stainless Steel Liner
Insulated
Length
Masonry Chimney,
New or Existing
TUBINOX or Projet SS
Liner Must Slide at
Least 2” Inside Length
6’ 8”
NOTE: DIAGRAMS & ILLUSTRATIONS ARE NOT TO SCALE.
20
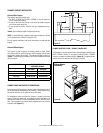
INSTALLATION INSTRUCTIONS FOR MASONRY APPLICATION
WARNING: Before starting the installation, the masonry chimney
must be inspected by a qualified sweep.
The following requirements must be respected:
1. The chimney must be absolutely clear of any soot residue or creosote.
Check for cracks, loose or missing bricks that could inhibit correct
installation of the liner.
2. The clearance to combustible must be a minimum of 1” between the
outside of the masonry and any wood framing or loose insulation.
3. The chimney must be built in accordance with the current building
code.
4. No other appliance can be connected to the same chimney.
5. The clearances to combustible for the BISUMA30 connectors are 2”
on the side and bottom and 16” at the top.
6. The connector parts are not necessary if the connection between
the insulated length and the stainless steel liner is done within the
masonry chimney.
Installation:
The chimney must be relined with a stainless steel liner model TUBINOX
or Projet SS of the same diameter as the outlet of the fireplace.
For connection at a 30º angle, a special connector (BISUMA30) must be
used to connect the liner to the insulated chimney.
* IMPORTANT NOTE - The use of a 45º connector (BISUMA) is ap-
proved for use in Canada ONLY. Installations in the USA must use
the 30º connector (BISUMA30).