


9
ENGLISH
Note: The time of day must first be set in order to operate the oven.
To Set the Clock
When the range is first plugged in, or when the power supply to
the range has been interrupted, the display will flash "12:00".
1. Press
once (do not hold pad down).
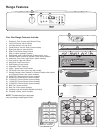
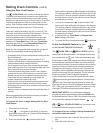
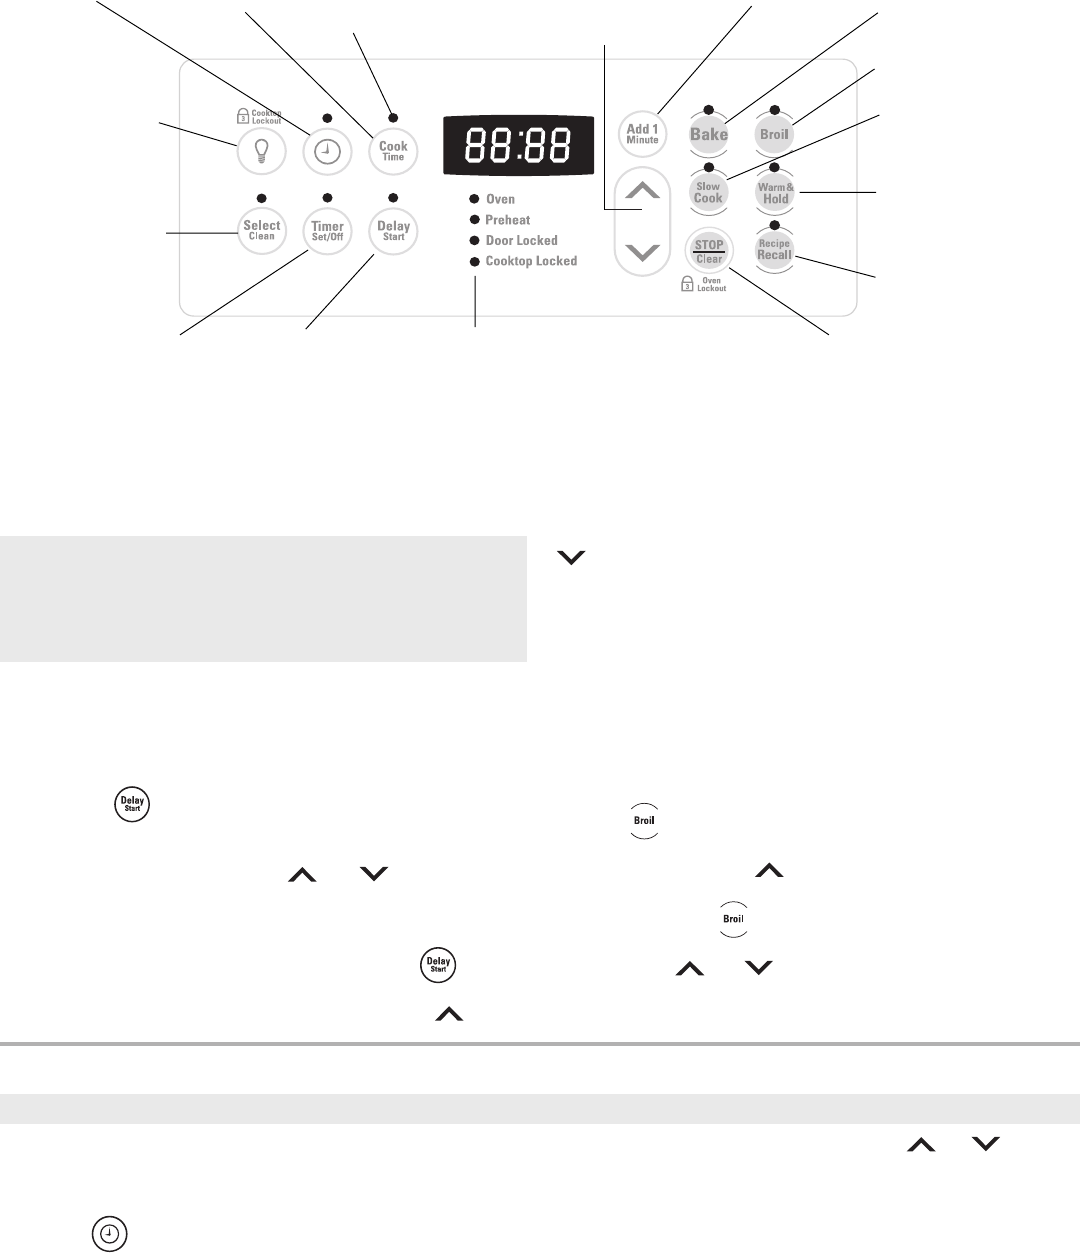
Oven Control Functions
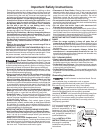
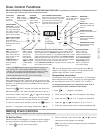
READ THE INSTRUCTIONS CAREFULLY BEFORE USING THE OVEN. For satisfactory use of your oven, become familiar with
the various pad functions of the oven as described below.
BROIL PAD— Used to
select the variable broil
function.
UP and DOWN ARROW PADS—
Used along with the function pads to
select oven temperature, cook time,
start time (when programming an
automatic start time), time of day,
clean time and minute timer.
BAKE PAD—
Used to select
the bake
function.
DELAY START
PAD— Used to
set the desired
start time for
baking & Self-
Clean. May be
used with COOK
TIME to program
a delayed bake
cycle.
COOK TIME
PAD— Used to
enter the length of
the baking time.
SELECT SELF-CLEAN
PAD— Used to select
the Self-Cleaning
cycle. A 2, 3 or 4 hour
Self-Clean time may be
selected.
OVEN, PREHEAT & DOOR LOCKED LIGHTS* — The "OVEN"
light will glow each time the oven turns on to maintain the set
oven temperature. The "PREHEAT" light will glow when the
oven is first set to operate, or if the desired temperature is reset
higher than the actual oven temperature. The "DOOR LOCKED"
light will flash when the oven door locks and unlocks or when
using the Self-Clean cycle or the oven door lockout is activated.
The indicator light will glow constantly after the door
locks.COOKTOP LOCKED light will glow when the cooktop has
been locked (some models).
FEATURE
INDICATOR
LIGHTS— These
light to show
which feature is
in use.
CLOCK SET
PAD— Used
to set the
time of day.
STOP/CLEAR PAD—
Used to clear any
function previously
entered except the time
of day and minute timer.
Press STOP/CLEAR to
stop cooking. Also the
STOP/CLEAR pad is
used to activate oven
door lockout setting.
TIMER SET/OFF
PAD— Used to set or
cancel the minute
timer. The minute timer
does not start or stop
cooking. Also,
TIMER SET/OFF pad
is used to set the
Continuous Bake
feature.
*Note: The OVEN indicator light on the electronic display will
turn ON and OFF when using the Bake feature and during
preheat. This is normal and indicates that the oven is cycling
to maintain the selected baking temperature. When the
preheat indicator light turns OFF, your oven is ready.
WARM & HOLD PAD—
Used to set the Warm &
Hold feature.
RECIPE RECALL PAD—
Used to set the Recipe
Recall feature.
SLOW COOK PAD—
Used to set the Slow Cook
feature.
ADD 1 MINUTE —
Use to select Add 1
Minute feature.
OVEN INTERIOR
LIGHT PAD— Used to
turn oven interior light
ON or OFF. This pad is
also used to activate
the Cooktop Lockout
feature (some models).
Temperature conversion
The electronic oven control is set to operate in °F (Fahrenheit)
when shipped from the factory. The oven can be programmed
for any temperature from 170°F to 550°F (77°C to 287°C).
To change the temperature to °C (Celsius) or from °C to °F
(control should not be in a Bake or Clean mode):
1. Press . "— —" appears in the display.
2. Press and hold the until "HI" appears in the display.
3. Press and hold
until °F or °C appears in the display.
4. Press the or to change °F to °C or °C to °F.
5. Press any control pad to return to normal operating mode.
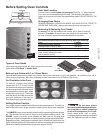
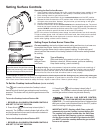
Setting Oven Controls
2. Within 5 seconds, press and hold the or until the
correct time of day appears in the display.
Note: The clock cannot be changed during any timed bake
or Self-Clean cycle.
For a silent control panel
When choosing a function, a beep will sound each time a pad
is pressed. If desired, the control can be programmed for silent
operation. To switch back and forth between normal sound or
silent operation:
Press & hold
. After 7 seconds, the control will beep once.
:SP should appear in the display indicating that the control is in
normal sound mode. Press either
or once to change
to silent mode (:- - will appear in the display). The silent mode
will block the controls from sounding when a pad is pressed.
To return to normal sound operation, press & hold
. After 7
seconds :- - will appear in the display. Press either
or
once to change back to normal sound mode (:SP will
appear in the display). The control will now provide normal
audible beeps whenever a pad is pressed.