15
Questions? Call the Kenmore Water Line 1-800-426-9345 or visit www.kenmorewater.com
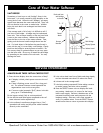
Adding Salt to the Storage Tank
ADDING SALT TO THE STORAGE TANK
You must keep salt in the tank, but it is not necessary to
fill it full. Especially in humid areas, it is best to fill the
storage tank no more than half full, and to add salt
more often. Salt “bridging” occurs more often when
conditions are humid.
Use NUGGET or PELLET water softener salt. DO NOT
use rock salts, as they have dirt and sediments that will
stop the softener from working. To maintain optimum
performance of your water softener, the salt tank
should be cleaned out every 2 to 3 years.
POTASSIUM CHLORIDE (KCl) SALT
If you choose Potassium Chloride (KCl) as a regenerant,
following these suggestions will help give you years of
maintenance free service.
1. Place only one bag of KCl in your softener at a time
(the salt storage tank should contain no more than
60 pounds of KCl at any one time).
2. A softener using KCl should not be placed in areas
with temperature fluctuations and high humidity (KCl
will harden in these environments and may make the
softener inoperable).
3. Check the brine tank and brinewell (black tube in
salt storage tank) monthly. If hardening is present,
pour small amounts of warm water onto hardened
areas until they loosen.
4. Be sure to set “Salt Type” on the controller to “KCl”.
This setting adjusts the regeneration cycle times to
compensate for the different rate at which KCl dis-
solves. See “Set Salt Type” on the previous page.
Persons who are on sodium restricted diets should con-
sider the added sodium as part of their overall sodium
intake. For example, if your water supply is 15 grains
hard, and you drank 3 quarts of softened water you
would consume 335 milligrams of sodium. That is
equivalent to eating 2-1/2 slices of white bread.
Persons who are concerned about their drinking water
should consider a Kenmore reverse osmosis drinking
water system that will remove in excess of 90% of the
sodium and other drinking water contaminants.
WATER SOFTENING SALT WITH IRON
REMOVING ADDITIVES
Some salts have an additive to help the softener handle
iron in the water supply. These salts may be used if
your water supply has a high iron con tent. It is recom-
mended to use Sears Water Softener Clean er (refer to
the parts list in back of manual for part number) for
periodic treatments to keep your resin bed clean. This
is available at your local Sears store.
Flushing the System
After all installation steps have been completed:
1. Make sure the bypass valve(s) is in the “service”
(open) position.
2. Start a recharge: Press the REGENERATION button
and hold for 3 seconds
, until “RECHARGE”, “Serv”
and “Fill” begin to flash in the display. The recharge
will take about 2 hours to complete.
3. After the recharge has completed, fully open a cold
water faucet, downstream from the softener, and
allow 50 gallons of water to pass through the system.
This should take at least 20 minutes.
4. Close the faucet.
Your new Sears softener is now softening the water for
your household needs. However, your WATER HEATER
is filled with hard water. To have fully soft water right
away, you can drain the water heater so it refills with
soft water. If you don’t drain the water heater, it will
take a few days before you have fully soft water.
NOTE: If this procedure is performed on a new softener,
water coming from the taps may initially be dis-
colored. This normally occurs the first time
water runs through the resin bed. The discol-
ored water is not harmful, and the discoloration
will not last more than a few minutes.


