


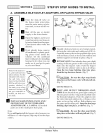
li!i! ::i:i ! ::i:i ! :i SECTION 3 STEP BY STEP GUIDES TO INSTALL
Ci
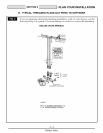
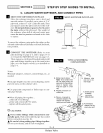
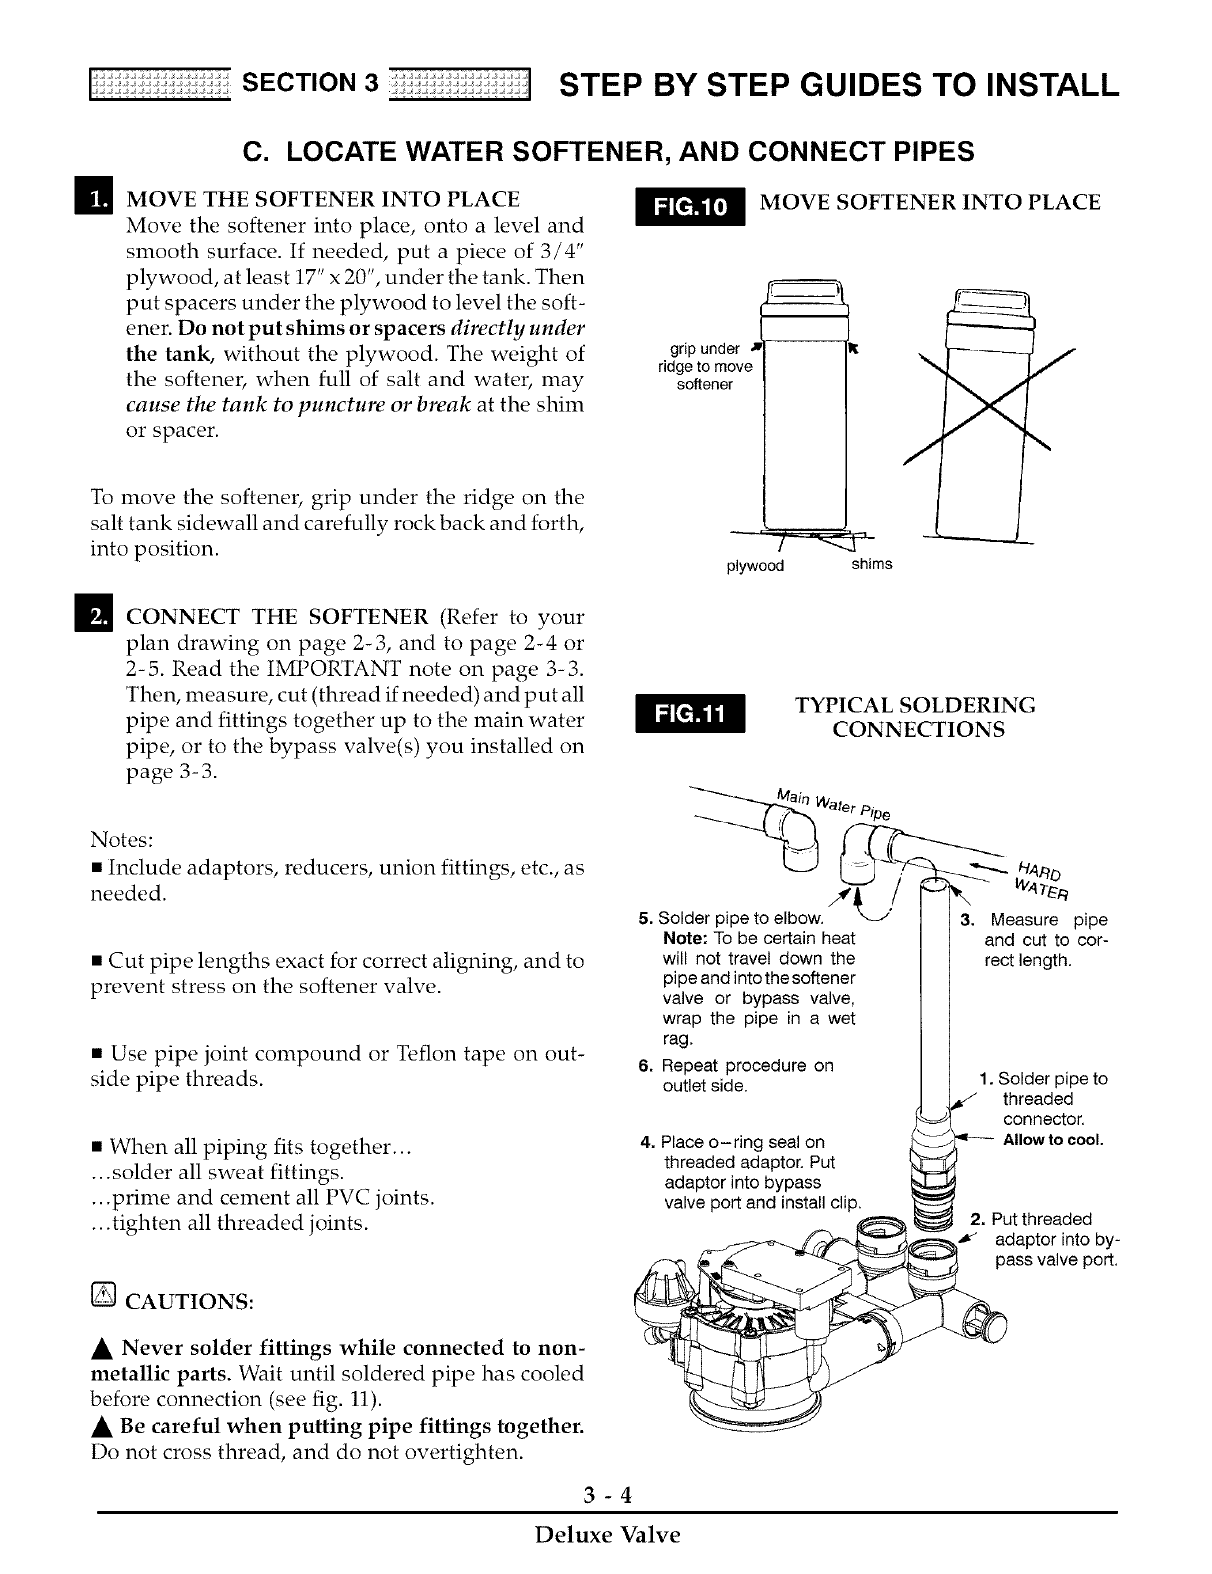
I! MOVE THE SOFTENER INTO PLACE
LOCATE WATER SOFTENER, AND CONNECT PIPES
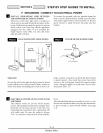
MOVE SOFTENER INTO PLACE
Move the softener into place, onto a level and
smooth surface. If needed, put a piece of 3/4"
plywood, at least 17" x 20", under the tank. Then
put spacers under the plywood to level the soft-
ener. Do not put shims or spacers directly under
the tank, without the plywood. The weight of
the softener, when full of salt and water, may
cause the tank to puncture or break at the shim
or spacer.
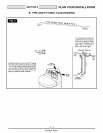
To move the softener, grip under the ridge on the
salt tank sidewall and carefully rock back and forth,
into position.
grip under
ridge to move
so_ener
plywood shims
/
J
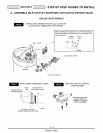
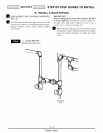
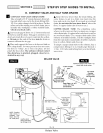
I CONNECT THE SOFTENER (Refer to your
plan drawing on page 2-3, and to page 2-4 or
2-5. Read the IMPORTANT note on page 3-3.
Then, measure, cut (thread if needed) and put all
pipe and fittings together up to the main water
pipe, or to the bypass valve(s) you installed on
page 3- 3.
Notes:
• Include adaptors, reducers, union fittings, etc., as
needed.
• Cut pipe lengths exact for correct aligning, and to
prevent stress on the softener valve.
• Use pipe joint compound or Teflon tape on out-
side pipe threads.
• When all piping fits together...
...solder all sweat fittings.
...prime and cement all PVC joints.
...tighten all threaded joints.
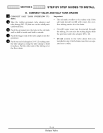
[] CAUTIONS:
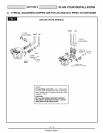
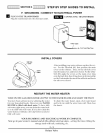
TYPICAL SOLDERING
CONNECTIONS
_Main Water Pie
5. S p'p t . ' 3. Measure pipe
6,
Note: To be certain heat
will not travel down the
pipe and into the softener
valve or bypass valve,
wrap the pipe in a wet
rag.
Repeat procedure on
outlet side.
Place o-ring seal on
threaded adaptor. Put
adaptor into bypass
valve port and install clip.
and cut to cor-
rect length.
1. Solder pipe to
threaded
connector,
Allowto cool.
2. Put threaded
•_ adaptor into by-
pass valve port.
• Never solder fittings while connected to non-
metallic parts. Wait until soldered pipe has cooled
before connection (see fig. 11).
• Be careful when putting pipe fittings together.
Do not cross thread, and do not overtighten.
3-4
Deluxe Valve