


Installation Instructions (cont'd)
Facts to Consider About the
Location
You should carefully choose an indoor location for the new
water heater, because the placement is a very important consid-
eration for the safety of the occupants in the building and for
the most economical use of the appliance. This water heater is
not intended for outdoor installation.
Whether replacing an old water heater or putting the water
heater in a new location, the following critical points must he
observed.
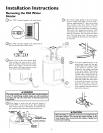
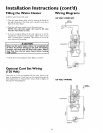
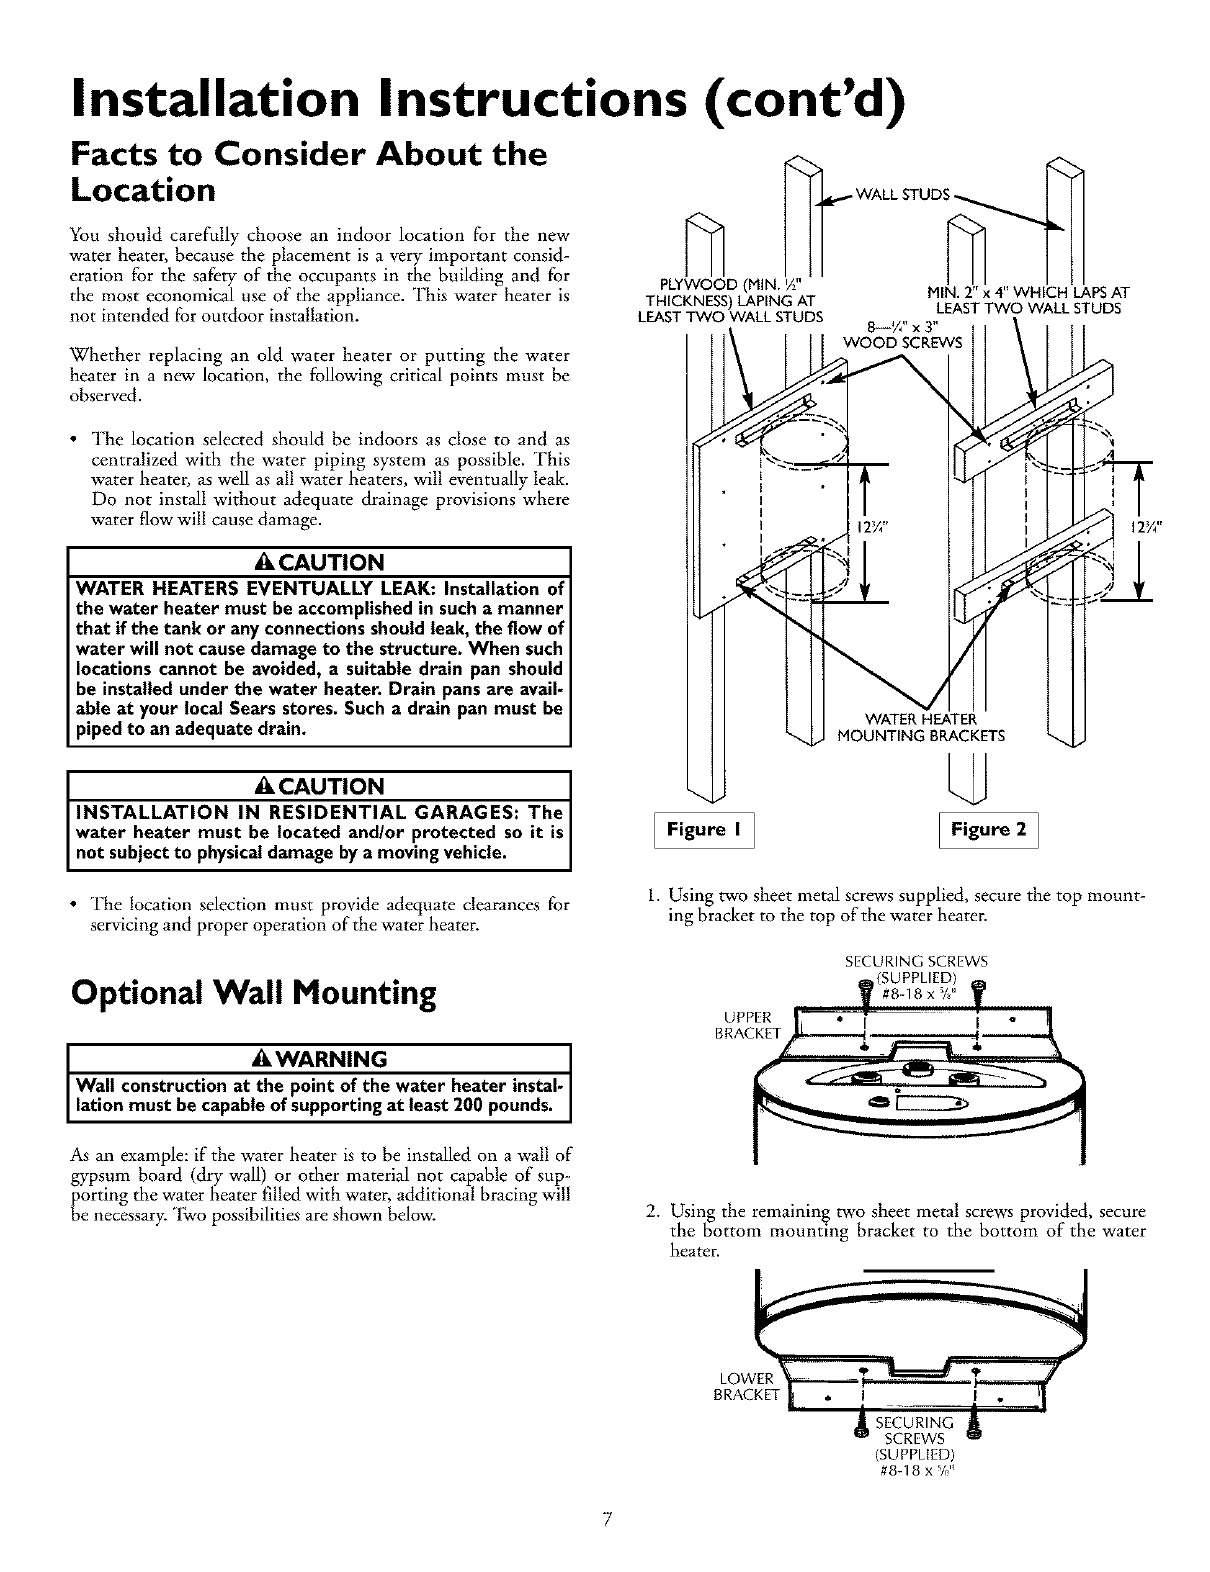
WALLSTUD
PLYWOOD(MIN.½" MIN. 2"x 4"WHICH LAPSAT
THICKNESS)LAPINGAT LEASTTWO WALLSTUDS
LEASTTWO WALLSTUDS
8_¼" x 3"
WOOD SCREWS
/x
• The location selected should be indoors as close to and as
centralized with the water piping system as possible. This
water heater, as well as all water heaters, will eventually leak.
Do not install without adequate drainage provisions where
water flow will cause damage.
_i,CAUTION
WATER HEATERS EVENTUALLY LEAK: Installation of
the water heater must be accomplished in such a manner
that if the tank or any connections should leak, the flow of
water will not cause damage to the structure. When such
locations cannot be avoided, a suitable drain pan should
be installed under the water heater. Drain pans are avail-
able at your local Sears stores. Such a drain pan must be
piped to an adequate drain.
WATER HEATER
MOUNTING BRACKETS
_, CAUTION
INSTALLATION IN RESIDENTIAL GARAGES: The I
water heater must be located and/or protected so it is
not subject to phys ca damage by a mov ng veh c e.
• The location selection must provide adequate clearances for
servicing and proper operation of the water heater.
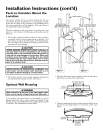
Optional Wall Mounting
_,WARNING J
Wall constructionat the point of the water heater instal-
at on must becapabe ofsupport ng at east 200 pounds.
As an example: if the water heater is to be installed on a wall of
gypsum board (dry wall) or other material not capable of sup-
porting the water heater filledwith water, additional bracing will
be necessary. "I_vopossibilities are shown below.
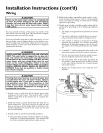
[Figure,] IFigu.e21
1. Using two sheet metal screws supplied, secure the top mount-
ing bracket to the top of the water heater.
SECURING SCREWS
_ (SUPPLIED!
UPPER !.... • ,_ #8-18x_/_ i! oIIW !¢ 11
BRACKET _L I -J 1
C 3
2. Using the remaining two sheet metal screws provided, secure
the bottom mounting bracket to the bottom of the water
heater.
LOWER
BRACKET
SECURING
SCREWS
(SUPPLIED)
#8-18 x %'_
7