


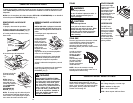
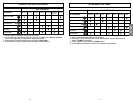


SUGERENCIAS SOBRE EL AJUSTE DE NIVEL DE PELO DE LA ALFOMBRA
Use el ajuste XLO (bajo) para obtener la
mejor limpieza a fondo. Por otra parte, quizás
se requiera elevar el nivel para facilitar algu-
nas tareas, como por ejemplo cuando se trata
de tapetes y algunas alfombras de pelo
largo, y para impedir que la aspiradora se
apague. Se sugieren los siguientes ajustes:
HI – Pelo muy largo y suelto, tapetes, alfom-
bras muy acojinadas.
MED – Pelo mediano a largo.
LO – Pelo corto a mediano.
XLO – La mayoría de las alfombras y pisos
descubiertos.
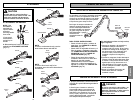
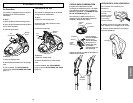
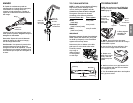
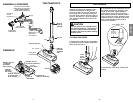
LIMPIADOR DE ORILLAS
Los activos cepillos
limpiadores de orillas
estan en cada lado
de la PowerMate.
Pase la PowerMate
junto a las paredes o
junto a los muebles
para ayudar a elimi-
nar la tierra
acumulada en las ori-
llas de la alfombra.
El dispositivo giratorio
de la manguera
360°
permite que ésta gire
sin necesidad de mo-
ver el receptáculo.
Esto es muy útil para
limpiar en áreas pe-
queñas. Asegúrese de
que la manguera no
esté torcida antes de jalar el receptáculo.
12
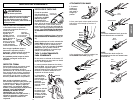
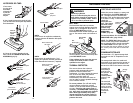
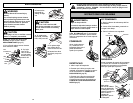
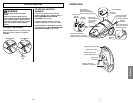
ESCALERAS
SOSTÉN PARA LA ESCALERA
El sostén para la escalera esta situado en el
cuerpo y ayudará a evitar que la
aspiradora se deslice cuando se está
utilizado en las escaleras. Durante la
operación normal de la aspiradora mientras
que está en la posición horizontal, las
ruedas del cuerpo giren libremente 360°.
La característica del
STAIR GRIP (Sostén
para la Escalera)
permite que las
ruedas del cuerpo se
traben automatic-
amente en posición
cuando la aspiradora esta
colocada en escaleras
residenciales.
NOTA: Asegúrese que la aspiradora esté
descansando con seguridad sobre las
escaleras y el base para piso está en la
posición bloqueada antes de usarla.
CUIDADO
Peligro de lesión personal y daño al
producto
No jale de la manguera para mover la
aspiradora de un escalón al siguiente.
Cuando termine de limpiar un área use la
manija en la aspiradora para moverla a
otro lugar para continuar la limpieza.
ADVERTENCIA
Peligro de lesión personal
Tenga cuidado si coloca el receptáculo sobre
escalones. Si se cae, podría causar lesión
personal o daño a la propiedad.
21
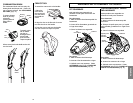
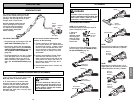
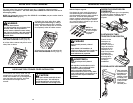
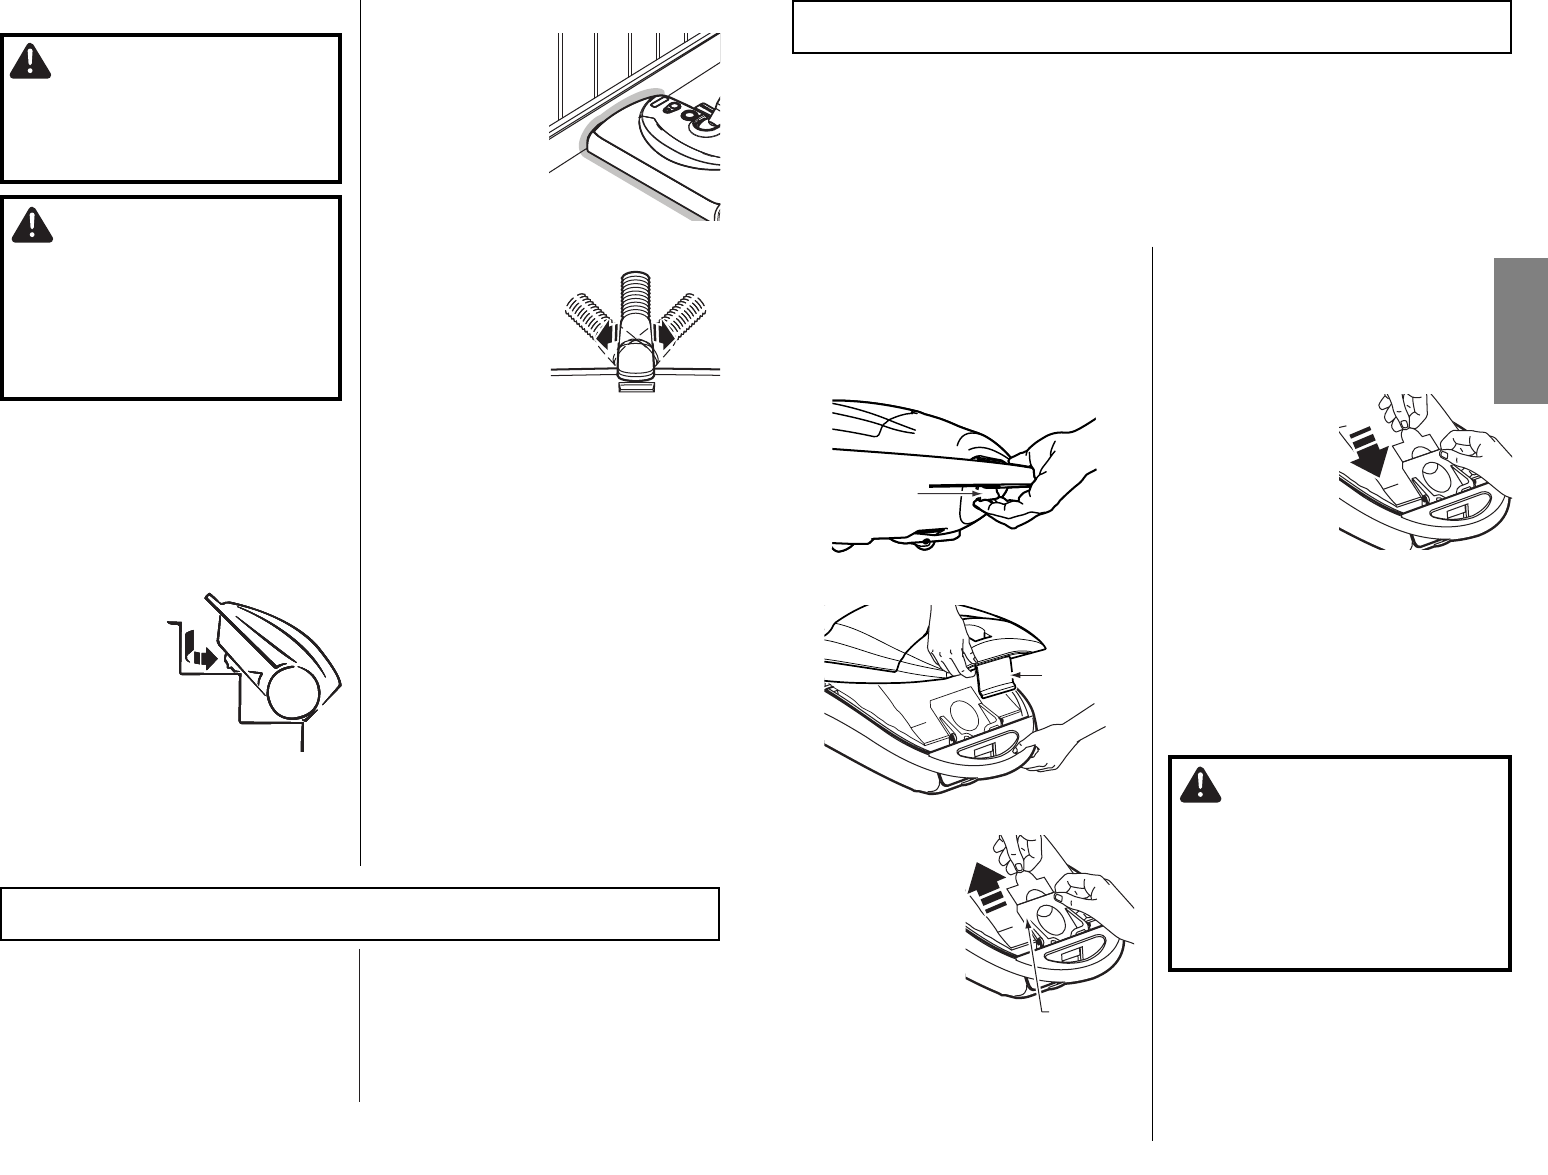
DUST BAG CHANGING
REPLACING DUST BAG
Note:
DO NOT bend or crease the
middle of the cardboard when installing
the dust bag into the bag mount slots.
1. Verify that vacuum cleaner is
unplugged.
2. Rotate red bag
mount down and
install dust bag into
slots per illustration,
pushing down until
the cardboard tab
locks into position
and the holes align.
3. Tuck the dust bag securely into the bag
cavity so that none of the dust bag is able
to be pinched by the hood.
4. Close and latch canister hood.
5. Insert hose into canister until it snaps in
place. (See ASSEMBLY INSTRUCTIONS,
page 8).
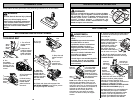
REMOVING DUST BAG
1. Turn off and unplug vacuum cleaner.
2. Remove hose from canister. (See
ASSEMBLY INSTRUCTIONS, page 8).
3. Pull hood release out and up.
4. Lift canister hood.
5. Pull dust bag out
of the red bag
mount and dispose
of dust bag.
NOTE: Check the
motor safety filter
and replace, if
necessary. (See
MOTOR SAFETY
FILTER CHANGING,
page 22).
NOTE: The red bag mount will flip forward
after removing dust bag. This will prevent
the hood from closing until a new dust bag
is installed.
For best cleaning results, the dust bag should be changed often. The CHECK BAG indicator
light will come on when the dust bag needs to be changed or the airflow is blocked.
NOTE: Use replacement dust bag STYLE Q or KC16KDRGZ0U0, see part number detail in
REPLACEMENT PARTS (page 5).
Hood
Release
Hood
Release
CAUTION
NEVER EMPTY OUT AND REUSE A DUST
BAG. Very fine materials, such as carpet
freshener, face powder, fine dust, plaster,
soot, new carpet lint, etc. can clog the
dust bag and cause it to burst before it is
full and may cause damage to vacuum
cleaner motor. Change dust bag more
often when vacuuming these materials.
Red Bag
Mount
ENGLISH