


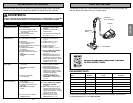
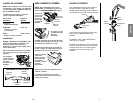
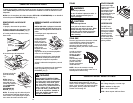
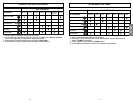
SUGGESTED HEIGHT ADJUST SETTINGS
For best deep down cleaning, use the XLO
height adjust setting. However, you may
need to raise the height to make some jobs
easier, such as scatter rugs and some deep
pile carpets, and to prevent the vacuum
cleaner from shutting off.
Suggested settings are:
HI – Shag, deep pile, or scatter rugs.
MED – Medium to deep pile.
LO – Low to medium pile.
XLO – Most carpets and bare floors.
13
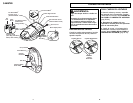
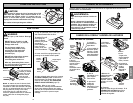
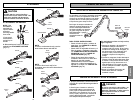
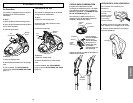
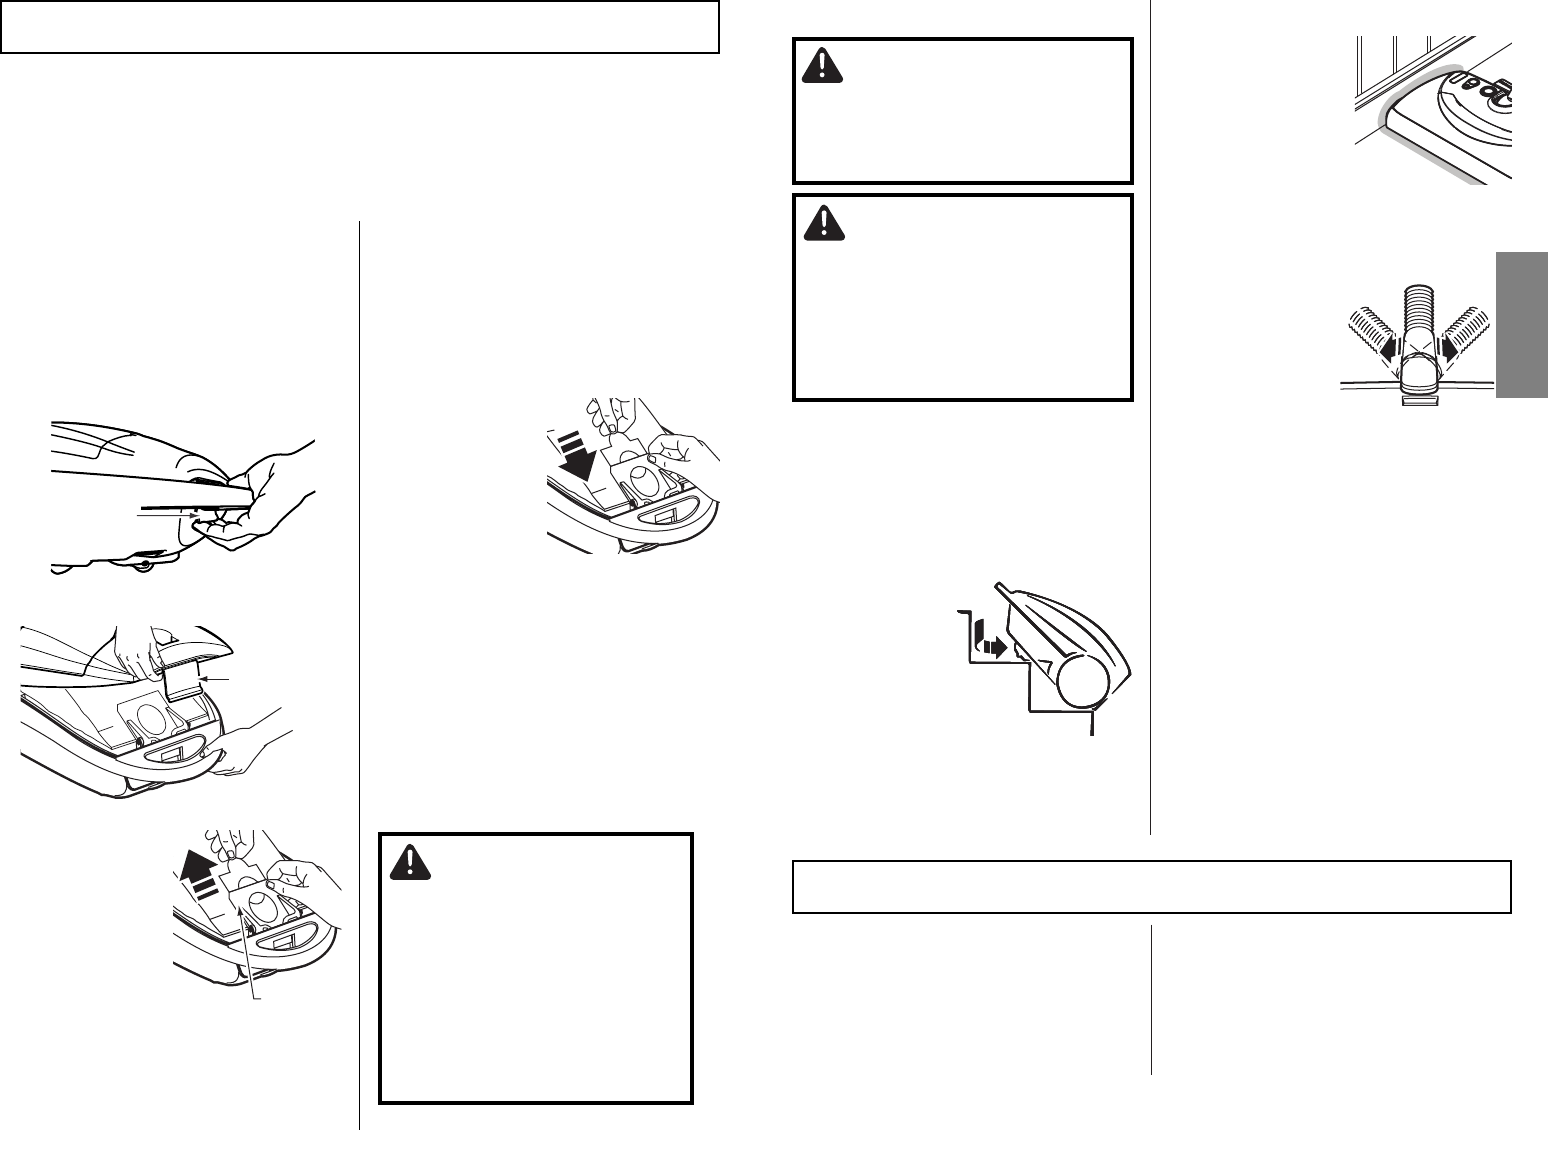
EDGE CLEANER
Active brush edge
cleaners are on both
sides of the
PowerMate. Guide
either side of the
PowerMate along the
wall or next to
furniture to help
remove dirt trapped
at carpet edges.
HOSE SWIVEL
The 360° hose
swivel allows the
hose to turn without
moving the canister.
This is helpful for
cleaning in small
areas. Check hose
for twisting before
pulling canister.
ENGLISH
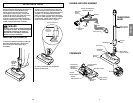
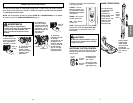
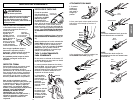
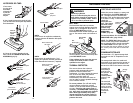
STAIR GRIP
The stair grip located on the caster will aid
in preventing the canister from slipping
when used on stairs. During normal
operation while the canister is in the
horizontal position, the caster wheel rotates
freely 360°.
In order to prevent
the canister from
slipping on stairs,
the STAIR GRIP
feature
automatically locks
the caster wheel in
position when the
canister is placed on
residential stairs.
NOTE: Be sure the canister is resting
securely on the stairs and the caster is in a
locked position before using.
WARNING
Personal Injury Hazard
Use care if canister is placed on stairs. It
may fall, causing personal injury or
property damage.
CAUTION
Product Damage Hazard
Do not pull on the hose to move the
canister from one stair to the next. When
finished cleaning in one area use the
handle grip on the canister to move the
vacuum cleaner to a new location for
further cleaning.
STAIRS
20
La bolsa de polvo debe cambiarse seguido para lograr los mejores resultados de limpieza. El indi-
cador CHECK BAG prendera cuando esta necesite ser cambiada o cuando el fluido de aire este
bloqueado.
NOTA: Use el reemplazo de la bolsa de polvo ESTILO Q o KC16KDRGZ0U0, ver en detalle el
número de parte en PARTES DE REEMPLAZO (Pág 4).
CUIDADO
NUNCA VACIÉ Y REUTILICE UNA
BOLSA PARA POLVO. Los materiales
muy finos, tales como desodorantes
para alfombras, talco facial, polvo
fino, yeso, hollín, pelusa de alfom-
bras nuevas, etc., pueden atascar la
bolsa y causar que se rompa antes
de que esté llena y puede dañar el
motor de la aspiradora. Cambie la
bolsa más seguido cuando aspire
este tipo de materiales.
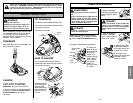
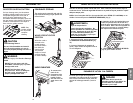
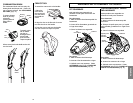
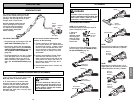
REEMPLAZANDO LA BOLSA DE
POLVO
NOTA:
NO doble ni pliegue el centro del
cartón
al instalar la bolsa de polvo en las
ranuras del montaje de la bolsa bolsa de
polvo.
1. Verifique que la aspiradora este
desconectada.
2. Gire hacia abajo
el soporte para la
bolsa roja y para
insertar la bolsa de
polvo en las ranuras
empuje hacia abajo
hasta que las
lengüetas de cartón
encierren
seguramente en las posiciones apropiadas
como se ve en el diagrama.
3. Empuje la bolsa de polvo asegurándola
dentro de la cavidad para evitar que sea
trabada por la tapa de la aspiradora.
4. Baje la cubierta del receptáculo y cierre el
pestillo.
5.
Introduzca la manguera en el receptáculo
hasta que quede fija en posición
(Ver
ENSAMBLE, pág 7).
REMOVIENDO LA BOLSA DE
POLVO
1. Apagué y desconecté la aspiradora.
2. Quite la manguera de la aspiradora.
(Ver
INSTRUCCIONES DE ENSAMBLE, pág 7).
3. Tire del pestillo de la tapa hacia fuera y
hacia arriba.
4. Levante la tapa del receptáculo.
5. Saque la bolsa de
polvo del montaje
rojo.
NOTA: Revise y
cambie el filtro de
seguridad del motor,
cuando sea necesario.
(Ver CAMBIO DEL
FILTRO DE
SEGURIDAD DEL
MOTOR, pág 21).
NOTA:
El montaje rojo de la bolsa de polvo
se inclinará hacia adelante después de que
retire la bolsa. Esto impedirá que la tapa se
cierre antes de instalar una bolsa nueva.
CAMBIO DE LA BOLSA DE POLVO
Pestillo
de la tapa
Montage
rojo
Pestillo
de la tapa