System Installation Guide
14
69-2490—03
Prestige THX9321 or EIM:
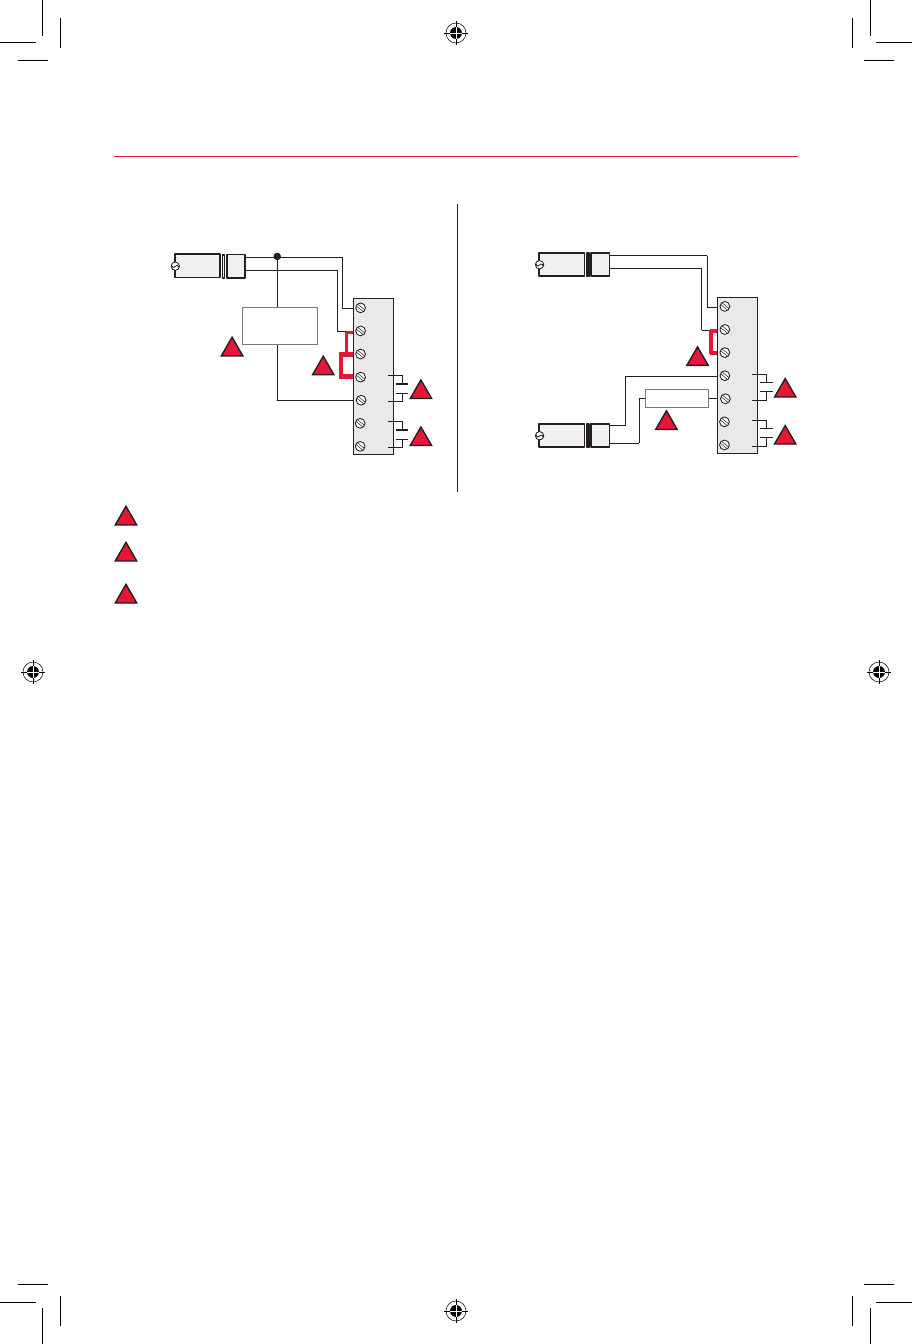
Using universal relays to control heating or cooling
Poweringuniversalrelaywithseparate
heatingtransformer(THX9321shown)
Poweringuniversalrelaywithsystem
transformer(THX9321shown)
1
2
3
U1/U2/U3 terminals are normally open dry contacts when set up for a stage of heating or cooling.
You must install a field jumper if the stage of heating or cooling is powered by system transformer. Do NOT install a field
jumper if the stage of heating has its own transformer.
U1/U2/U3 terminals are assigned to a stage of heating or cooling in the Installer Setup. Options are:
• Heat--Stage3(laststageofheating)--ISU2100,2140,or2170
• Cool:Stage3--ISU2080
• Cool:Stage4--ISU2090
• Geothermalradiantheat:Stage1--(seewiringguideonpages12-13)
• Geothermalradiantheat:Stage2--(seewiringguideonpages12-13)
HEAT STAGE 3 or
COOL STAGE 3 or
COOL STAGE 4
120
VAC
C
Rc
R
U1
U1
U2
U2
24
VAC
Transformer
Thermostat
C
R
1
1
2
3
MCR32952
HEAT STAGE 3
120
VAC
C
Rc
R
U1
U1
U2
U2
24
VAC
Transformer
120
VAC
24
VAC
Transformer
Thermostat
C
R
C
R
1
1
2
3
MCR32953
69-2490_B.indd 14 7/13/2011 1:41:57 PM
