


T7100D,E,F MICROELECTRONIC COMMERCIAL THERMOSTATS AND Q7100A,C,D SUBBASES
68-0163—3
5
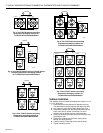
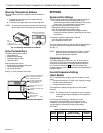
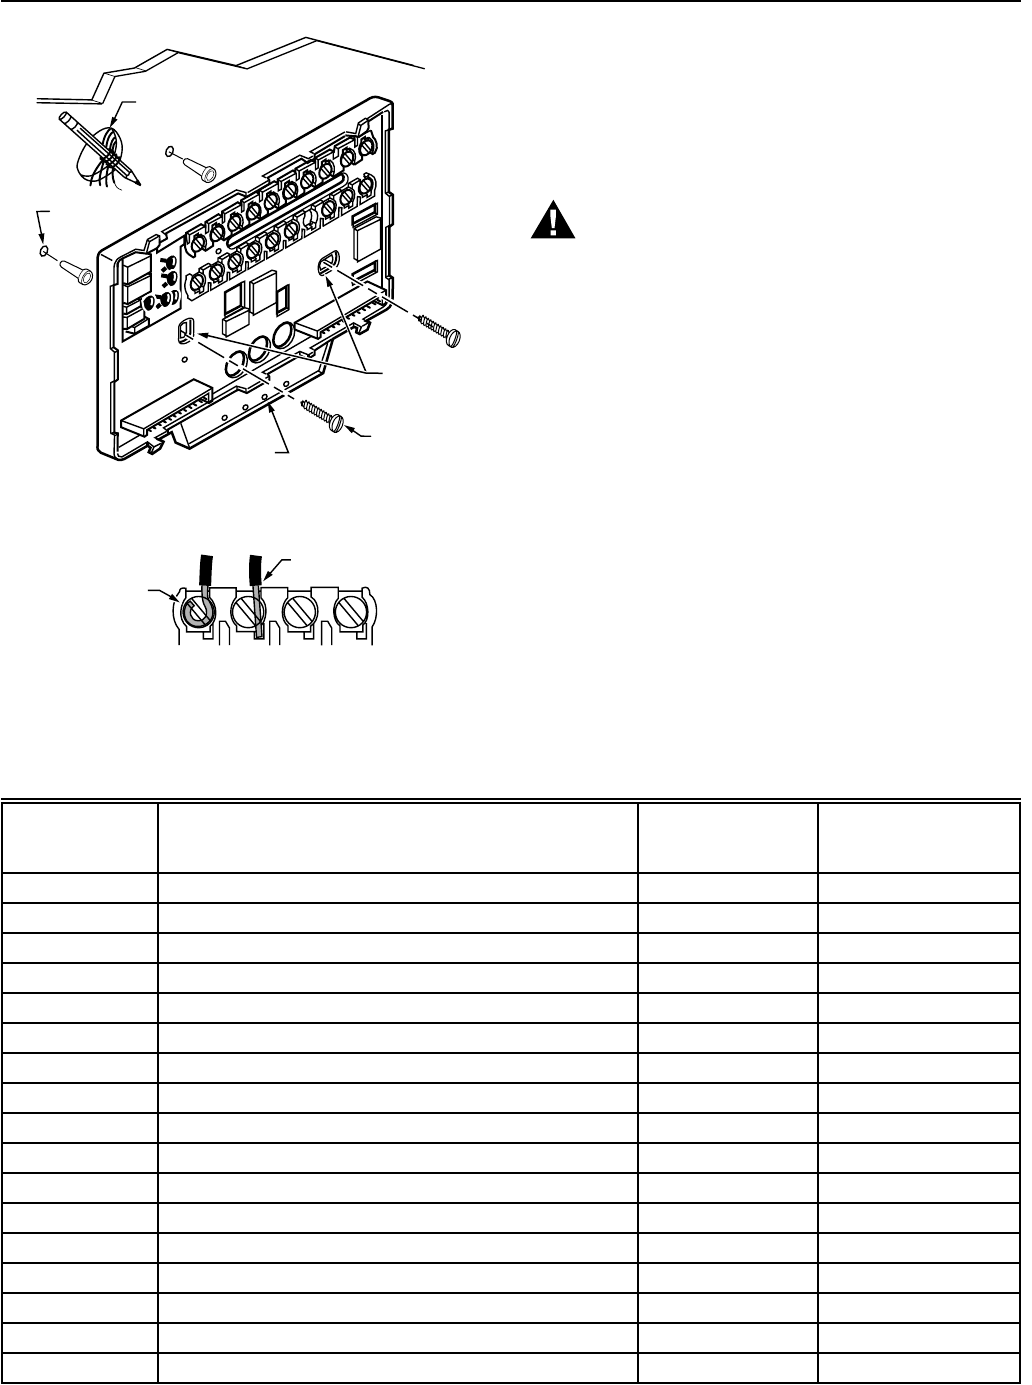
Fig. 8. Mounting the subbase.
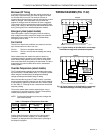
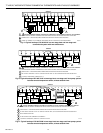
WIRING
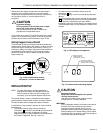
All wiring must comply with local electrical codes and
ordinances. Follow equipment manufacturer wiring
instructions when available. Refer to Fig. 16 through 21 for
typical hookups. A letter code is located near each terminal
for identification. Refer to Table 4 for terminal designations.
WARNING
Electrical Shock Hazard.
Power Supply can cause electrical shock.
Disconnect power supply before beginning
installation.
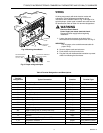
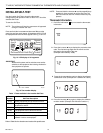
1. Loosen the terminal screws on the back of the
thermostat and connect the system wires. See Fig. 9.
IMPORTANT
Use 18 gauge, color-coded thermostat cable for
proper wiring.
2. Securely tighten each terminal screw.
3. Push excess wire back into the hole.
4. Plug the hole with nonflammable insulation to prevent
drafts from affecting the thermostat.
WIRES
THROUGH WALL
WALL
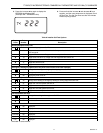
LEDS
MOUNTING
HOLES
MOUNTING
SCREWS
M6531
WALL
ANCHORS
(2)
Fig. 9. Proper wiring technique.
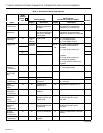
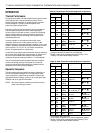
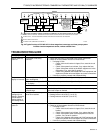
Table 4. Terminal Designations and Descriptions.
M4826
FOR WRAPAROUND
INSERTION STRIP
7/16 IN. (11 MM).
FOR STRAIGHT INSERTION
STRIP 5/16 IN. (8 MM).
Standard
Terminal
Designations Typical Connection Function Terminal Type
BHeating changeover valve or damper Output 24V powered contact
D, D Remote setback timer Input Dry contact
E Emergency heat relay Output 24V powered contact
GFan relay Output 24V powered contact
OCooling changeover valve Output 24V powered contact
R 24V system transformer Input —
RC 24V cooling transformer Input —
RH 24V heating transformer Input —
T, T Remote temperature sensor Input —
WHeating relay or valve coil Output 24V powered contact
W1 Stage 1 heating relay Output 24V powered contact
W2 Stage 2 heating relay or auxiliary heat relay Output 24V powered contact
W3 Auxiliary heat relay Output 24V powered contact
XCommon Input —
X1, X2, X3, X4 User-defined Light Emitting Diodes (LED) Annunciation —
Y, Y1 Compressor contactor 1 Output 24V powered contact
Y2 Compressor contactor 2 Output 24V powered contact