


6
7
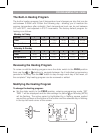
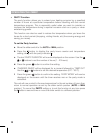
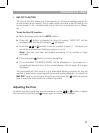
PROGRAMMING THE CM907
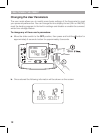
b. To adjust the period start time press the
or
buttons and ‘TIME 1 OK?’ will
be displayed. Holding the button down will change the time quickly.
Note: If you are pressing the
or
buttons and the display ashes the next
change period, it means the next change will be pushed forward if you continue
to press
or
buttons).
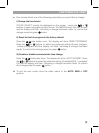
c. Press the green
button to conrm the setting. ‘CHANGES SAVED’ is displayed
for 1.5 seconds then ‘SET TEMP 1’ will be shown.
Note: If the original time setting did not require adjustment press the green
button to move on to step ‘d.’.
d. The temperature setting for period
1
on Monday (MON) will now be ashing. To
adjust this press the
or
buttons and ‘TEMP 1 OK?’ will be displayed.
e. Press the green
button to conrm the setting. ‘CHANGES SAVED’ will be
displayed for a moment followed by ‘SET TIME 2’.
f. The next time and temperature period will now be active. Adjust this by repeating
steps b - e above until all 6 periods are set for Monday or move the slider switch
to the AUTO position to run the program as set, at any time.
g. After setting period
6
‘CHANGES SAVED’ will be displayed as before, followed
by ‘DAY COMPLETE’.
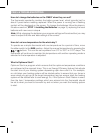
You now have a choice of how to set the program for the next day:
h. To COPY the Monday’s program to another day:
Press the COPY DAY button to copy Monday’s program into Tuesday. The display
will go blank apart from ‘COPY MON TO’, indicating the program for Monday will
be copied to the selected target day, which is ashing in the top left corner of the
display. To select a different target day press the DAY button to cycle through the
days. Once the required day is ashing accept it by pressing the green
button.
Note: Once the target day is conrmed it becomes the day that is copied if the
COPY DAY button is pressed again.
OR
To program a different day:
Press the DAY button to select the next day, which is displayed in the top left
corner of the display. The program for that day can then be adjusted by following
steps b - g above. Programs for the remaining days can be set in the same way,
using the DAY button to move to the next day.