


R
September 1, 2008
250-7251F
Page 23
Castile Pellet Insert
C. Before Your First Fire
1. First, make sure your appliance has been properly
installed and that all safety requirements have been met.
Pay particular attention to the fire protection, venting and
thermostat installation instructions.
2. Double check that the ash pan and firebox are empty!
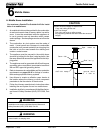
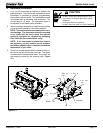
3. Check the position of the thermocouple, located above
the firepot, and make sure that it protrudes approximately
3/4 inch (19mm) into the firepot.
4. Close the front door.
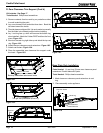
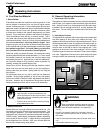
E. Fire Characteristics
A properly adjusted fire with the heat output control switch
set on “HIGH” has a short active flame pattern that extends
out of the firepot approximately 4 inches (102mm). If the fire
has tall flames with black tails and seems somewhat lazy, the
feed rate will need to be reduced. If the fire is not 4 inches
(102mm) tall, increase the feed rate. A medium and low
setting will give a shorter flame. The flame will rise and fall
somewhat. This is normal.
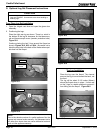
The fuel adjustment control rod is factory set, and should be
adequate for most fuels.
The set screw is located at the bottom of the hopper and
set loose at the factory so the fuel adjustment control rod
will slide by only loosening the wing nut. Do not re-tighten
bottom set screw.
However, if the flame height is too high or too low, you will
need to adjust the feed rate. Wait until the appliance has been
burning for 15 minutes before making your adjustments and
a
llow 15 minutes for feed adjustment to take effect.
Make
adjustments in approximately 1/2 inch increments.
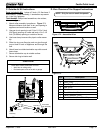
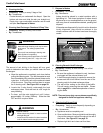
1. Loosen the wing nut. Figure 23.2.
2. Adjust the fuel adjustment control rod towards the
"+" symbol to increase the feed rate and flame height or
towards the "-" symbol, to decrease the feed rate and flame
height.
3. Re-tighten the wing nut.
F. Feed Rate Adjustment
D. Starting Your First Fire
1. A thermostat is required for proper operation of this
appliance, except for corn. At this time, fill the hopper
with pellets, set the thermostat to its lowest setting. Plug
the power cord into nearby outlet.
2. The exhaust blower will stay on for approximately 18
minutes even though the thermostat is not calling for
heat. This is normal.
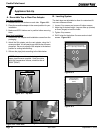
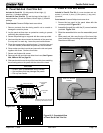
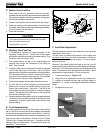
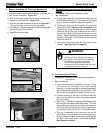
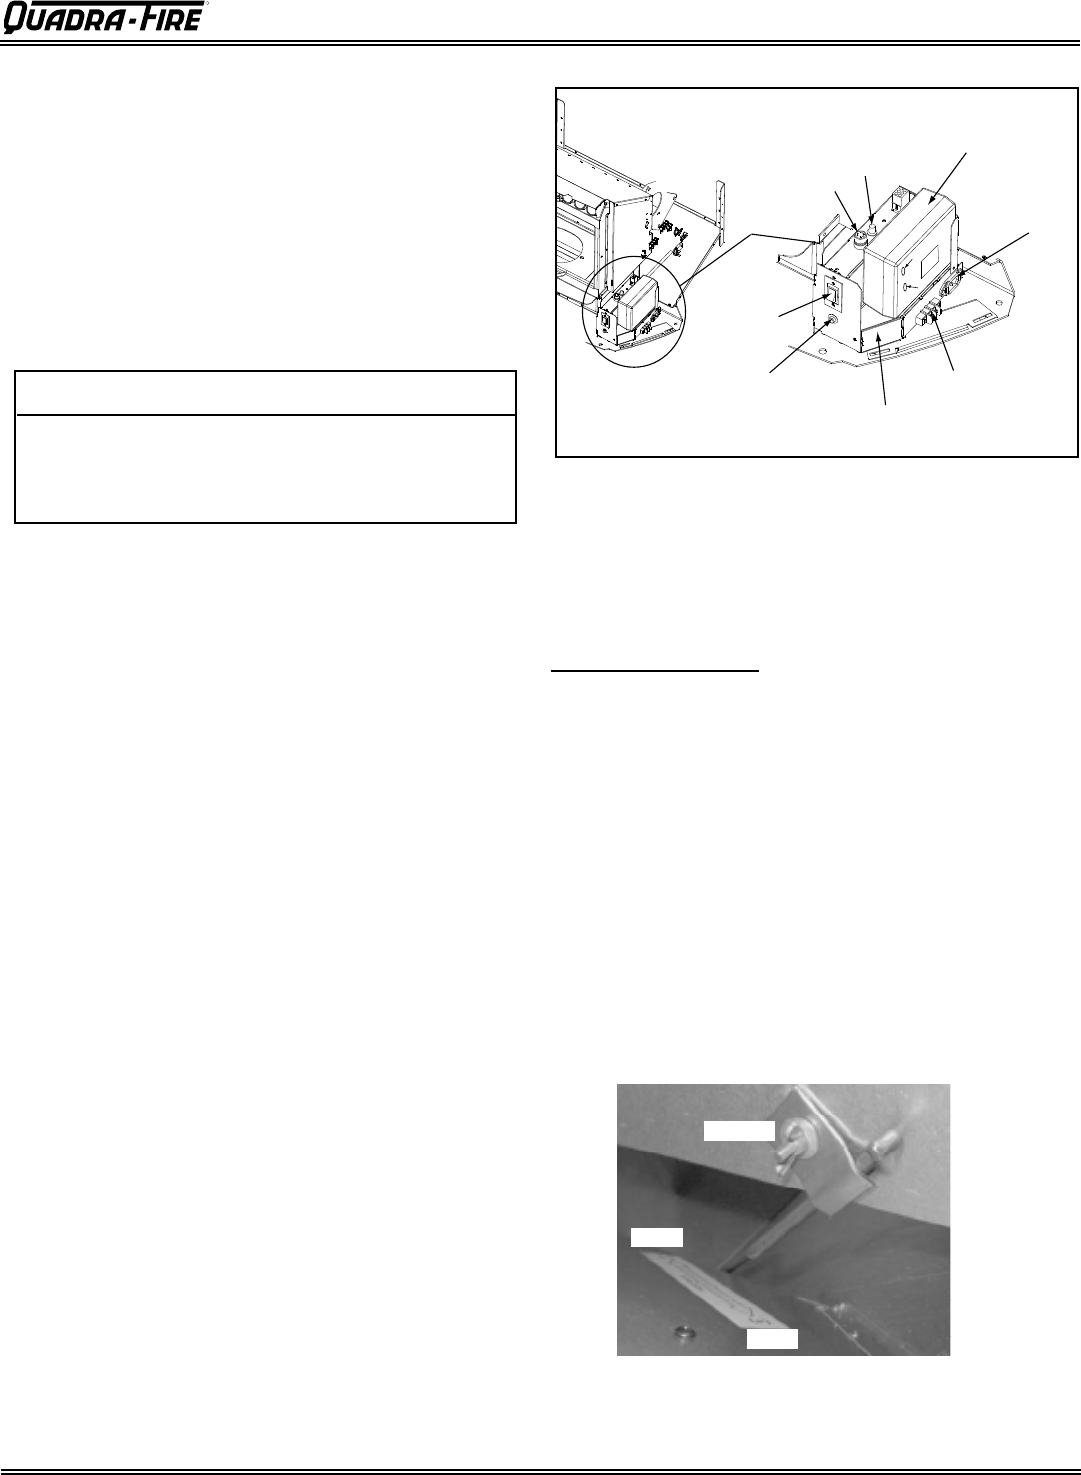
3.
Locate the heat output control switch behind the right face
on the lower right side of the firebox. Set to the HIGH
setting and then adjust the thermostat to its highest setting.
The red call light will be on which is located on the top of
the junction box behind the right cast side. This indicates
the thermostat is calling for heat. Figure 23.1.
4.
The fuel feed system and the igniter should
now
be on.
5. For your first fire it will be necessary to press the reset
button once a minute until pellets start to drop into the
firepot, then press button 1 more time. This will fill the
feed system and allow the appliance to begin dropping
pellets. The appliance will continue to run as long as the
thermostat is calling for heat.
6. Once the appliance has ignited, let it burn for approximately
15 minutes, then set the thermostat to the desired room
temperature. Adjust the heat output control switch to the
desired setting.
Figure 23.1
Control Box
Junction Box
Reset Button
Heat Output
Switch
Power Cord
Outlet
Thermostat
Block
Fuse
Red Call
Light
Red/Green Light
Blue Light
Wing Nut
"+"
"-"
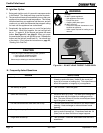
CAUTION
Tip of thermocouple must be in contact with the inside
end of the thermocouple cover.
Missed ignitions can occur.