


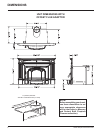
HI200 Hampton Wood Cast Insert 9
NOTE: You will be required to purchase either the standard or offset
6" diameter (152mm) fl ue adaptor that is best suited for the specifi c
installation.
List of Tools needed;
- Pull Rod (included with insert)
- 1/2” socket / ratchet
- 3/8 open face wrench
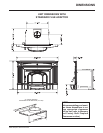
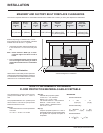
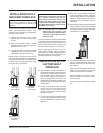
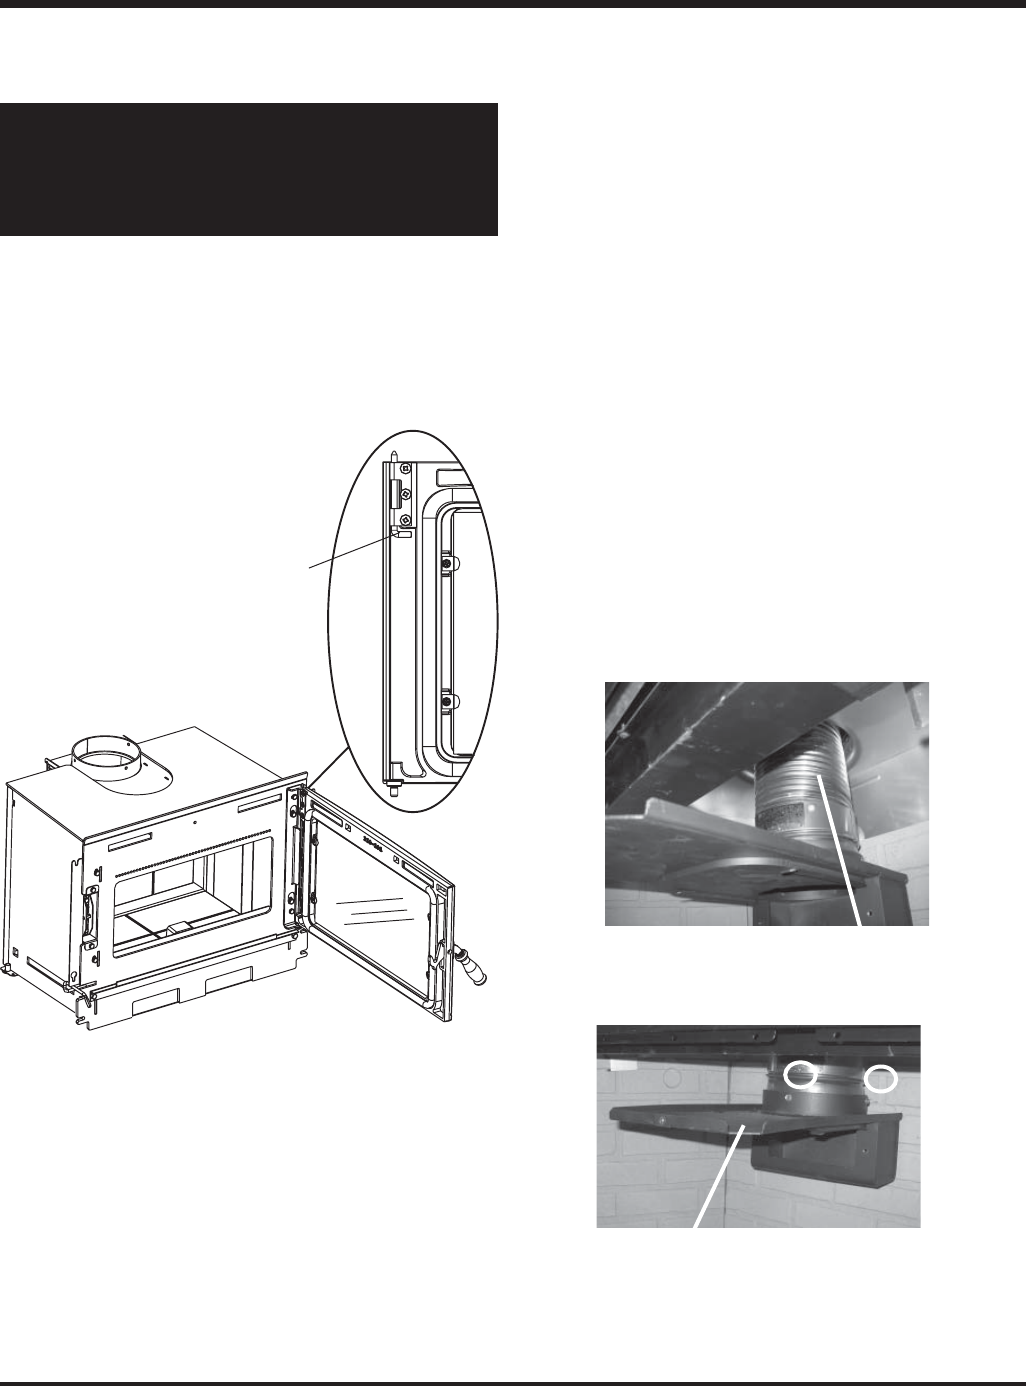
4) Install fl ex liner into existing chimney as per liner manufacturer’s
specifi cations. See diagram 1.
5) Install the required fl ue adaptor onto the end of the fl ex liner. Secure
the adaptor using 3 screws - 1 on the front, left and right side as
shown in diagram 2.
Alignment of the fl ue adaptor can be critical during the install, it is
recommended that the fl ex liner be left as compressed as possible.
Before inserting the unit the adaptor should hang, when level, slightly
above the required height.
Secure adaptor using 3 screws - 1 in the
front and 1 each on the left and right side.
Flex Liner
Flue Adaptor
Diagram 1
Diagram 2
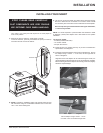
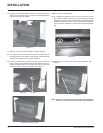
Your insert is very heavy and will require two or three people to
move it into position.
1) Remove the Door to make the insert easier to handle.
To remove the Door, open fully and release the push pin at the top
of the door and lift out from the bottom.
3) Lift the unit up onto the Hearth and slide into the fi replace opening.
Be sure to leave the unit out at least 3 to 4 inches in order to make
the necessary fl ue connections and to install the fan and faceplate.
Be sure to protect your hearth extension during the installation,
ie. with a heavy blanket.
Push Pin
INSTALLING YOUR INSERT
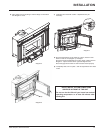
STOP! PLEASE READ CAREFULLY.
CAST COMPONENTS ARE VERY FRAGILE.
USE EXTREME CARE WHEN HANDLING.
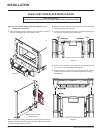
2) NOTE: For Masonry installation make sure that the fi rebox is level
with the hearth using non-combustible materials and no more than
1/2 to 1 inch of the leveling bolt.
INSTALLATION