


6
7
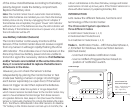
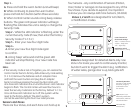
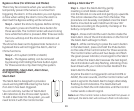
of the arrow. Install batteries according to the battery
polarity diagram inside the battery compartment.
Replace the battery door.
Note: The Control Center has an automatic internal battery
tester. After batteries are installed you can check the backup
battery status at any time by unplugging the AC adapter. If
the batteries are acceptable, the green ‘Power’ LED indicator
will be remain on. If the batteries are low, the LED indicator will
flash slowly. If the batteries are too low to power unit, or dead,
the LED indicator will be off.
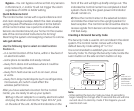
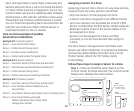
Low Battery Indicator (Sensors)
The Control Center continuously monitors all the
Sensors. If the Control Center does not receive a signal
from any Sensor it will begin rapidly flashing the Zone
LED indicator . This indicates one or more Sensors in the
Zone may have low battery power and are unable to
transmit a signal the necessary distance. If all batteries
and/or Sensors are installed at the same time into a
Zone, it is recommended to replace the batteries in
all Sensors in the Zone.
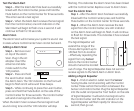
However, you can check the Sensor’s status
independently by placing the Control Center in Test
mode (see Testing a Sensor on page 11) and trigger
each Sensor separately (i.e. open door). If the Sensor
does not trigger an alert then replace the batteries.
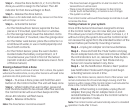
Note: The Sensor detection system is ‘range dependant’,
which means Sensors located closer to the Control Center may
seem to have batteries that last longer than those Sensors
at a greater distance. Also, keep in mind, because the Motion
Sensor is continually checking for activity the battery life is less
than the lithium cell batteries in the other Sensors. An Alkaline
“9V” battery in the Motion Sensor can last up to 9 months; the
Lithium cell batteries in the Door/Window, Garage and Water
Leak Sensor can last up to two years. If the Motion Sensor is in a
Zone with other Sensors, try replacing its battery first.
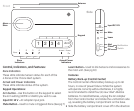
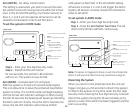
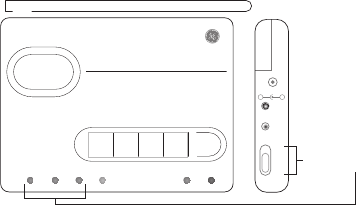
INTRODUCTION
Let’s review the different features, functions and
terminology of the Control Center.
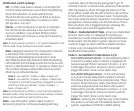
The Choice Alert System operates in
three different modes
1. Notification Mode (Zones 1, 2, 3)
2. Dedicated Alert Mode (Zone 4)
3. Armed/Alarm Mode (Zones 1, 2, 3)
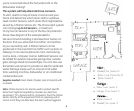
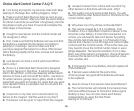
Mode 1 - Notification Mode – Off/Chime/Alert (Zones 1,
2, 3) Perfect for Windows, Doors & Motion Sensors
(alarmed areas)
- Unarmed immediate notification mode
- User is notified of triggered Sensor based on
position
of notification switch.
1 2 3 4
Arm
Zone
Armed Power
1 2 3 4
Alert
Chime
Off
Mute
Learn
Input DC 12V
-
+
Mode settings
Control Center has
three Mode settings
“Alert” - Continuous Tone
“Chime” - Single Tone
“Off” - Lights only
Notification switch
(affects Zone 1, 2, 3 only)