


3-1
3. ADJUSTMENT
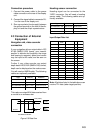
This section covers adjustment of the radar
after installation. You will need to
• adjust tune/video amplifier level
• enter antenna height
• align heading
• adjust sweep timing
• adjust main bang suppression
• select STC curve
• set a dead sector, and
• confirm magnetron heater voltage.
These adjustments are done through the in-
stallation setup menu.
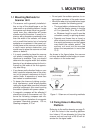
3.1 Preparation
Most adjustments and initial settings may be
completed on the Installation Setup menu,
and you can display this menu as follows:
1. Turn off the radar. While pressing and
holding down the [GAIN] control (at least
three seconds), press the [POWER] key.
2. Press the [MENU] key, select “OTHERS”
by using the omnipad, and press [ACQ/
ENTER] key.
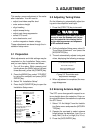
3. Select “24. Installation Setup”.
4. Press the [ACQ/ENTER] key to open the
Installation Setup menu.
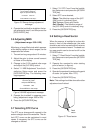
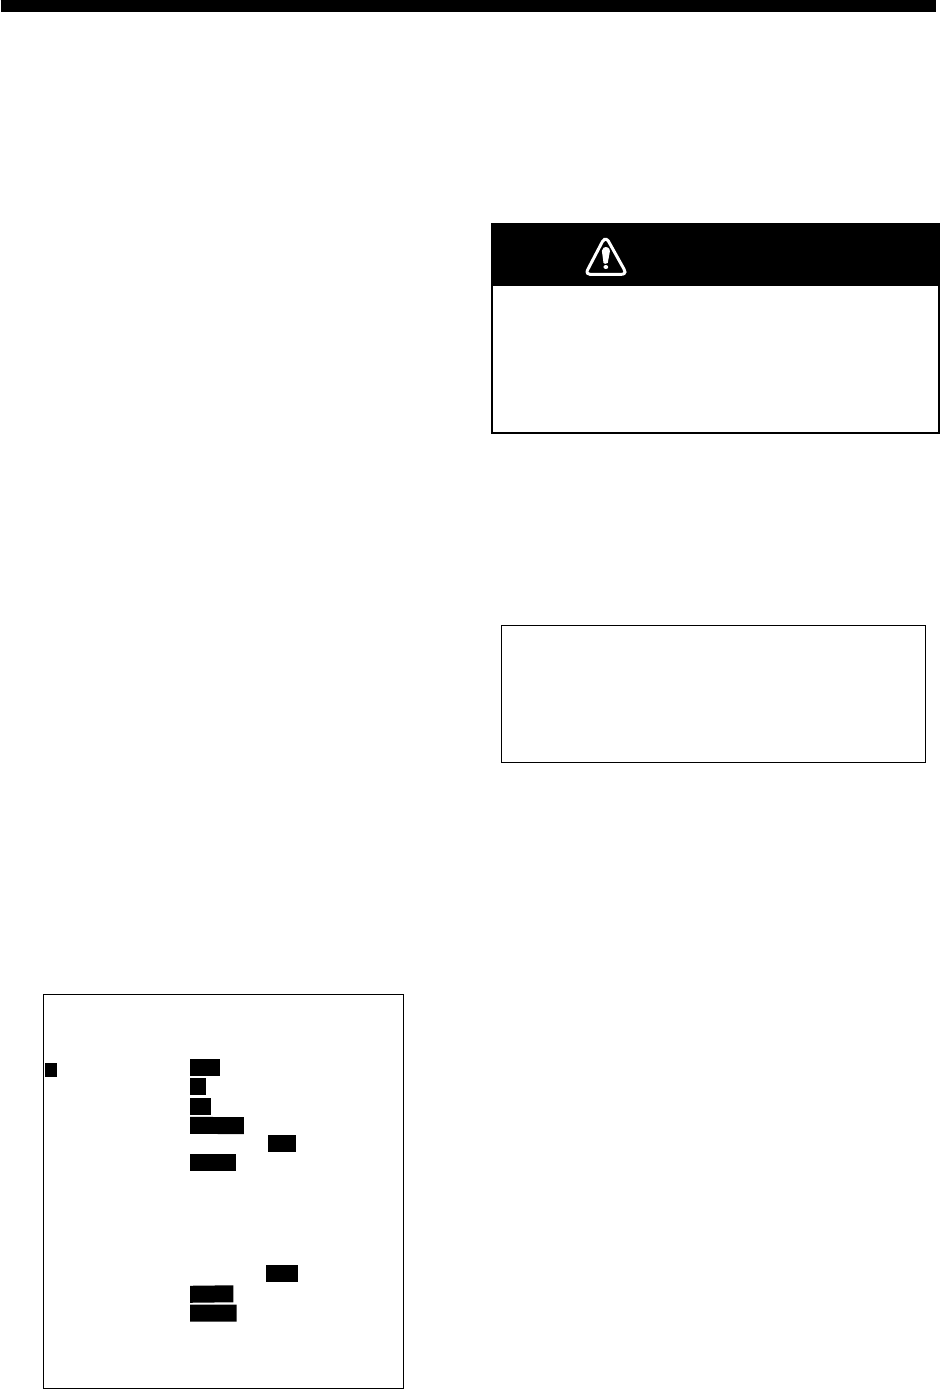
1 . Nav Talker
2 . Depth Unit
3 . Temp Unit
4 . Hdg Sensor
5 . Key Beep
6 . Ant on Tx
7 . Dead Sector
8 . Tuning/Video Auto Adjustment
9 . Heading Alignment
10. Sweep Timing Adjustment
11. MBS Adjustment
12. Ant Height
13. STC Curve
14. Ope Mode
15. Hours in Use
16. Tx Hours
Low
Mid
High
GPS
fa
ßF
Gyro
On
Stop
Std
Slave
All
m
ßC
Magnet
Off
Rotate
180ß~180ß
Sharp
Master
000001.5H
000000.0H
Gntl
LC
ft
[ Installation Setup ]
Select item by omnipad
and press ENTER key.
Figure 3-1 Installation Setup menu
3.2 Adjusting Tuning/Video
Do the following to automatically adjust tun-
ing and video amplifier level input.
1. Press the [STBY/TX] key to transmit.
WARNING
Before transmitting the radar make sure
no one is near the scanner unit, to pre-
vent the potential risk of being struck
by the rotating scanner and exposure
to RF radiation hazard.
2. On the Installation Setup menu, select “8.
Tune/Video Adjustment” and press the
[ACQ/ENTER] key.
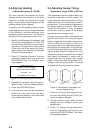
3. The unit automatically adjusts tuning and
video, displaying the following message.
[ Tune/Video Auto Adjustment ]
Now under correction.
Return to installation setup
menu after the correction.
Figure 3-2 Tune/video auto
adjustment message
4. When adjustment is completed, the mes-
sage disappears.
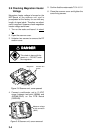
3.3 Entering Antenna Height
The STC curve changes with respect to an-
tenna height above the waterline. Enter an-
tenna height above the waterline to optimize
the STC curve.
1. Select “12. Ant Height” from the Installa-
tion Setup menu and press the [ACQ/EN-
TER] key.
2. Operate the omnipad to select antenna
height above the waterline; Low (3 m or
less), Mid (3 to 6 m) or High (6 to 10 m).
3. Press the [ACQ/ENTER] key.