


1-3
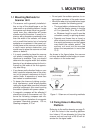
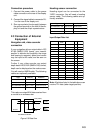
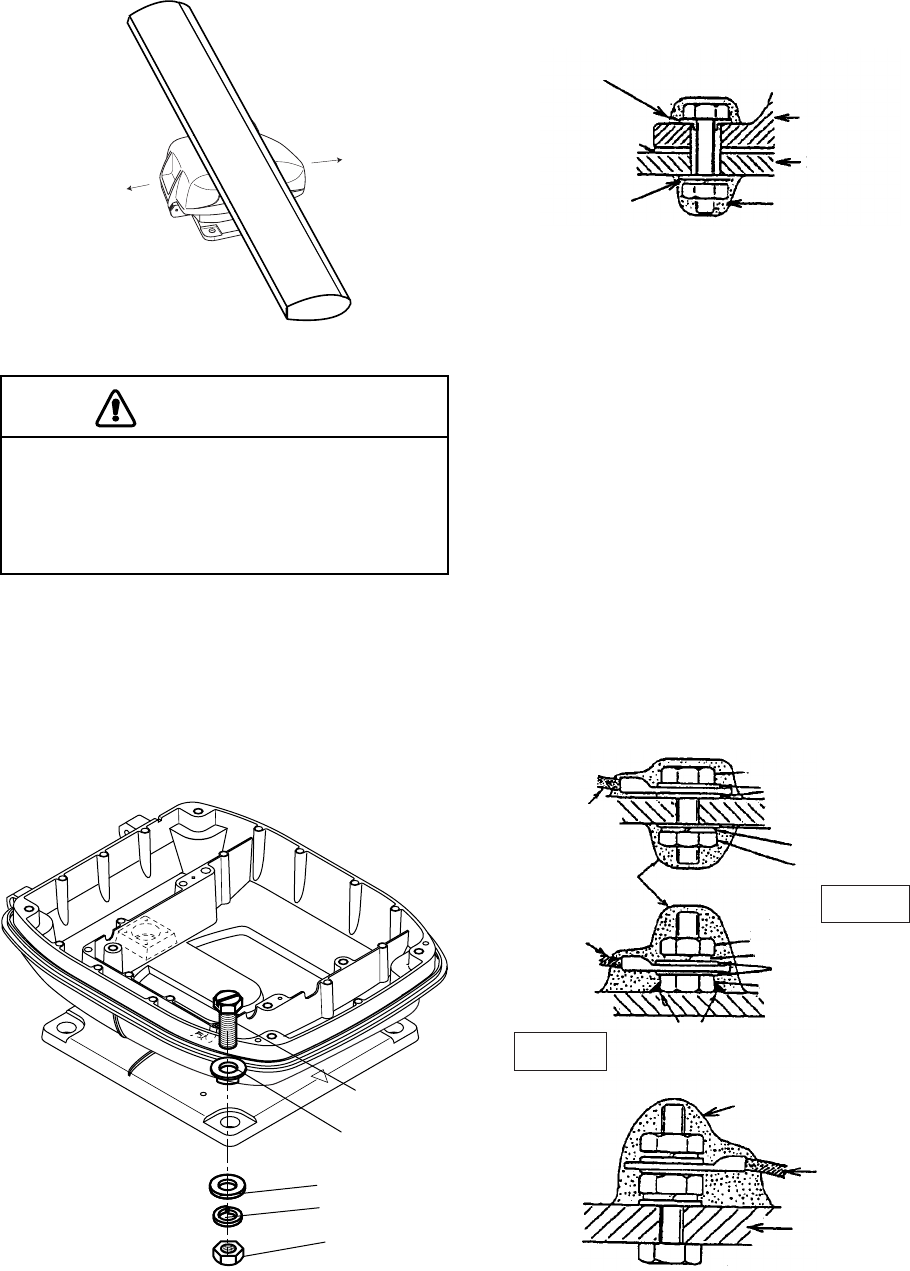
2. Lay the scanner unit on the mounting plat-
form, orienting it as shown in Figure 1-6.
STERN
BOW
Figure 1-6 Scanner unit (Shown: XN12A)
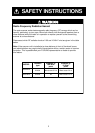
CAUTION
Do not lift the scanner unit by the
radiator; lift it by the housing.
The radiator may be damaged.
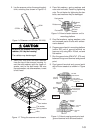
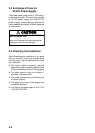
3. Insert four hex bolts and seal washers
from the top of the scanner housing. In-
sert the seal washers with the larger di-
ameter next to the bolt heads. Be sure
the seal washer, not other washers, is next
to bolt head.
Hex bolt
Seal washer
Flat washer
Spring washer
Nut
Figure 1-7 Fixing the scanner unit chassis
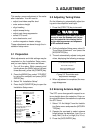
4. Pass flat washers, spring washers and
nuts onto hex bolts. Fasten by tightening
nuts. Do not fasten by tightening the hex
bolts; seal washers may be damaged.
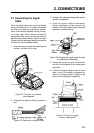
Scanner
unit
Mounting
platform
Silicone
sealant
Flat washer
Rubber mat
Seal washer
Figure 1-8 How to fasten scanner unit to
mounting platform
5. Coat flat washers, spring washers, nuts
and exposed parts of bolts with anticor-
rosive sealant.
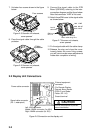
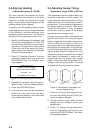
6. Prepare ground point in mounting platform
(within 300 mm of ground terminal on
scanner unit) using M6 x 25 bolt, nut and
flat washer.
7. Run the ground wire (RW-4747, 370 mm)
between the ground terminal and ground
point.
8. Coat ground terminal and ground point
with silicone sealant as shown in Figure
1-9.
Ground
terminal
Hex bolt
Flat washer
Spring washer
Flat washer
Hex nut
Silicone
sealant
Hex nut
Weld here.
Silicone
sealant
Ground
wire
Scanner
unit
OR
Flat washer
Spring washer
Ground
wire
GROUND
POINT
Hex nut
GROUND
TERMINAL
Figure 1-9 How to coat ground point and
ground terminal with silicone sealant