10
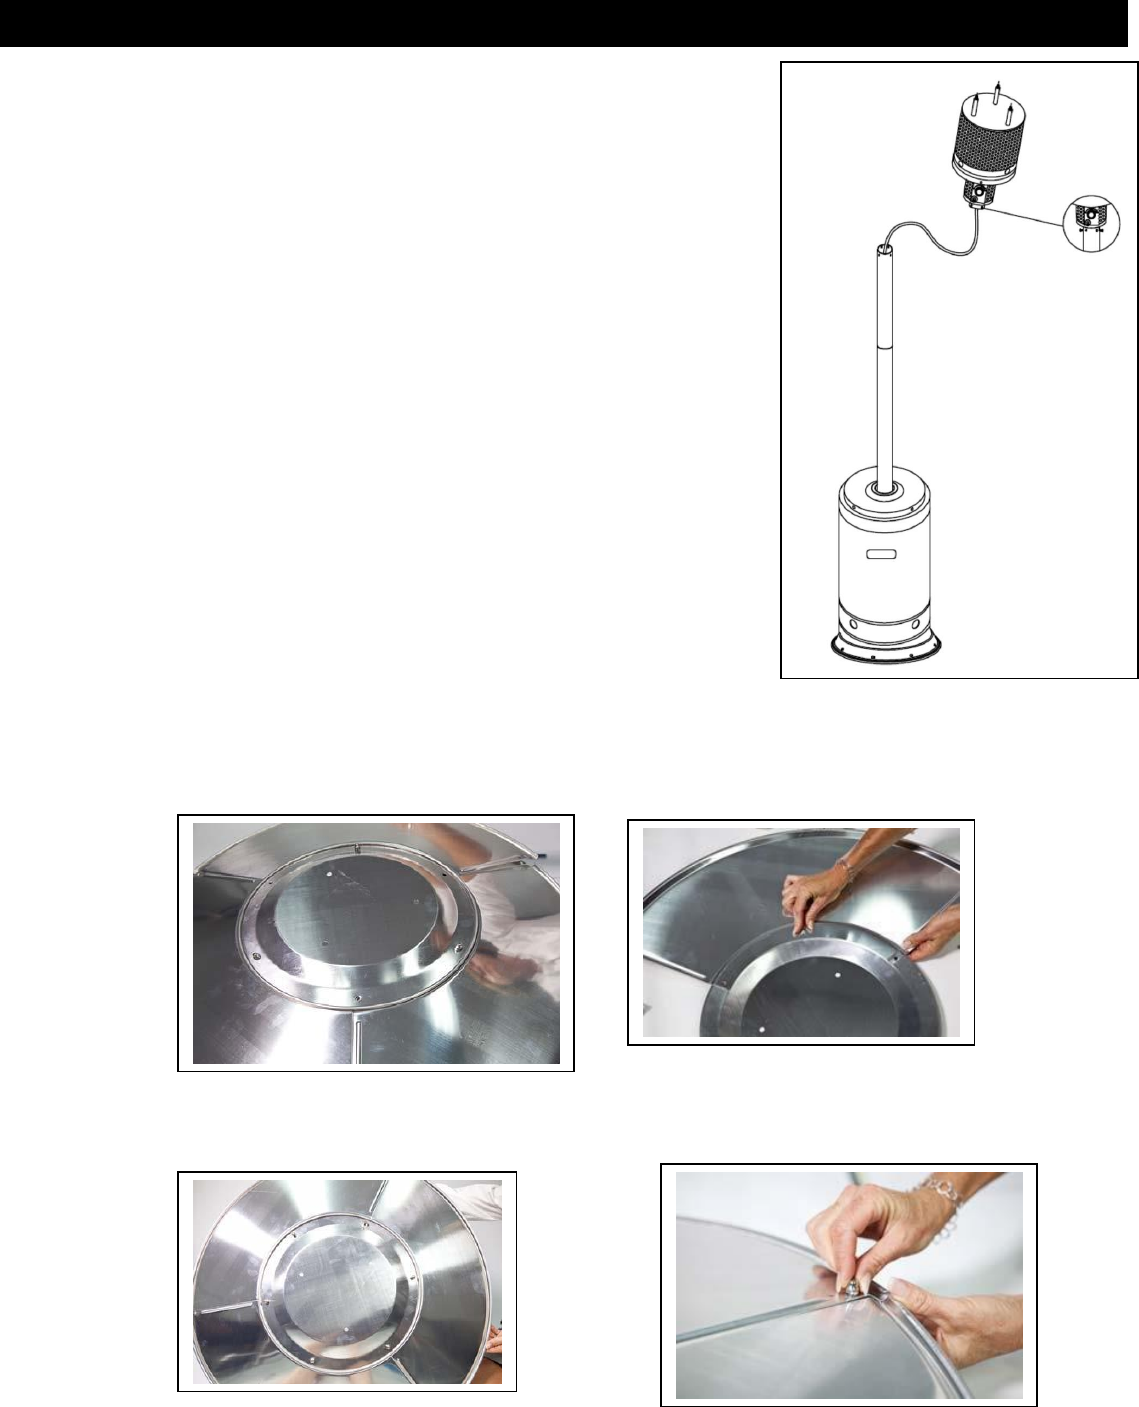
6. Screw the 3 Barrel Bolts (A) into the holes located on the top of the
Head Assembly (2). Hold the Head Assembly over the assembled Post
and route the Gas Hose (3) down into the Post. Rest the Head Assembly
on the top of the Post and align 4 small holes on Head Assembly with
4 Small holes in Upper Post.
[HINT: Control Knob should be above decal on post.]
Secure the Head Assembly to the Post with 4 - M6x10mm Bolts (F)
and 4 - M6 lock Washers (K) that come pre-assembled in the Head
Assembly.
7. Reflector (1) is comprised of 3 - outer pieces and 1 - center piece. Locate all 4 pieces of the Reflector which
are wrapped in bubble wrap. Unwrap and remove all pieces and peel off the protective blue plastic on each piece.
Locate 9 bolts and 9 cap nuts in the plastic bag. Align the 3 - outer pieces with the 1 - center piece and place a
bolt through the center hole on each piece as shown below. Tighten castle nut on each bolt.
Next, align the sides of each outer piece and the center piece and insert the next 3 bolts through both holes.
Tighten castle nuts on bolts. Finally, insert bolt through holes located at outside edge of adjoining panels of the
reflector side pieces (3 bolts required) and tighten castle nuts on bolts.
