8
Installing the air conditioner into the wall sleeve
1. Replace any damaged foam inside the wall sleeve with
replacement foam. Two pieces of adhesive backed
replacement foam are provided, one vertical piece (15 3/4” x
3/4” x 1”) and one horizontal (25” x 3/4” x 1”).
2. Depending on the model, your air conditioner may weigh as
much as 95 pounds. To insure safe handling, obtain the
necessary help to lift and position the unit during installation
and removal.
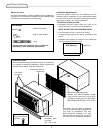
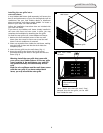
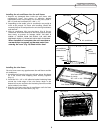
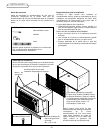
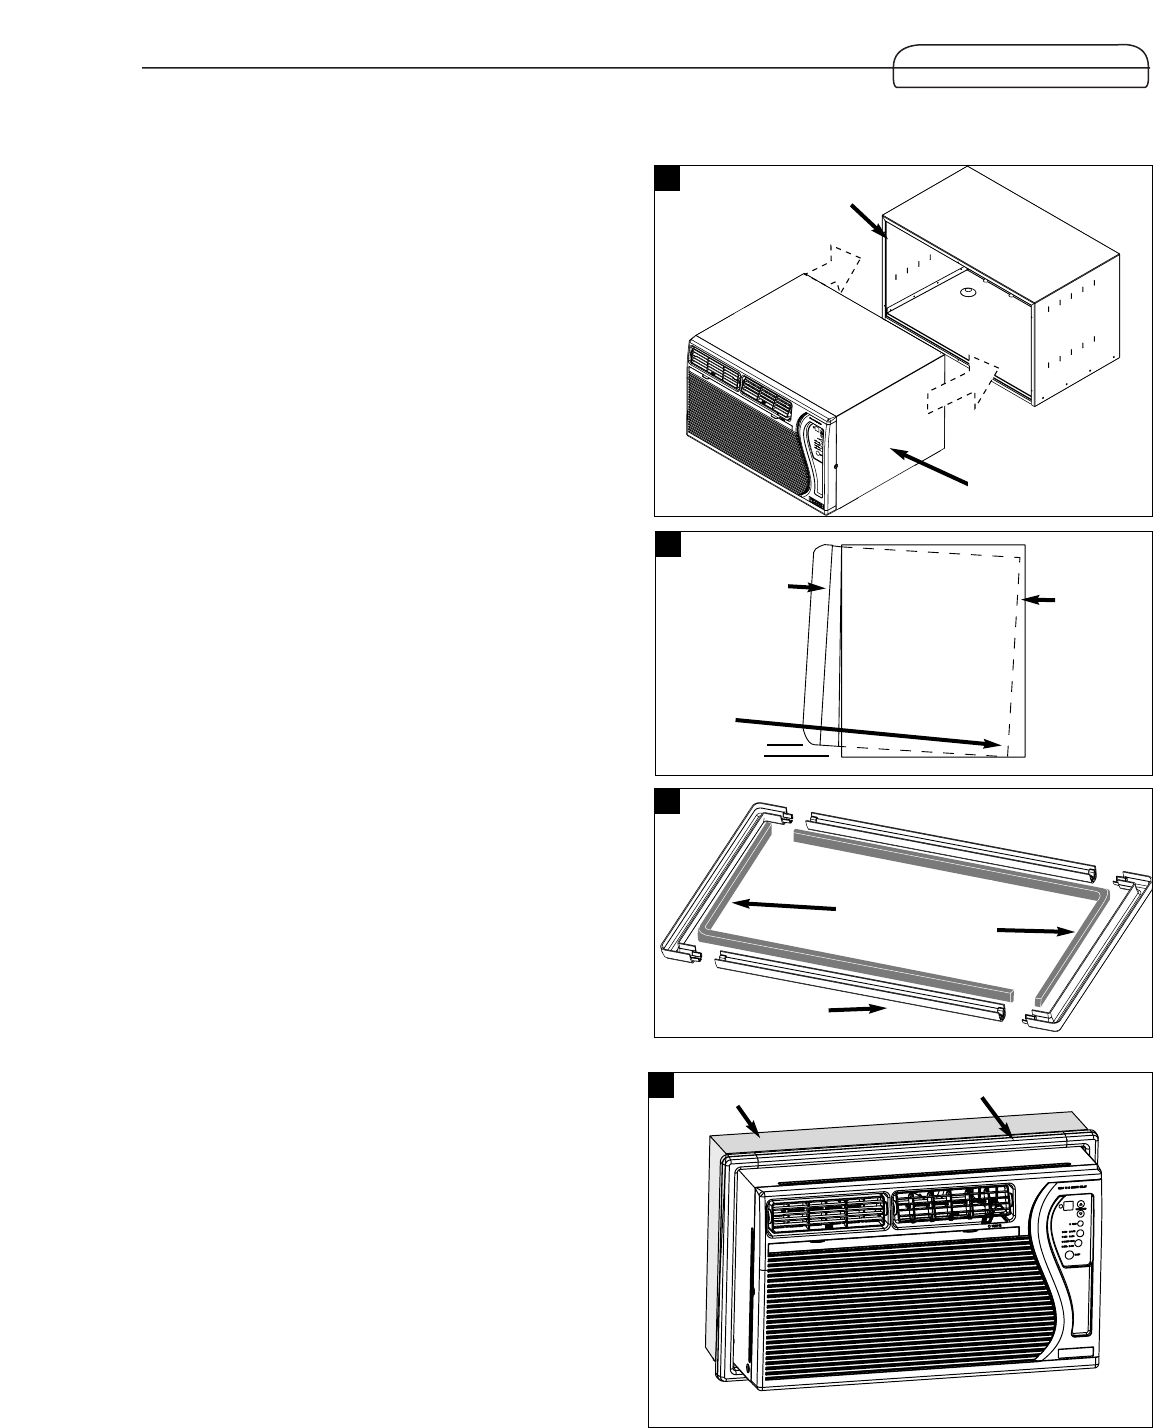
3. Slide air conditioner fully into the sleeve. (Fig. 9) The air
conditioner should be centered in the sleeve so that all seals
bear evenly to prevent air leakage. NOTE: THE UNIT IS
APROX. 6” DEEPER THAN THE SLEEVE. THE UNIT WILL
PROTRUDE APROX. 6” FROM THE SLEEVE INTO THE ROOM.
When installation is complete, the unit must have a
rearward slope to prevent condensate water from
entering the room. (Fig. 10) Check with a level.
Installing the trim frame
The trim frame covers any gaps between the wall sleeve and the
air conditioner.
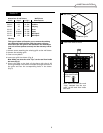
1. Assemble trim frame by laying the 4 frame pieces face down
on a flat surface and snapping them securely together.
(Fig. 11)
2. Install the 20” x 1/2” x 1/8” adhesive backed insulating foam
around the inside edge of the trim frame. Begin in the
bottom left corner and place the insulating foam around the
entire inside of trim frame.
3. Slide the trim frame onto the air conditioner until the foam
makes a seal with the wall sleeve. (Fig. 12)
Trim frame
11
12
9
Trim frame
Wall sleeve
Wall sleeve
Air conditioner
10
Rearward
slope
Wall
sleeve
(outdoors)
INSTALLATION
Trim frame foam
(2 pieces)
20” x 1/2” x 1/8”
Air conditioner
(inside of room)


