


6
Warning:
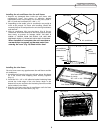
This type of sleeve will require you to remove the existing
rear grille and install the new grille that came with your
unit. If this new rear grille is not installed in the wall sleeve
your unit will not operate correctly and the warranty will be
void.
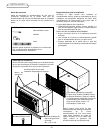
1. Remove screws attaching the existing grille to the wall sleeve.
2. Remove the existing grille.
3. Clean out any debris.
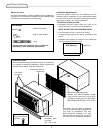
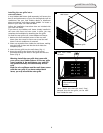
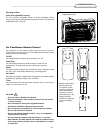
4. Insert new grille into sleeve. (Fig. 4)
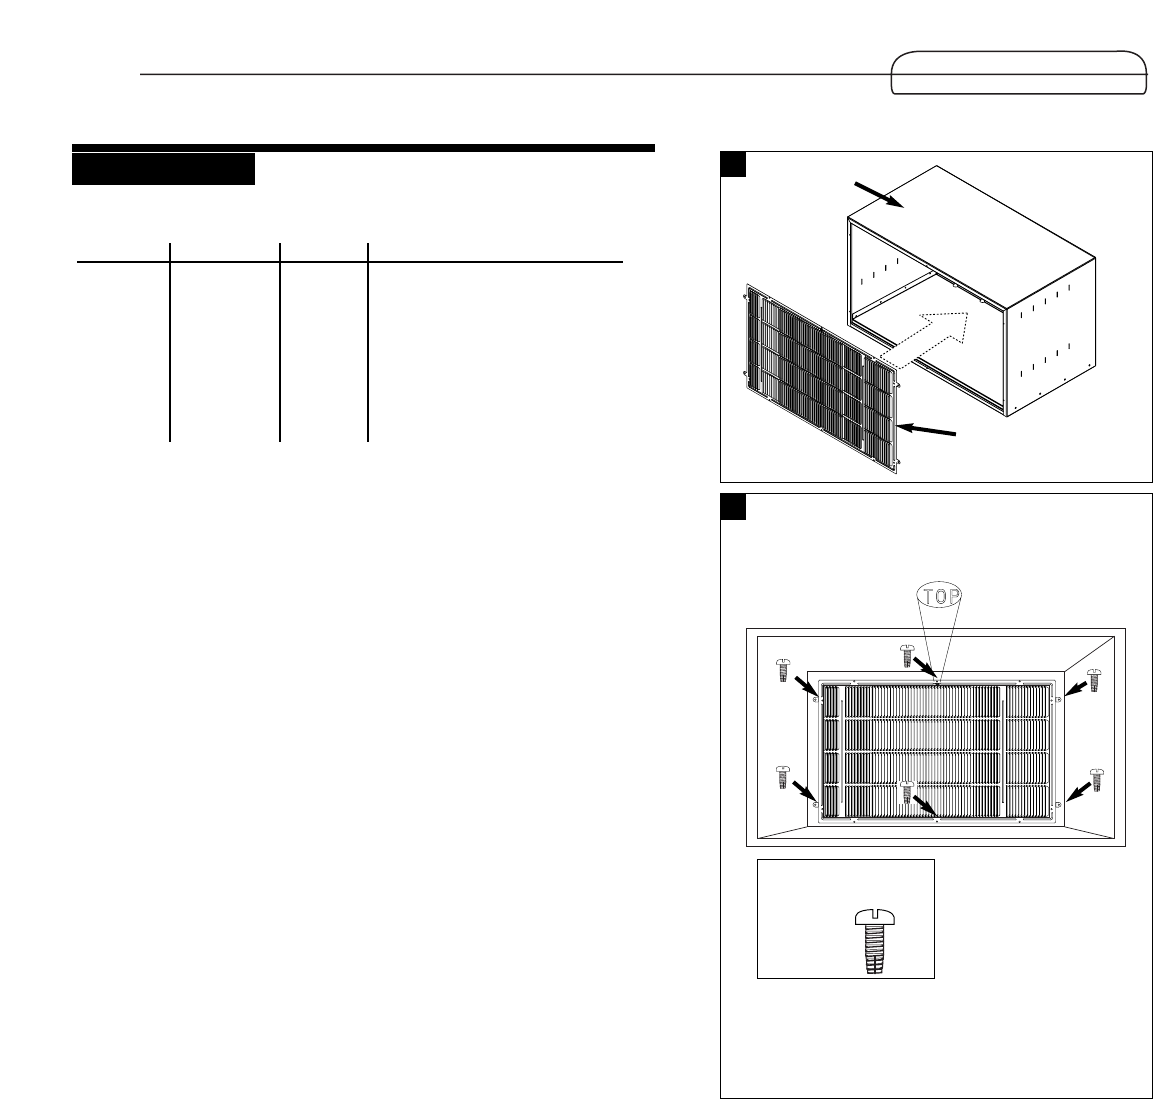
Note: Make sure that the word “Top” can be read from inside
the room.(Fig. 5)
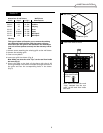
5. Secure the grille to the back of the sleeve with the six (6)
screws (provided). The screws will attach through the holes in
the grille and into the corresponding holes in the sleeve.
(Fig. 5)
Section A
4
5
View from inside of room
INSTALLATION
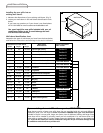
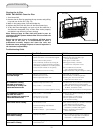
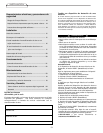
Dimensions of wall sleeve
Wall Sleeve
Manufacturer
Width HeightDepth
26 3/4” 15” 15 3/4” Fedders
26 3/4” 15” 15 3/4” Maytag
25 1/2” 22 9/16” 15 5/8” Whirlpool
25 1/2” 19” 15 5/8” Sears
25 1/2” 22 9/16” 15 5/8” Sears
26 3/4” 15” 15 3/4” Emerson Quiet Kool
25 1/2” 19” 15 5/8” Whirlpool
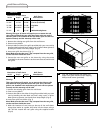
Wall sleeve
Rear grille
# 8-32 self tapping
Phillips head screws
(6 pieces)
Note: Make sure that the word
“Top”, stamped into the rear
grille, can be read from inside
the room.