


Excalibur
®
P95-3 Zero Clearance Direct Vent Gas Fireplace 29
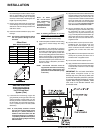
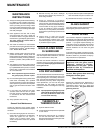
Door
Flange
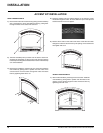
OPTIONAL
SCREEN DOORS
GLASS DOOR
INSTALLATION
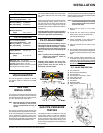
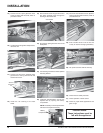
1) Fit top door bracket over the fl ange at the
top of the fi rebox.
2) Secure with 3 screws on the bottom.
FRONT FACADE
INSTALLATION
2) Place the Front Facade into position by
sliding the 2 holes in the bottom brackets
over the pins on the base, one on each
side.
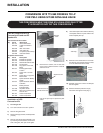
Fit the bottom brackets over
the pins on the base.
View from underneath of the
screw and the bracket.
Tab
Tighten both screws to secure Front
Facade to Glass Door.
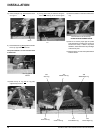
3) Mount the 2 screws back onto the mounting
plate on the rear of the facade through the
tab on the glass frame and then tighten
screw to secure.
Secure left side with 2 screws and right
side with one screw.
1) Remove the 2 screws from the mounting
plate that are on the back of the facade.
Screw
Remove screws from the mount-
ing tabs.
4) Slide Bottom Louver into position. On each
side secure the bottom screw fi rst into the
side bracket. Do not overtighten, leave
slightly loose to allow the louver to move
freely.
Secure
Screw
Bracket
Pin
5) Attach the two control boxes to the bottom
unit base and tighten the 2 screws on the
left side and 1 screw on the right side.
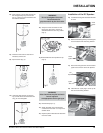
1) Attach door bracket to side using 2 screws
to the left and right side of the unit.
Door Bracket
attaches with
2 screws.
2) Slide the door(s) onto the hinges.
Adjusting the Plunger: Loosen the screw
that holds that plunger bracket so that you can
remove the plunger.
Loosen the
screw holding
the bracket.
Once the plunger has been removed take a pin
and put it in the hole that is in the round part of
the plunger and adjust it accordingly by turning
it to the left or right.
Adjust plunger by
turning it to the left
or right with a pin.