


8
ENGLISH
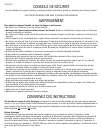
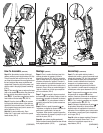
How To Assemble (CONTINUED)
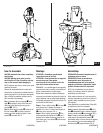
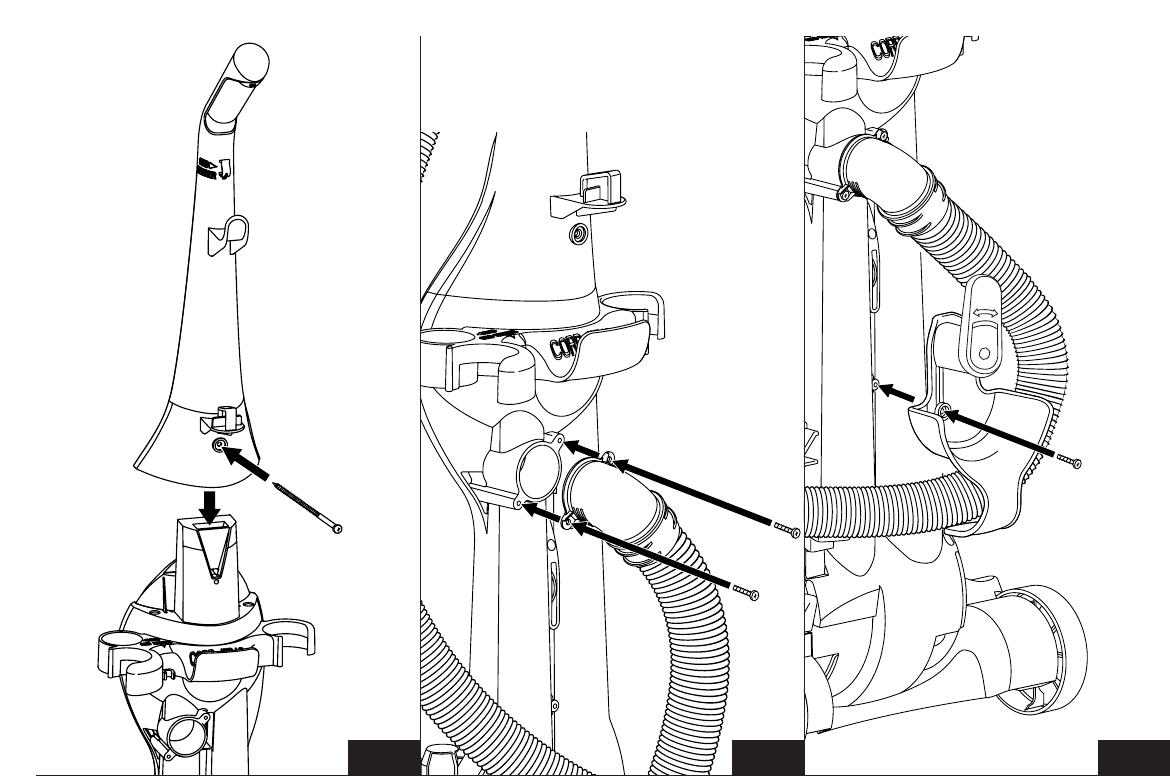
Step 3: Attach the handle
●
G
to top of tool caddy
●
H
by sliding it downward and then securing with
a long screw
●
K2
. (FIG. 3)
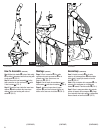
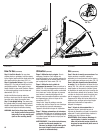
Step 4: Secure the hose assembly
●
D
to the
hose connection on the rear housing
●
I
with
2 short screws
●
K1
(FIG. 4).
Step 5: Thread the hose inside the lower hose
retainer
●
J
and then attach the lower hose
retainer to the rear housing with a short
screw
●
K1
(FIG. 5).
FRANÇAIS
Montage (CONTINUÉ)
Étape 3. Fixez le manche
●
G
à la partie
supérieure du porte-accessoires
●
H
en le
glissant vers le bas. Vissez avec une
longue vis
●
K2
. (FIG. 3)
Étape 4. Fixez le boyau de raccordement
●
D
au
boîtier arrière
●
I
avec deux vis courtes
●
K1
. (FIG. 4)
Étape 5. Insérez ce boyau dans le boyau
inférieur
●
J
, puis fixez le boyau inférieur au
boîtier arrière avec une vis courte
●
K1
(FIG. 5).
ESPAÑOL
Ensamblaje (CONTINUADO)
Paso 3. Instale la manija
●
G
en la parte
superior del portaaccesorios
●
H
deslizándola
hacia abajo y luego fíjela usando un tornillo
largo
●
K2
. (FIG. 3)
Paso 4. Fije el conjunto de la manguera
●
D
a la
conexión de la manguera en el alojamiento
trasero
●
I
usando 2 tornillos cortos
●
K1
(FIG. 4).
Paso 5. Pase la manguera dentro del conjunto
inferior del soporte de la manguera
●
J
y luego
fije el conjunto inferior del soporte al alojamiento
trasero usando un tornillo corto
●
K1
(FIG. 5).
FIG. 3
●
K2
●
J
●
G
●
I
●
H
FIG. 4
(CONTINUED) (CONTINUÉ) (CONTINUADO)
●
K1
●
K1
●
K1
FIG. 5