


BRICK PANEL INSTALLATION:
NOTE: The brick liner is fragile and should be handled gently.
1. Ensure the Sonnet is turned off and allow the unit to cool.
2. Remove the glass door as shown in the MAINTENANCE AND SERVICE - GLASS DOOR REMOVAL.
Warning: Do not touch or attempt to remove the glass if the replace is not completely cold. Never
operate the replace with the glass removed.
3. Remove the log set and all ember material.
4. Choose which brick pattern you would like to face
out.
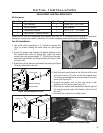
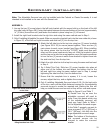
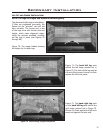
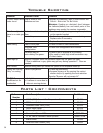
5. There is a ledge at the back of the rebox (see
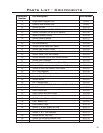
Figure 67). Place the back brick panel on the ledge
and ensure the panel is ush at the bottom and top
(refer to Figure 68). Do not push at the center of the
panel.
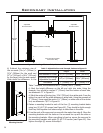
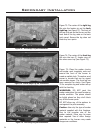
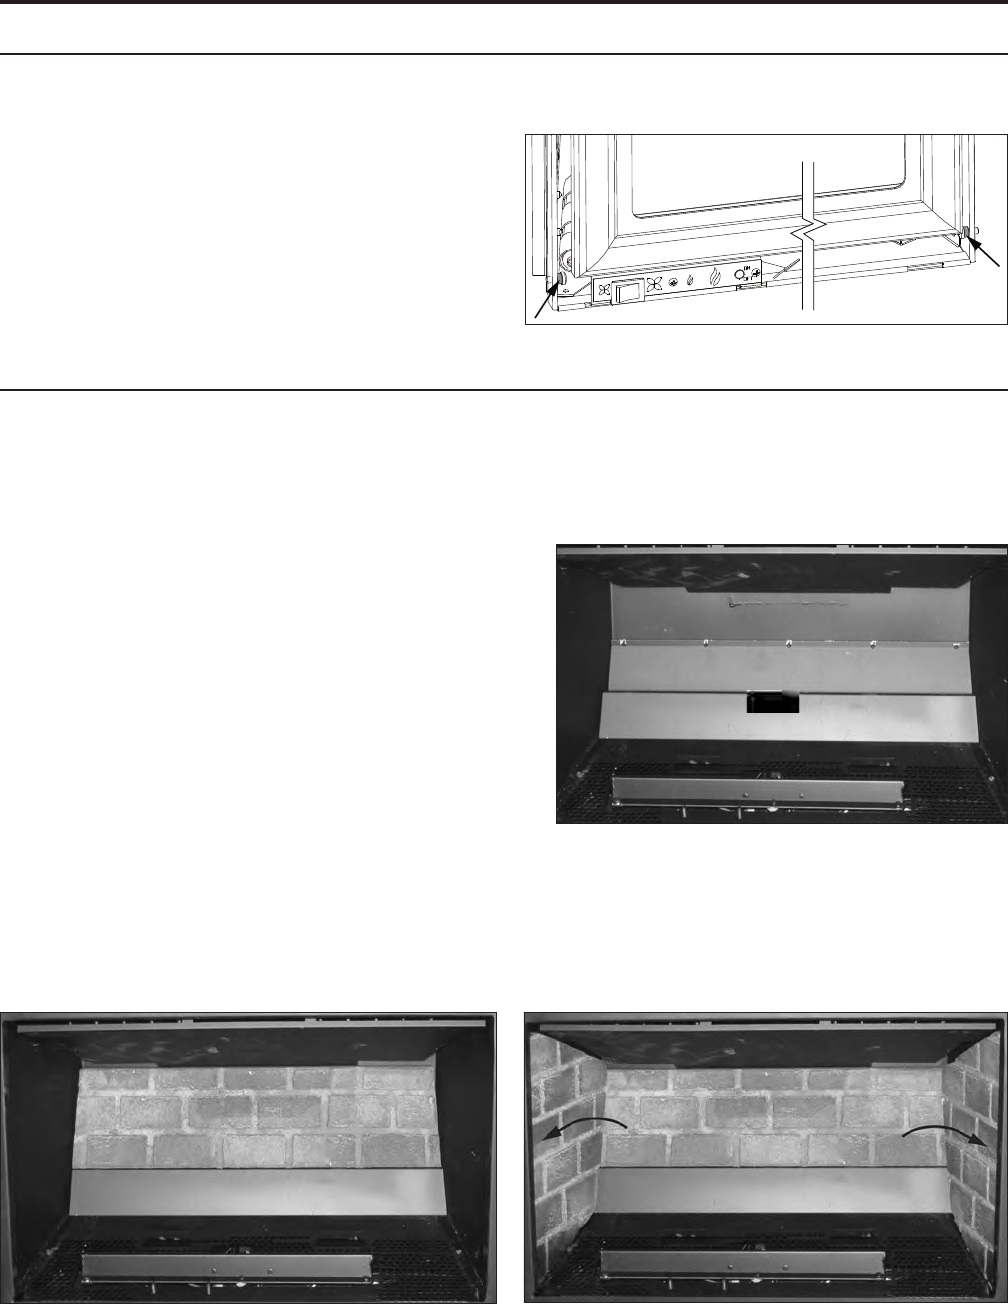
6. Slide the front of the left brick panel into the left lip
at the front of the rebox. Ensure the panel is ush to
the side of the rebox and the back brick panel while
still being hooked behind the front lip (refer to Figure 69). Take care to not bump the brick panel on
the burner.
7. Repeat step 6 for right brick panel.
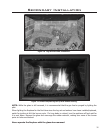
8. Install the log set and ember material (refer to SECONDARY INSTALLATION - LOG SET AND EMBER
INSTALLATION) and the glass door.
Ledge
Figure 68: Back Brick Panel in Place.
Figure 67: Back Brick Panel Ledge.
Figure 69: Side Brick Panels in Place.
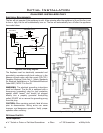
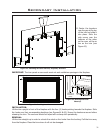
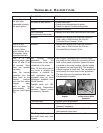
of the Sonnet, pointed out in Figure 66, and snap
them rmly down into place. When in place it will
look similar to the image on the front cover of this
Sonnet Owner’s Manual.
Note: The mounting brackets may need to be
adjusted to t onto the two (2) bushings. Loosen
the screws on the brackets, adjust the brackets, and
then re-tighten the screws.
Figure 66: Hook Placements.
Secondary Installation
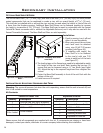
OPTIONAL CAST ANDIRON & GRATE:
A footing (i.e. Base Shelf) may need to be installed before the Cast Andiron is installed so that the Cast
Andiron has something to sit on. Hook the Andiron assembly over the two (2) bushings near the bottom
32