


Page 10 19400-3-0406
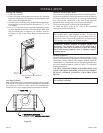
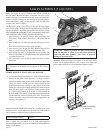
Framing dimension "A" includes a three inch clearance
for standoffs on firebox.
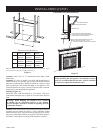
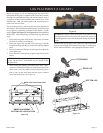
Framing and Finishing
1. Choose unit location.
2. Frame in fireplace with a header across the top. It is important
to allow for the finished face thickness when setting the depth
of the frame. See Figures 9 & 11.
3. Attach fireplace to framing using (4) adjustable nailing flanges.
Preset depth to suit facing material (adjustable to 1/2", 5/8" or
3/4" depths).
4. Use (8) 1/2" hex-head screws supplied in hardware package
to screw through slotted holes in nailing flanges, then screw
into pre-drilled holes on fireplace side. Measure from face
of fireplace to face of the nailing flanges to determine final
depth.
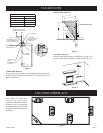
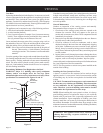
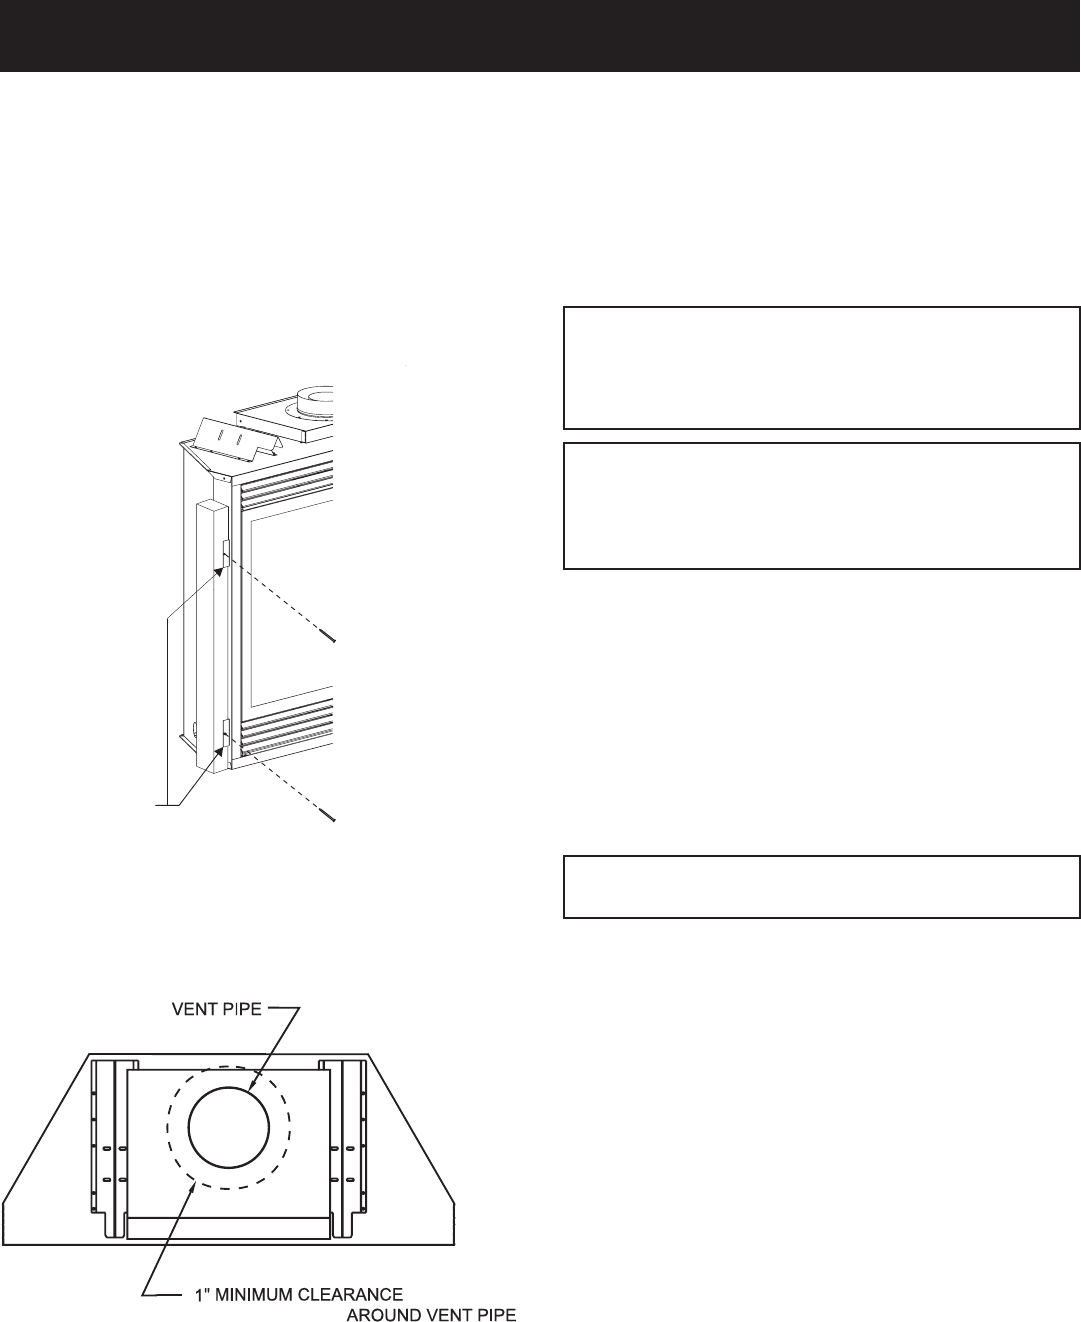
Vent Pipe Clearance
Note: Maintain one inch (1") of clearance around vertical vent pipe.
Follow the B-Vent system instructions for installation requirements
and clearances. Failure to follow the B-Vent manufacturer's
instructions may cause improper draft and possible fire hazard.
Figure 10
B-
TO
COMBUSTIBLES
NAILOR OTHERSUITABLE FASTENER
MOUNTING
BRACKETS
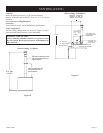
Install the Fresh Air Kit - BVA1
A fresh air kit is available as an optional feature with this appliance.
The fresh air kit helps to decrease the amount of room air taken by
utilizing outside air for combustion. It is strongly recommended
that it be installed. Installation of the fresh air kit should be
performed at the framing stage of the fireplace installation.
The fresh air kit installs on the left side of the fireplace.
To install the BVA1 fresh air kit, refer to the installation
instructions provided with the kit.
Note: The outside air kit can terminate at any level with
the exception that it must terminate at least 1 ft below the
vent termination cap. The fresh air kit inlet hood should be
positioned at least 2 ft above the ground level, in a manner that
will not allow snow, leaves, etc. to block the inlet.
WARNING: Exhaust products of gasoline engines are
hazardous. The outside air must not be taken from a
garage space, attic spaces, basements, or above the roofing
where other heating appliance, fans, or chimneys exhaust
or utilize the air.
Figure 9
Framing (Figure 11)
Fireplace framing can be built before or after the fireplace is set in
place. Framing should be positioned to accommodate wall covering
and fireplace facing material. The fireplace framing should be
constructed of 2 x 4 lumber or heavier. The framing headers may
rest on the fireplace standoffs. Refer to Figure 11 for minimum
framing dimensions.
CAUTION: MEASURE FIREPLACE DIMENSIONS AND
VERIFY FRAMING METHODS, AND WALL COVERING
DETAILS BEFORE FRAMING CONSTRUCTION
BEGINS.
INSTALLATION