


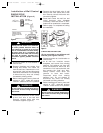
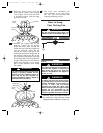


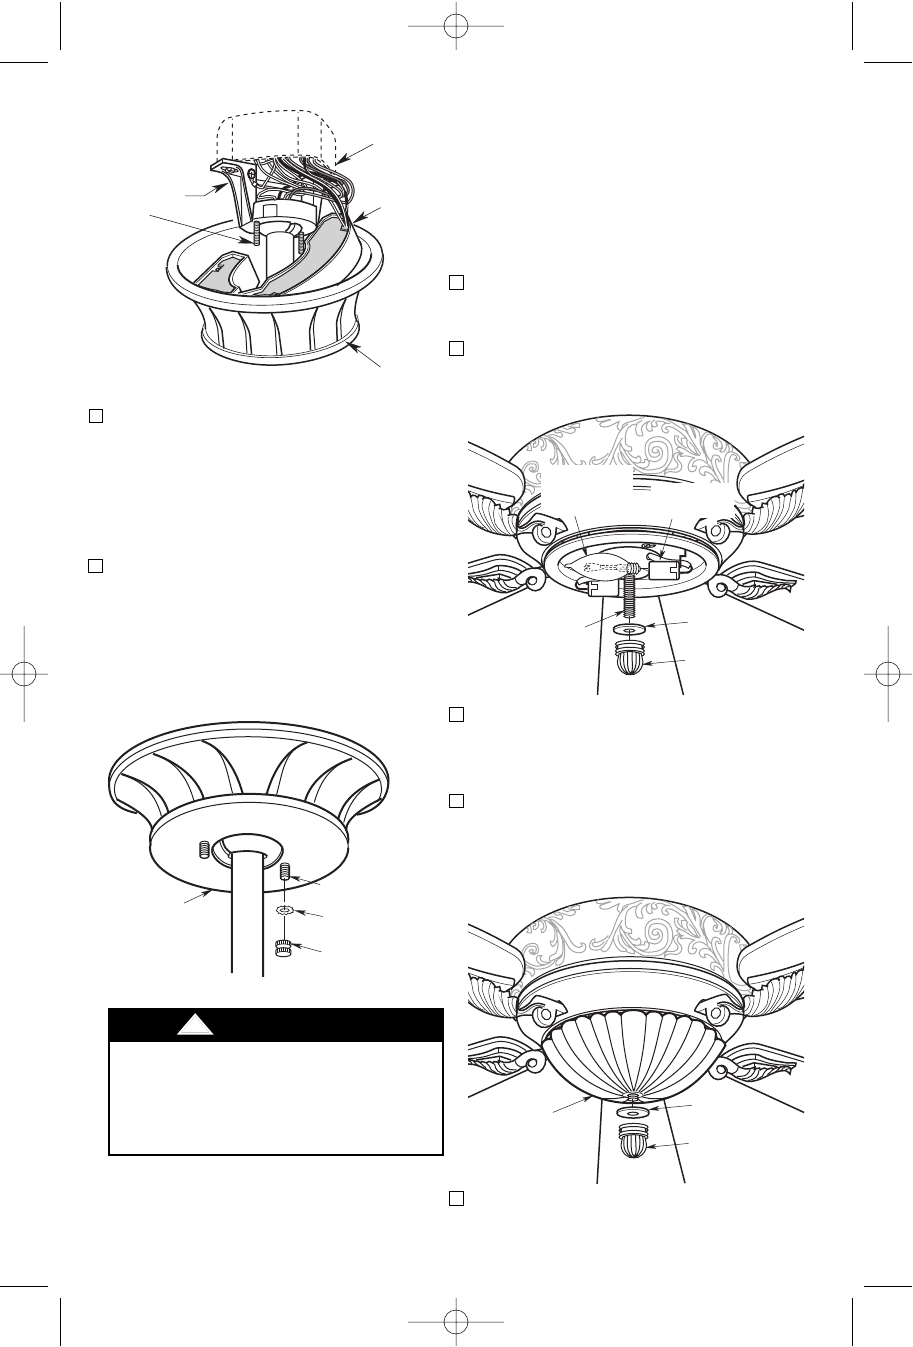
OUTLET
BOX
RECEIVER
CEILING
COVER
HANGER
BRACKET
1-1/4"
THREADED
STUDS (2)
Figure 22
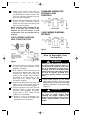
7. Slide the receiver up and over the
hanger bracket. Press the receiver
against the ceiling, then slide the
ceiling cover up to the threaded studs
and turn until the studs protrude
through the holes in the ceiling cover
(Figure 23).
8. Secure the ceiling cover in place by
sliding lockwashers (supplied) over the
threaded studs and installing the two
knurled knobs (supplied) (Figure 23).
Tighten the knurled knobs securely
until the ceiling cover fits snugly against
the ceiling.
LOCKWASHER
(2)
1-1/4" THREADED
STUD
CEILING
COVER
KNURLED
KNOB (2)
Figure 23
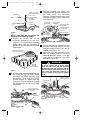
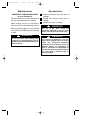
How to Install
Your Light Kit
CAUTION: To avoid risks of burns or
other injury, assure power is off before
attempting to install or replace the
candelabra base bulbs.
1. Install two 60W (maximum) candelabra
base bulbs (not supplied) in the sockets
of the light fitter assembly (Figure 24).
2. Unscrew the decorative finial nut and
threaded washer from the light fitter
assembly threaded stud (Figure 24).
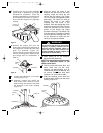
3. Slide the glass shade onto the
threaded stud until the glass rest
against the light fitter assembly (Figure
25).
4. Thread the previously removed
threaded washer and decorative finial
nut onto the threaded stud until finger
tight.
5. Your ceiling fan is now installed and
wired to be controlled by your fan/light
wall control.
13
To avoid possible fire or shock, make
sure that the electrical wires are
completely inside the outlet box and
not pinched between the ceiling
cover and the ceiling.
!
WARNING
DECORATIVE
FINIAL NUT
THREADED
WASHER
THREADED
STUD
60W (MAX.)
CANDELABRA
BASE BULB (2)
LIGHT FITTER
SOCKET (2)
Figure 24
GLASS
SHADE
DECORATIVE
FINIAL NUT
THREADED
WASHER
Figure 25
BP7335 Palazzo 1/9/07 9:05 AM Page 13