www.desatech.com
111826-02J12
OPERATING HEATER
Continued
WARNING: Make sure selec-
when you are away from home
-
ance will come on automatically
with selector switch in the ON
TO TURN OFF GAS
1. Turn control knob clockwise to the
OFF position.
2a. Set selector switch in the OFF position.
2b.
Set selector switch in the OFF position to
prevent draining battery.
You may shut off the burners and keep the pilot
lit by doing one of the following:
1. Turn control knob clockwise to the
PILOT position.
2. Use remote control manual OFF button.
3. Set selector switch in the OFF position.
MANUAL LIGHTING
1. Follow steps 1 through 6 under Lighting
Instructions, page 16.
2. Depress control knob and light pilot with
match.
3. Keep control knob pressed in for 30 seconds
after lighting pilot. After 30 seconds, release
control knob. Now follow steps 9 through
11, Lighting Instructions, page 17.
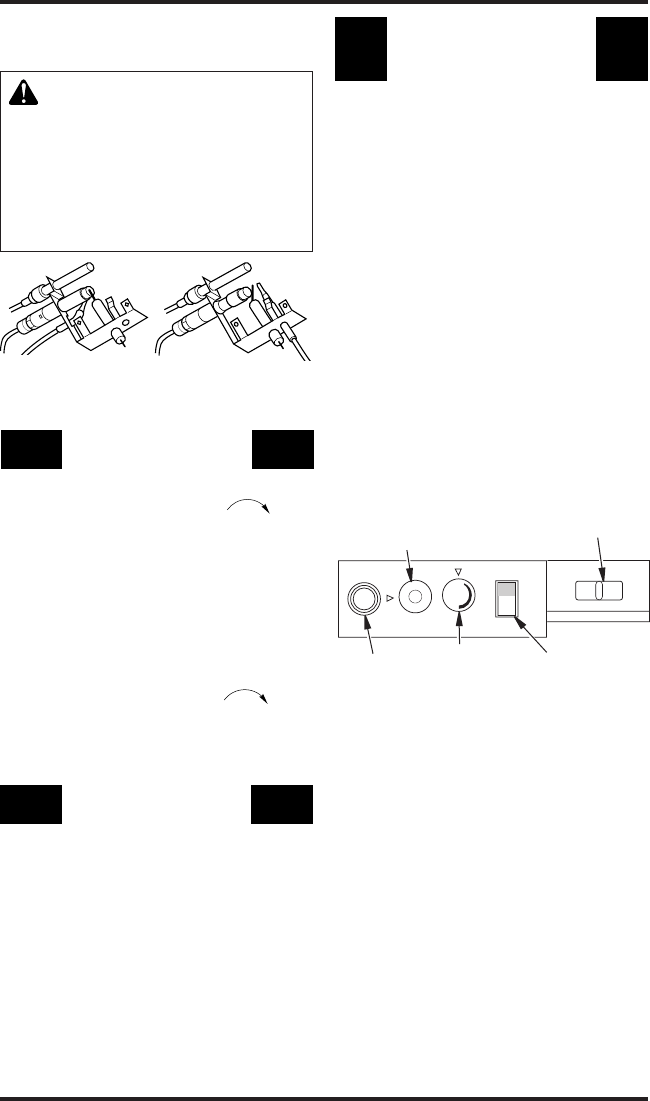
Figure 12 - Pilot (Remote Shown)
Natural
REMOTE CONTROL
1. After lighting, let pilot flame burn for
about one minute. Turn control knob to
ON position. Adjust ame adjustment knob
anywhere between HI and LO. Set toggle
selector switch to AUTO. Slide remote
selector switch to REMOTE position (see
Figure 13). Note: The burner may light if
hand-held remote was on when selector
switch was last turned off. You can now
turn the burner on and off with the hand-
held remote control unit.
IMPORTANT: Do not leave the selector
switch in the REMOTE or ON position
when the pilot is not lit. This will drain the
battery.
2. Press ON/OFF button to turn burners on
and off. When turning burners off, the pilot
will remain lit.
IMPORTANT: Be sure to press ON/OFF
buttons on hand-held remote control unit for
up to 3 seconds to assure proper operation.
Batteries: (See instructions with remote for
removing and installing batteries)
Transmitter requires 12V (A-23) and 3V button
cell for LCD (both included)
Remote receiver requires 4 AA (1.5V) alkaline
batteries (included)
: 303.875 MHz
L
O
I
H
O
F
F
P
I
L
O
T
O
N
OFF REMOTE ON
AUTO
OFF
ON
Figure 13 - Control Knob and Ignitor
Button Locations for Remote Control
Control Knob
Ignitor
Button
Remote Selector
Switch
Flame
Adjustment
Knob
Selector Switch
in AUTO Position


