


111739-01A
For more information, visit www.desatech.com
For more information, visit www.desatech.com
24
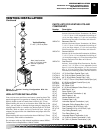
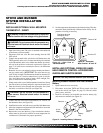
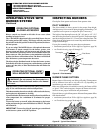
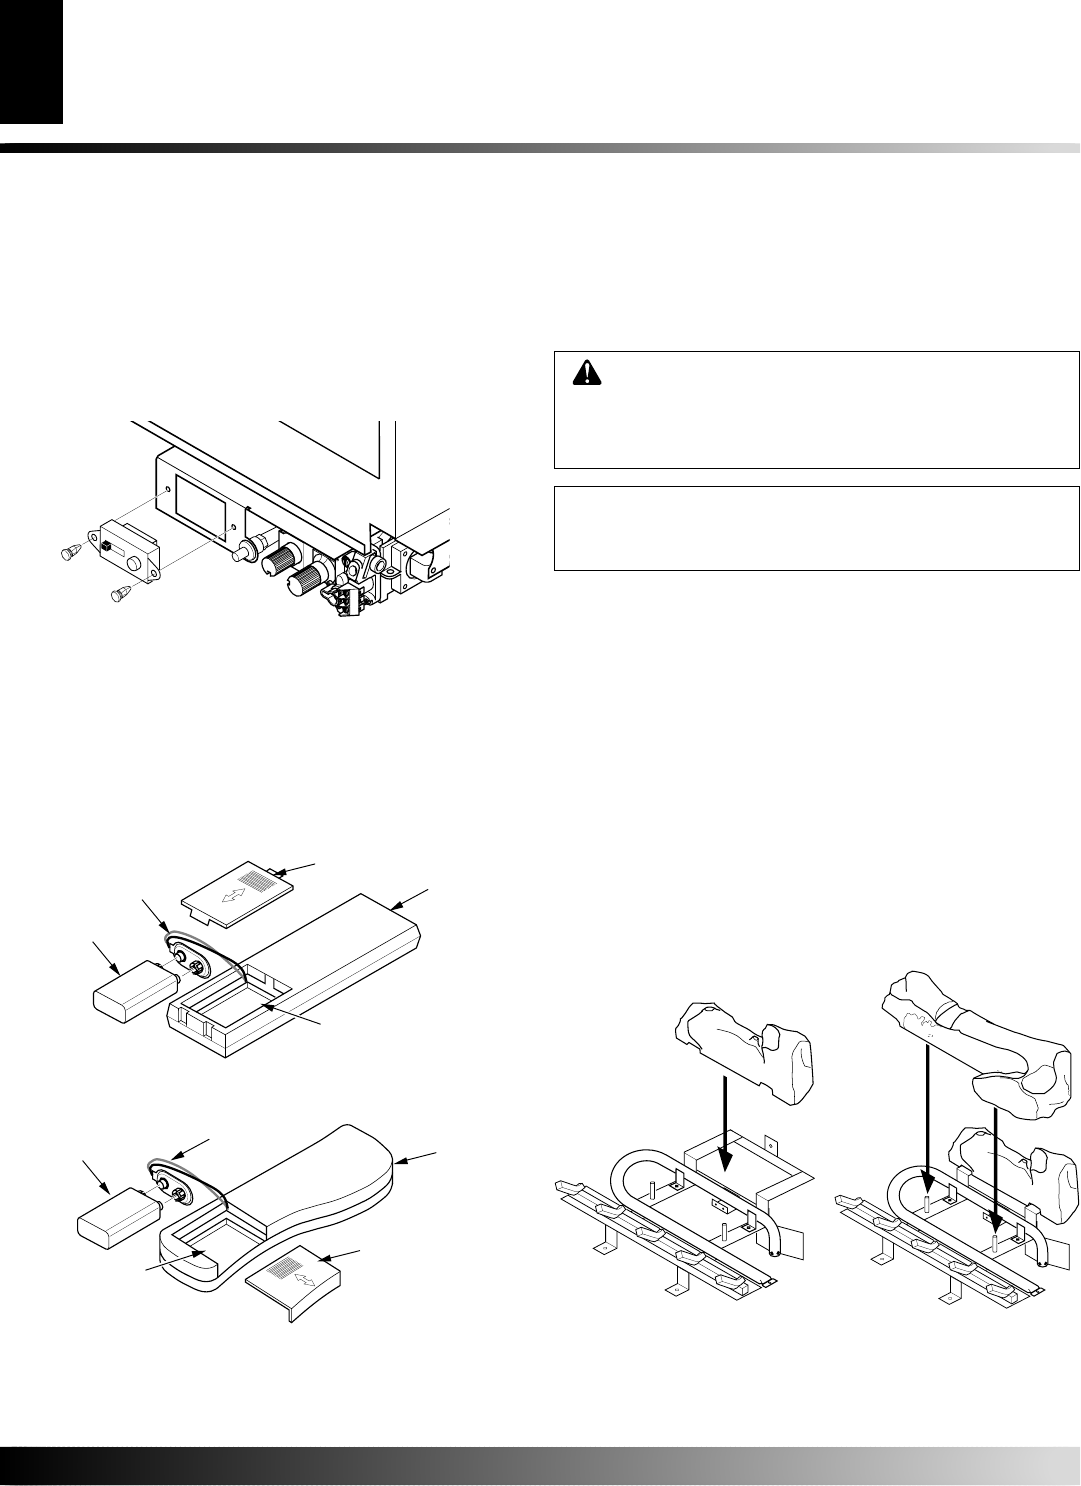
It is very important to install these logs exactly as instructed in
Figures 55 through 58. Do not modify logs. Only use logs supplied
with freestanding burner system. Do not use if any log(s) are broken
(see Replacement Parts, page 33).
1. Remove glass door. See Removing/Replacing Glass Door, page 6.
2. Place log #1 (back log) on top of grate. Make sure the notches
in the bottom of the log fit over the grate (see Figure 55).
2. Rest log #2 (large front log) on the pins on the front part of the grate
(see Figure 56).
3. Place log #3 (crossover log) onto the rear and front logs. Make
sure it is seated properly into the notch on the front log and
over the raised triangular portion of the rear log as shown in
Figure 57, page 25.
4. Place log #4 (small log) onto the front left part of the grate making
sure the notches fits over the prong of the grate. See Figure 58,
page 25.
WARNING: Failure to position the parts in accor-
dance with these diagrams or failure to use only parts
specifically approved with this burner system may
result in property damage or personal injury.
INSTALLING LOGS, LAVA ROCK AND
GLOWING EMBERS
1
2
Figure 55 - Installing Log
No. 1
Figure 56 - Installing Log No. 2
You must remove glass door and front panel to install
logs, lava rock, and ember material. See
Removing/
Replacing Glass Door,
page 6.
STOVE AND BURNER
SYSTEM INSTALLATION
Continued
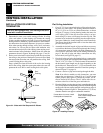
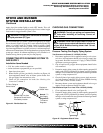
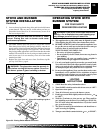
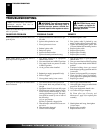
Figure 53 - Installing Battery in Hand-Held Remote Control Unit
(GHRCB Series)
Installing 9-Volt Alkaline Battery in Hand-Held
Remote Control Unit
1. Remove battery cover on back of remote control unit
2. Attach terminal wires to a 9-volt battery (not included). Place
battery into the battery housing.
3. Replace battery cover onto remote control unit.
Terminal
Wires
Battery
Cover
9-Volt
Battery
Remote
Control Unit
Battery
Housing
TPTH
TPTH
TP
TP
TH
TH
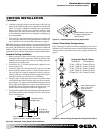
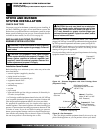
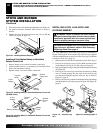
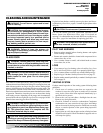
Figure 52 - Installing Remote Receiver
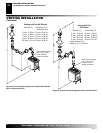
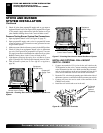
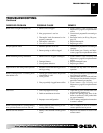
Figure 54 - Installing Battery in Hand-Held Remote Control Unit
(GHRCTB Series)
Terminal
Wires
Battery
Cover
9-Volt
Battery
Remote
Control
Unit
Battery Housing
4. Place receiver into valve bracket and align holes (see Figure 52).
5. Use push-in fasteners included with receiver to secure to
bracket.
6. Connect the wires from the receiver to the valve at TH and
THTP (see Figure 48, page 22).
STOVE AND BURNER SYSTEM INSTALLATION
Installing Optional Wireless Hand-Held Remote Control Accessories - GHRCB and GHRCTB Series (Cont.)
Installing Logs, Lava Rock and Glowing Embers